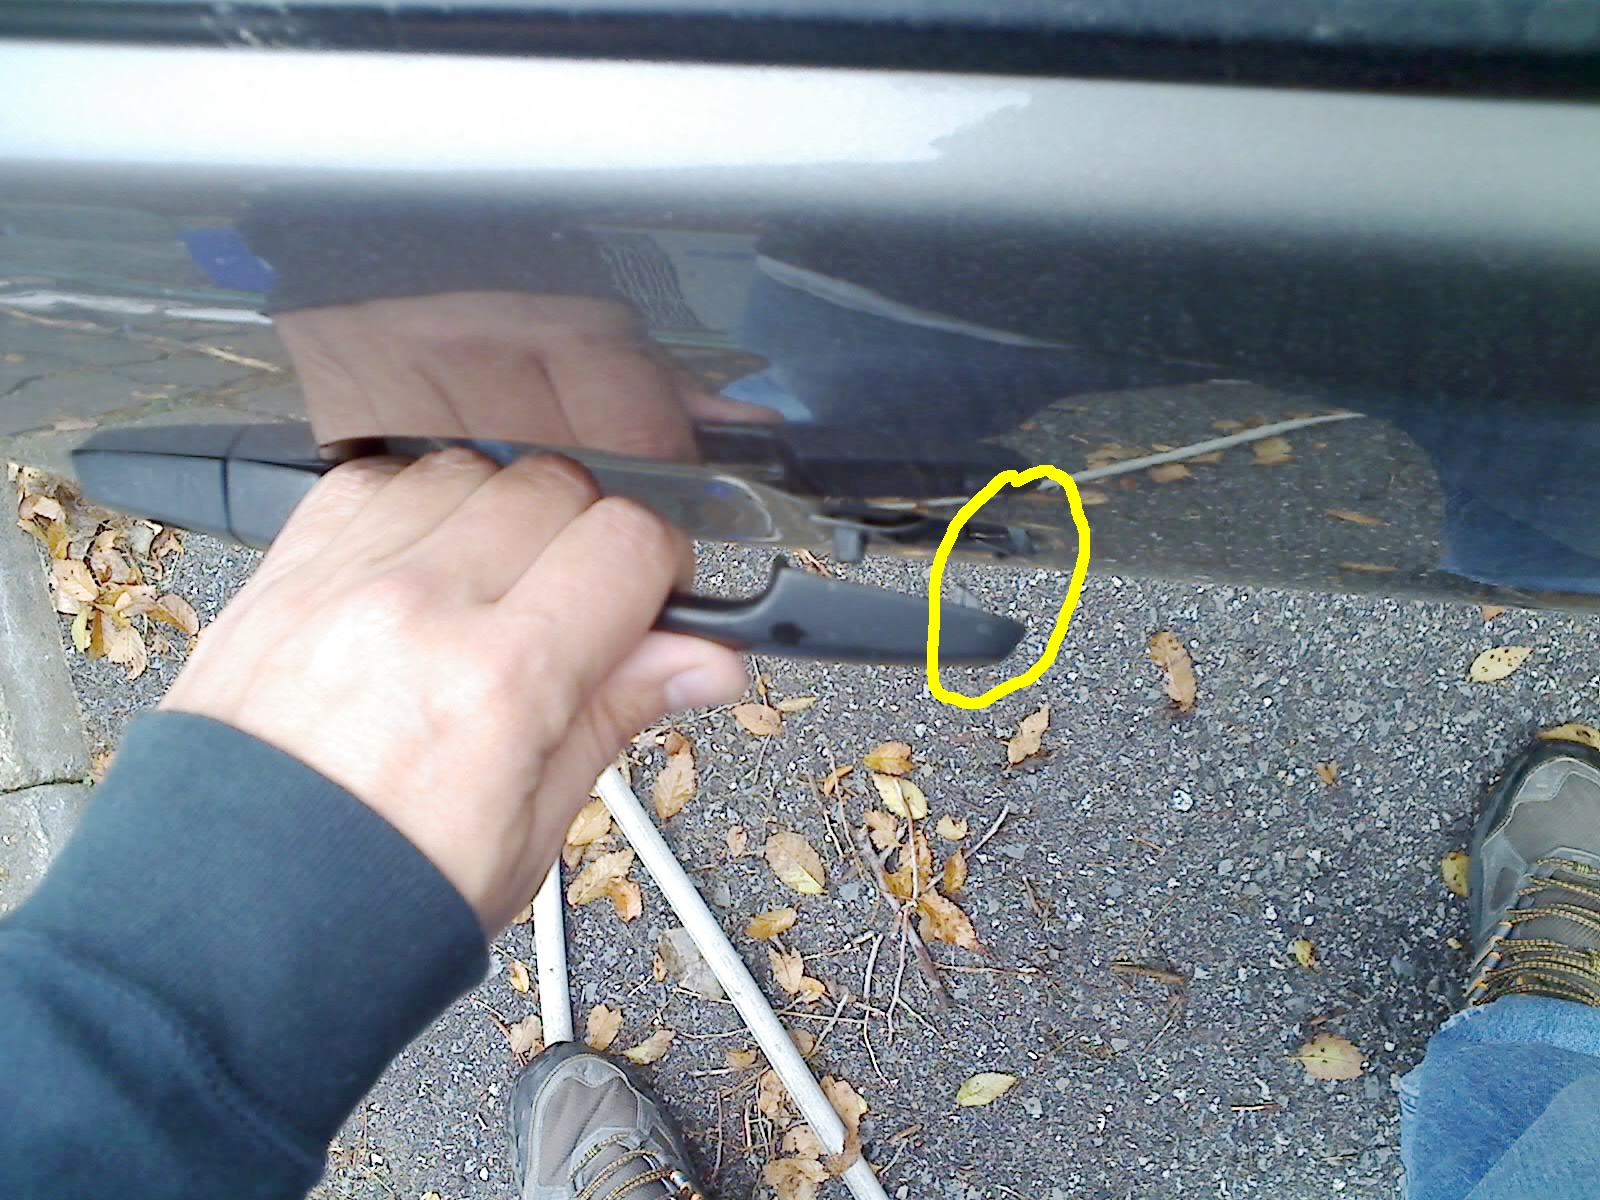
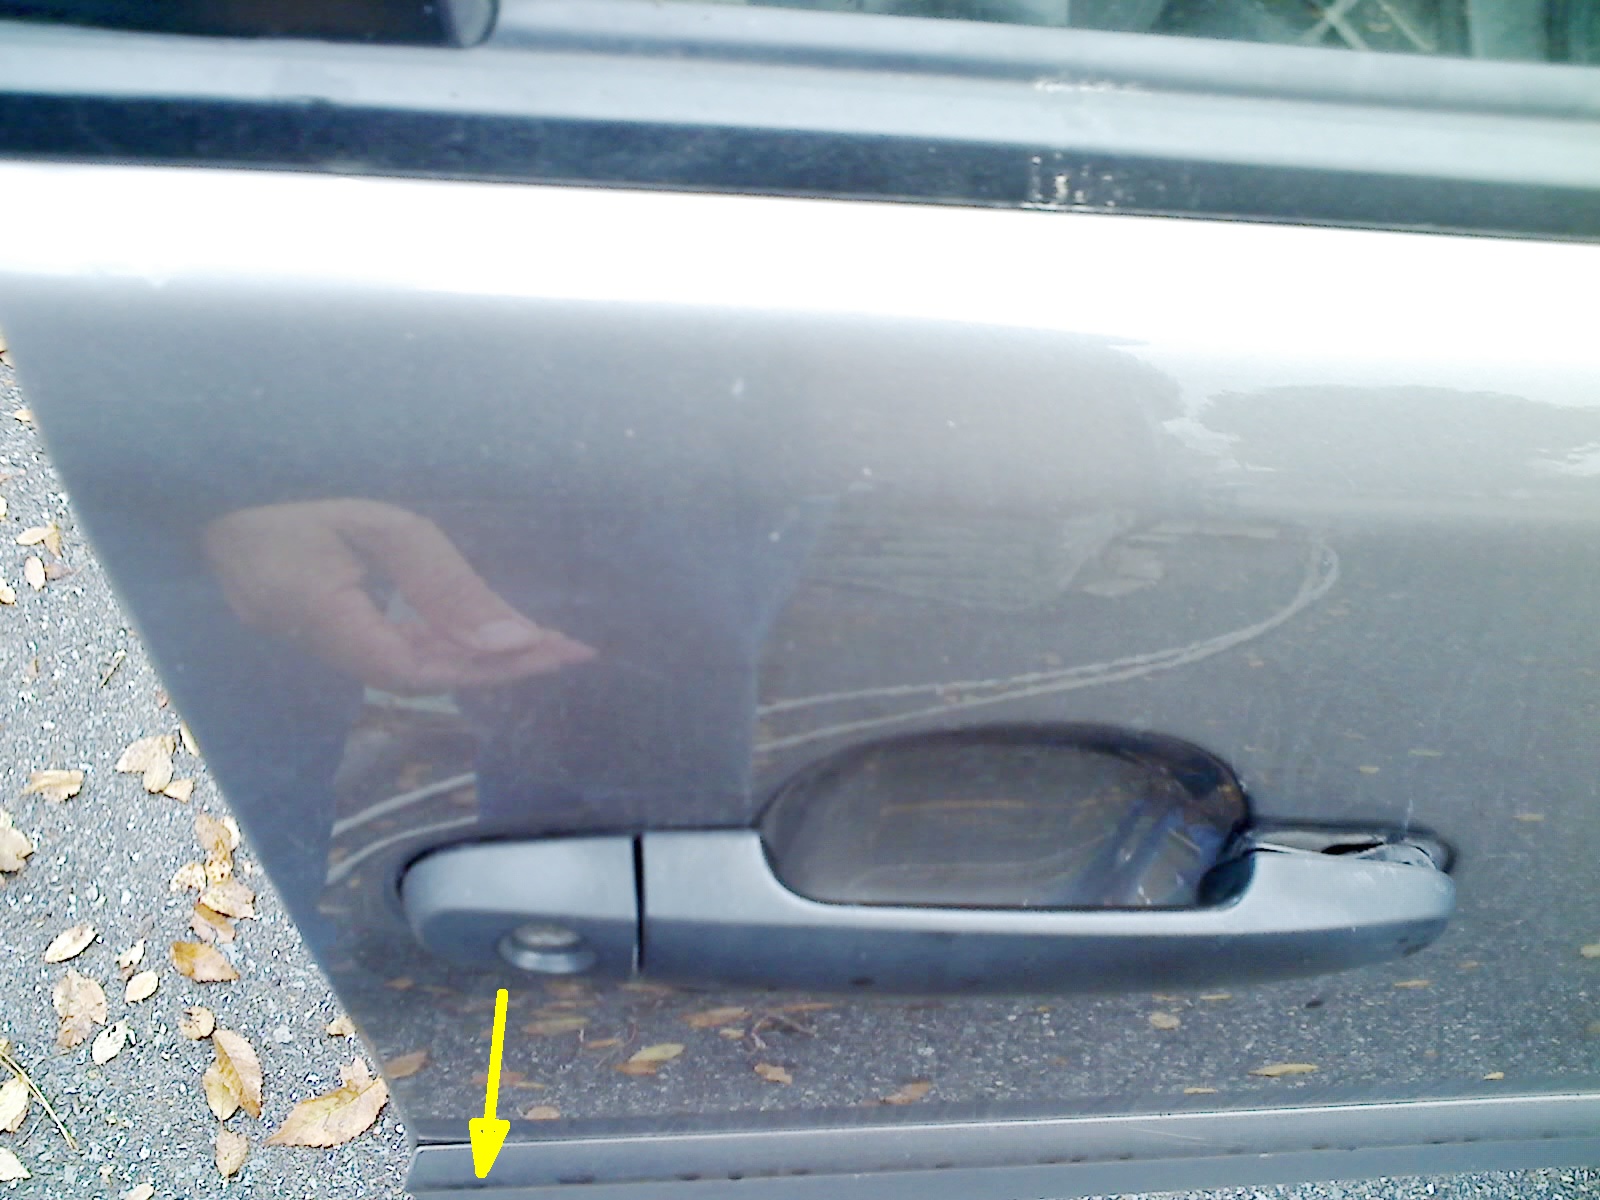
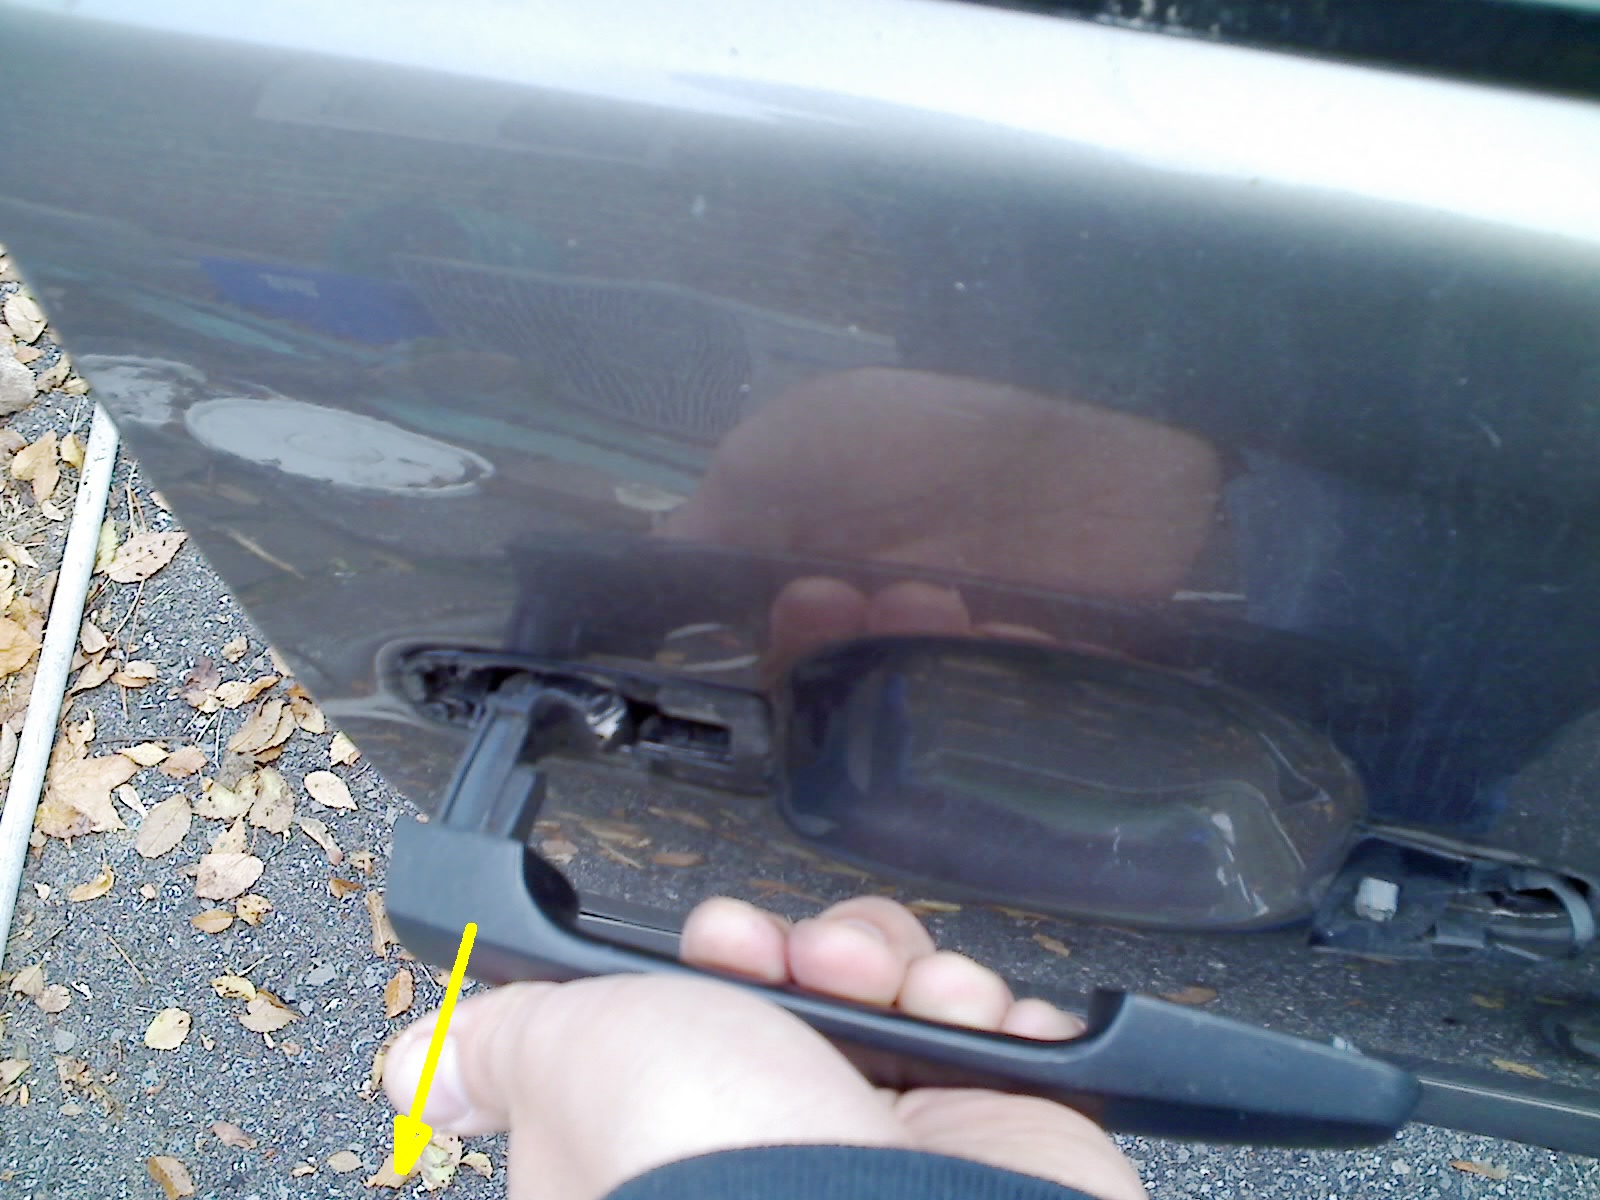
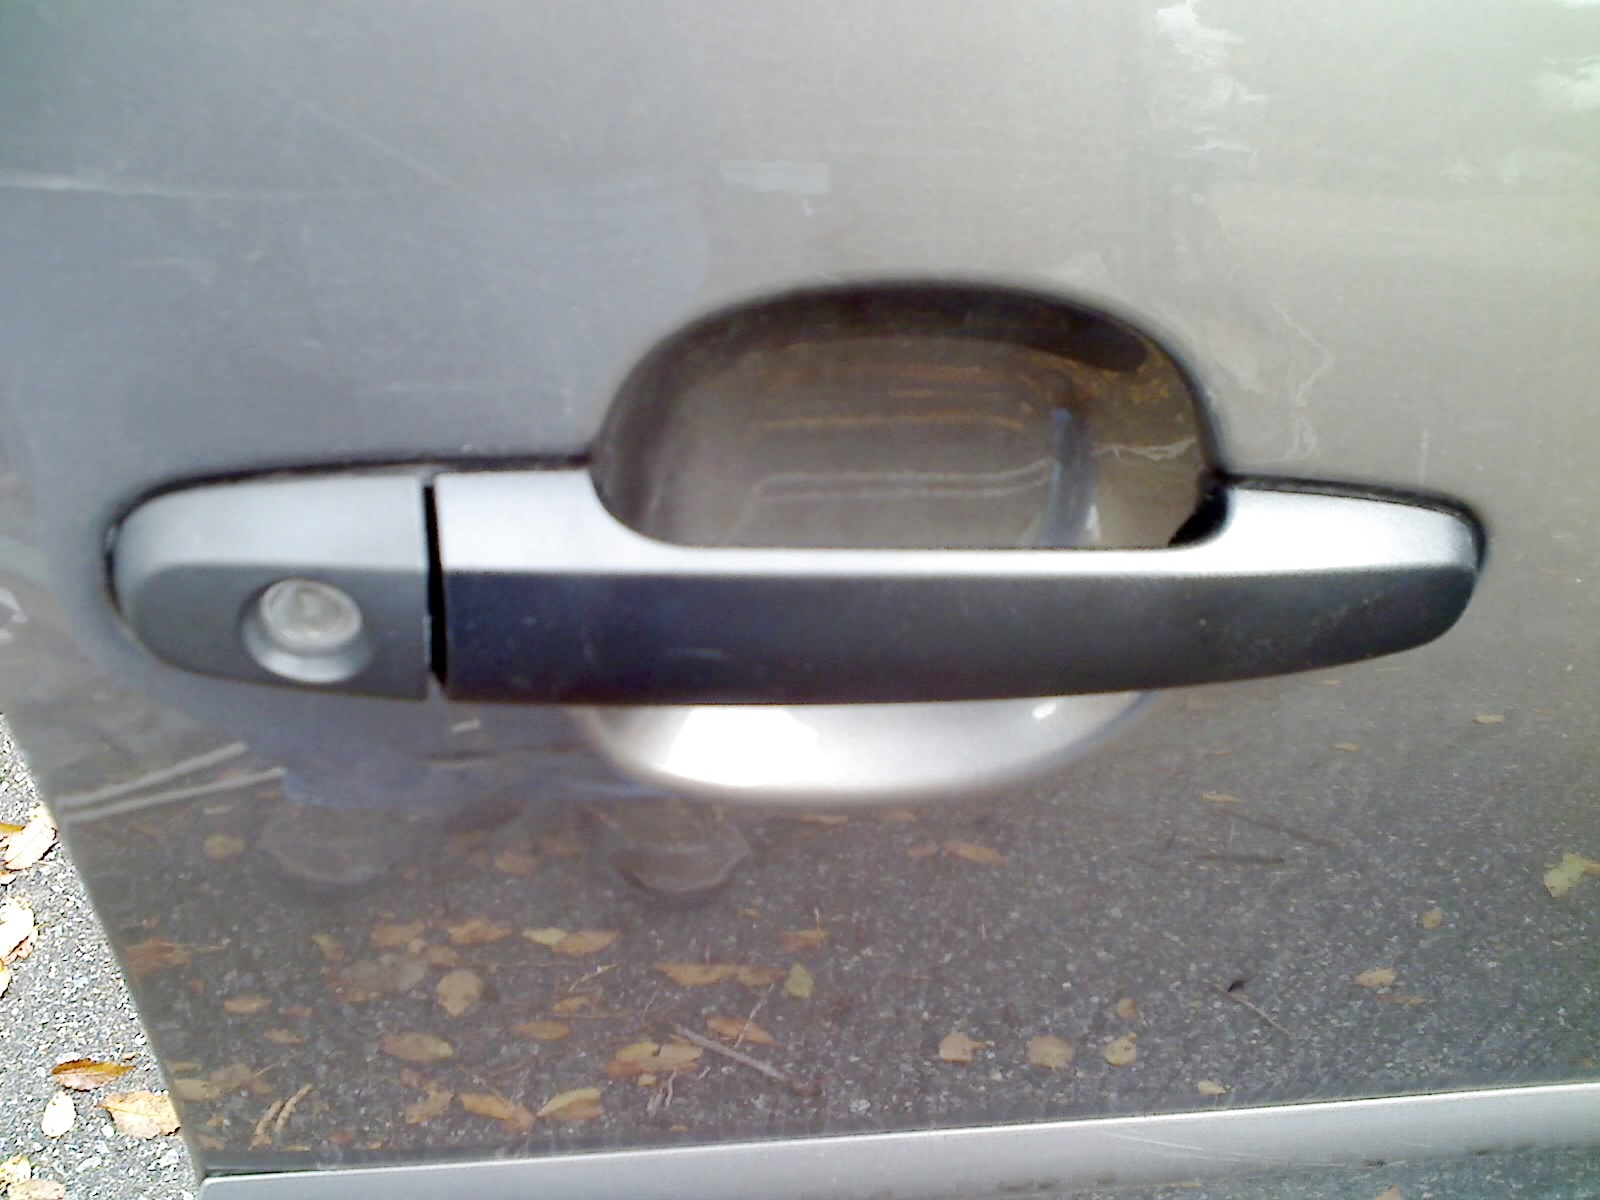
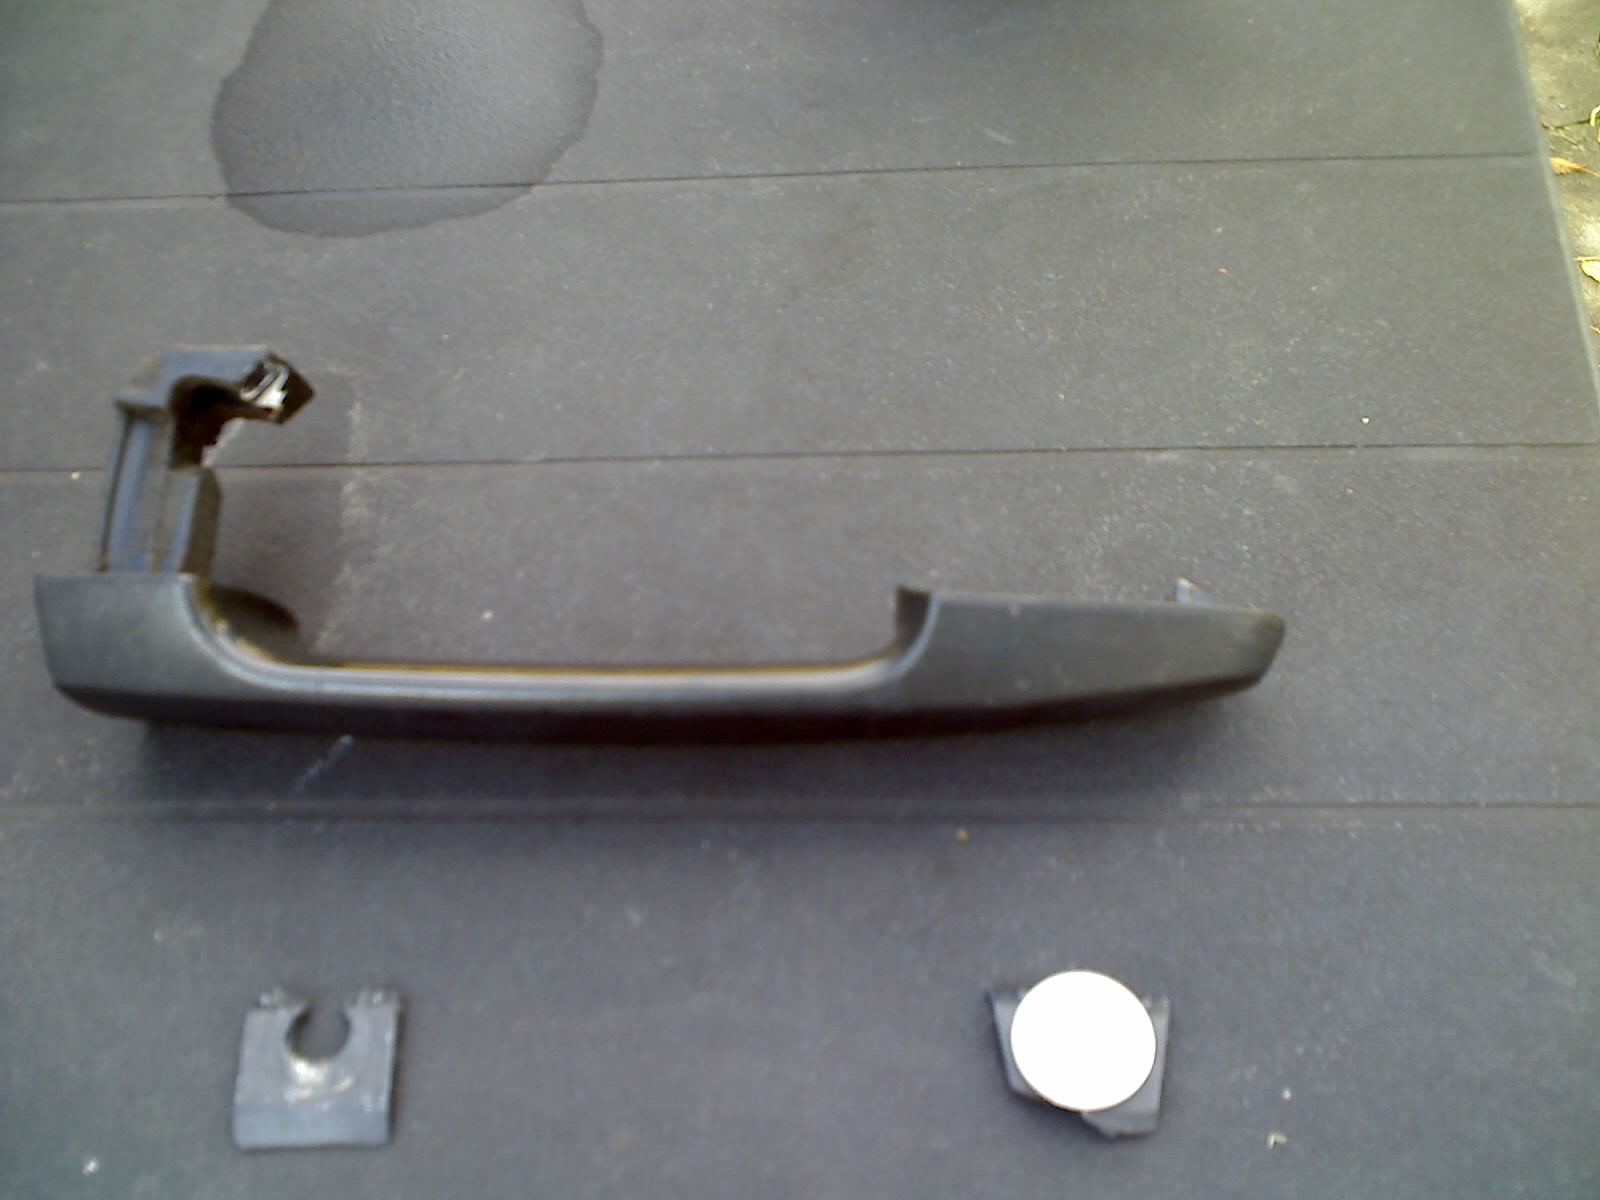
Broken exterior front passenger side door handle. Handle should hinge and remain attached towards front of car (right side of photo) and only travel at the rear-wards end of the handle (left side of photo).
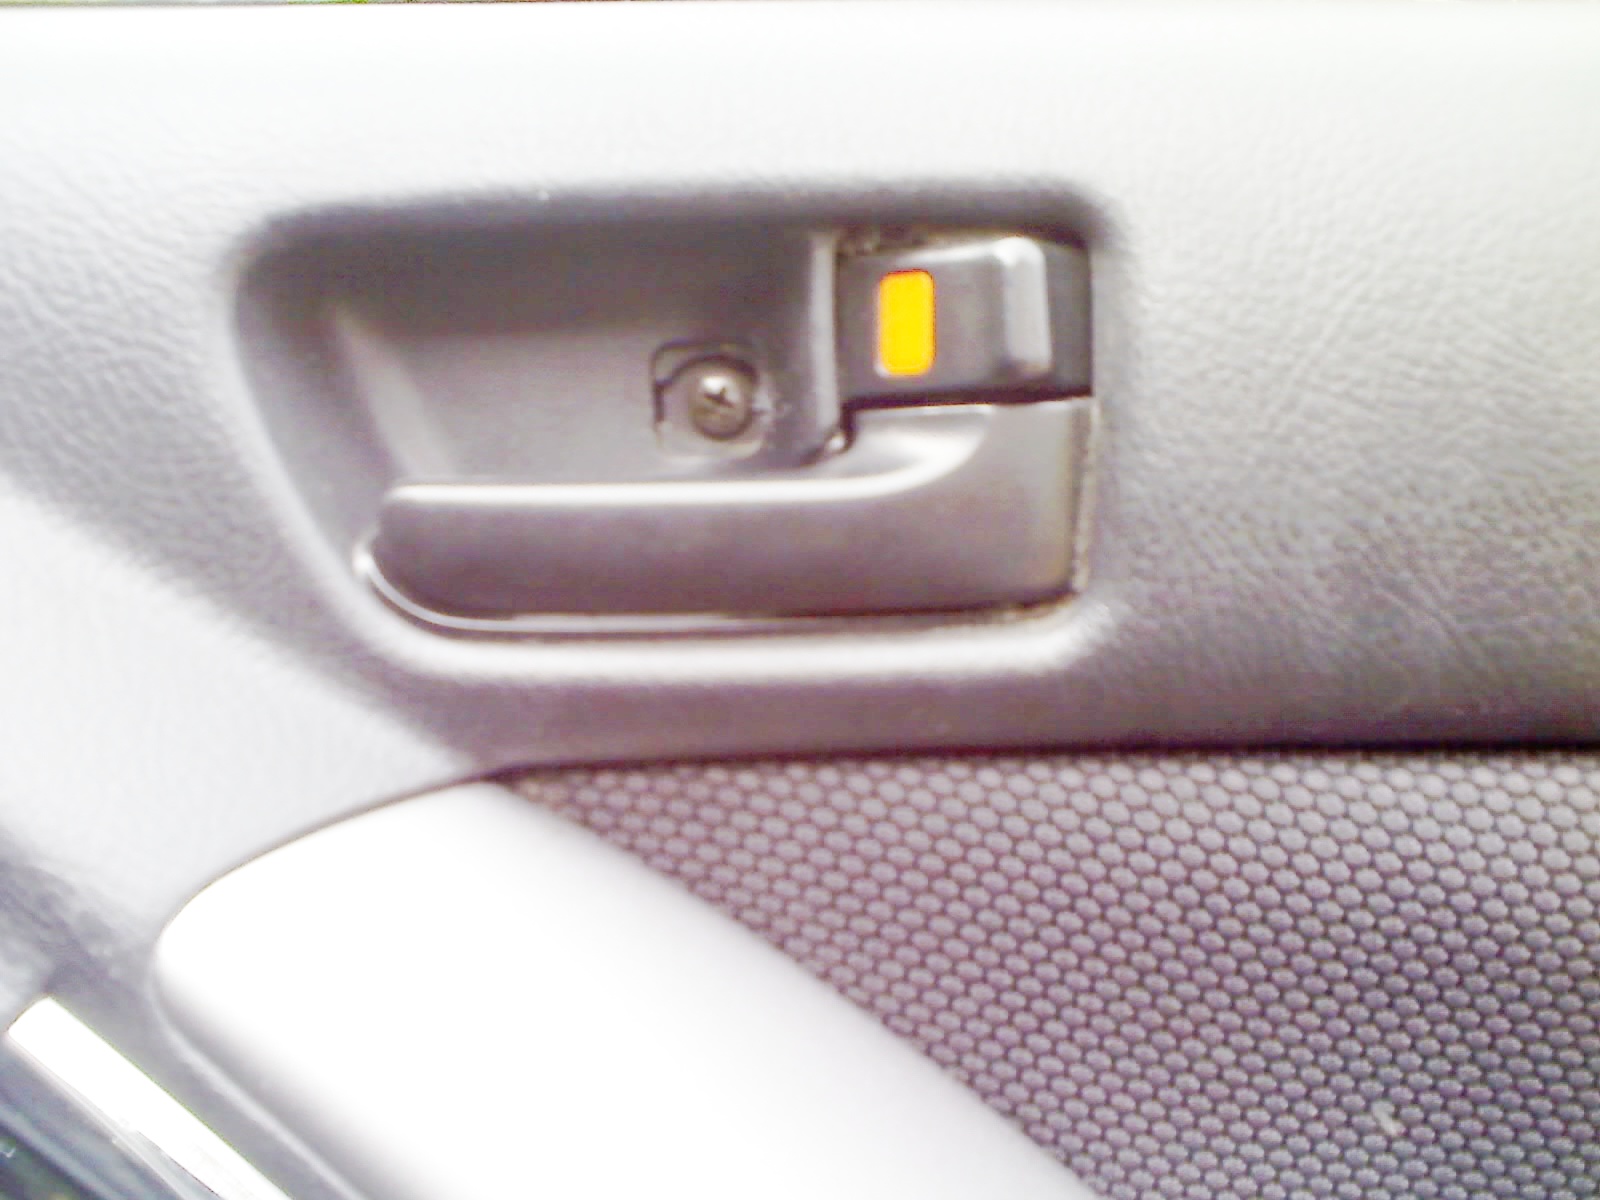
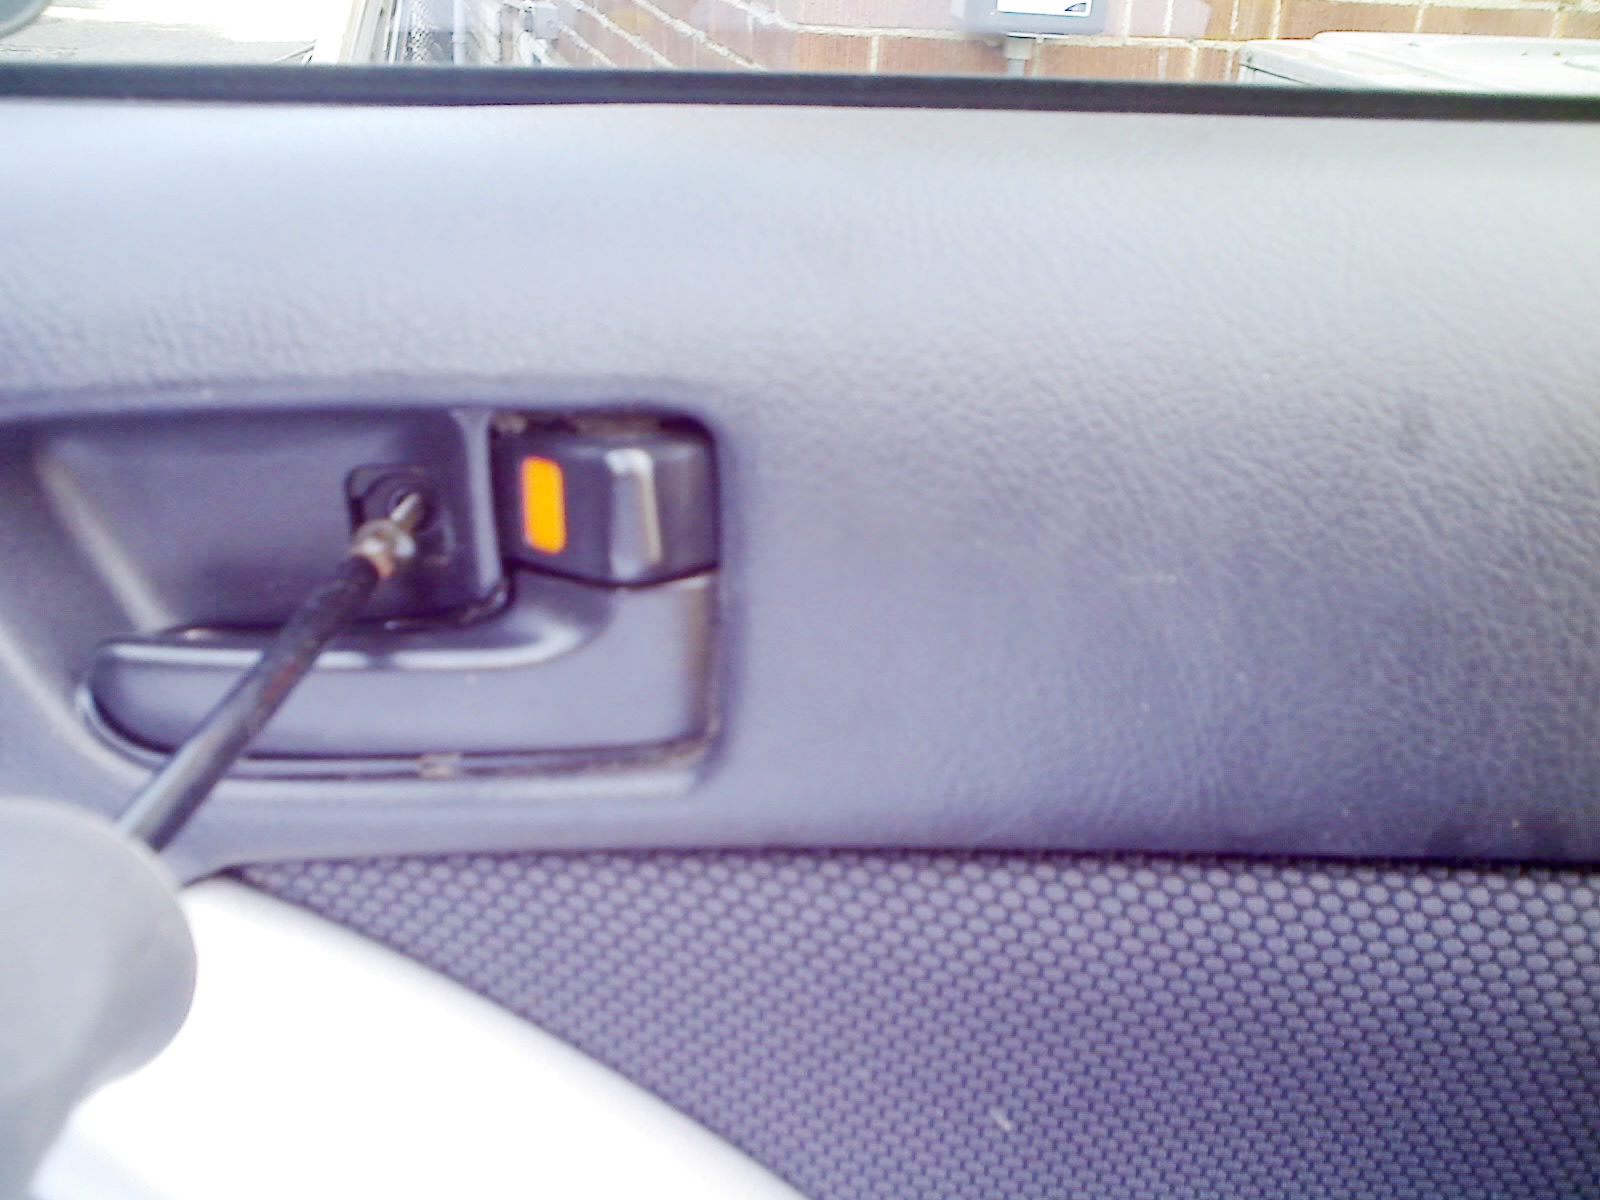
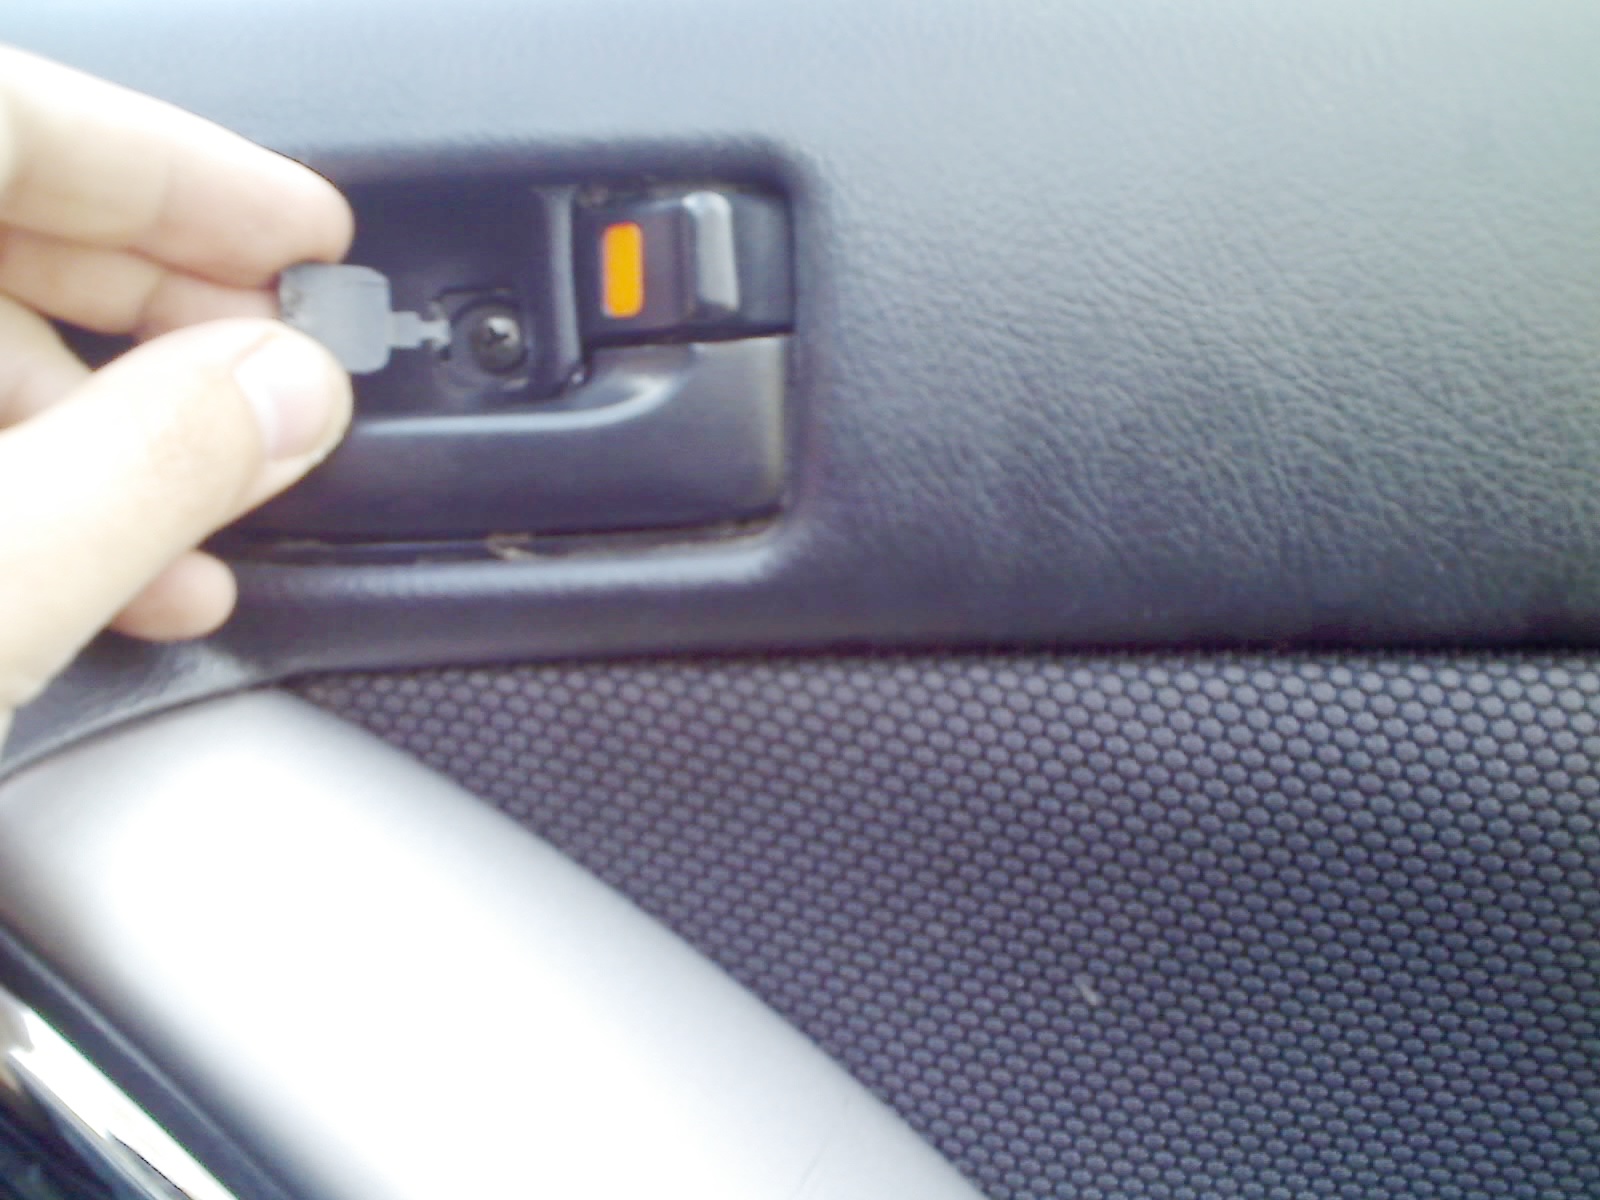
Pry out plastic screw cover behind interior door handle (I was unable to do this with a flat screwdriver as it was too blunt, and even with other tools was still unable to do it cleanly without scratching and mangling the plastic : - (

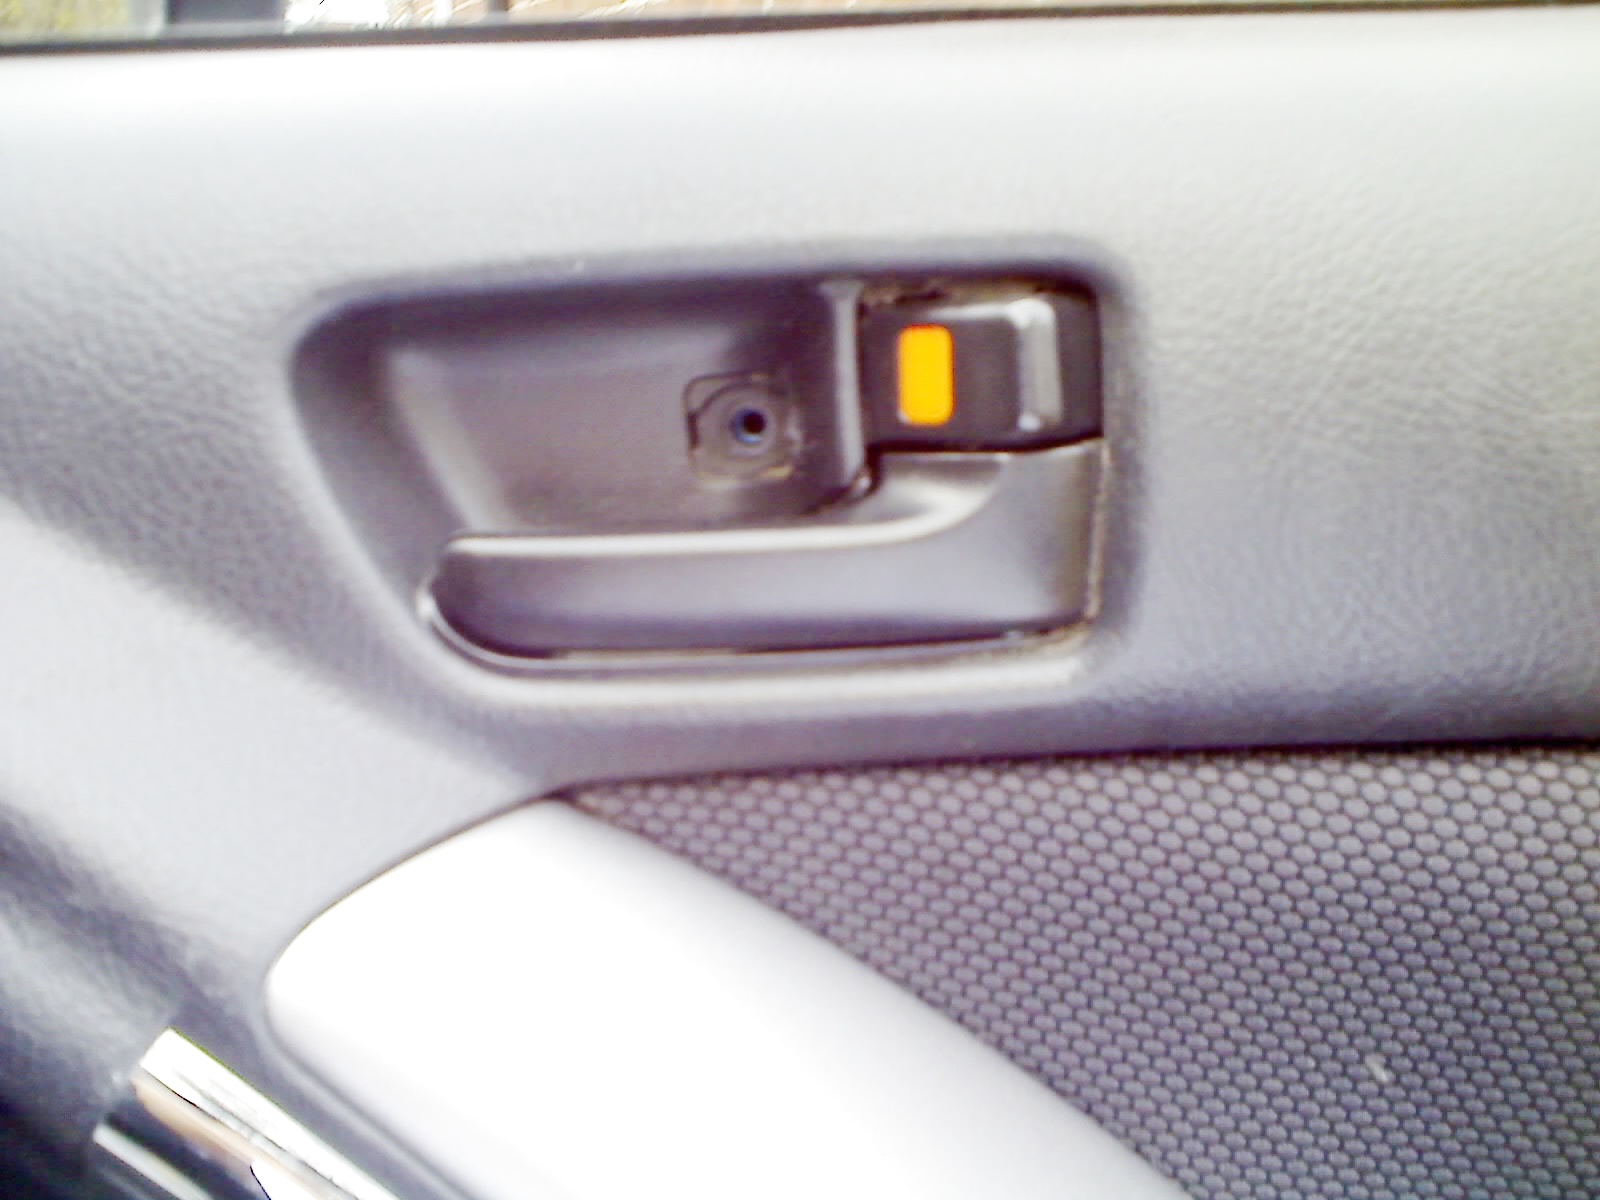
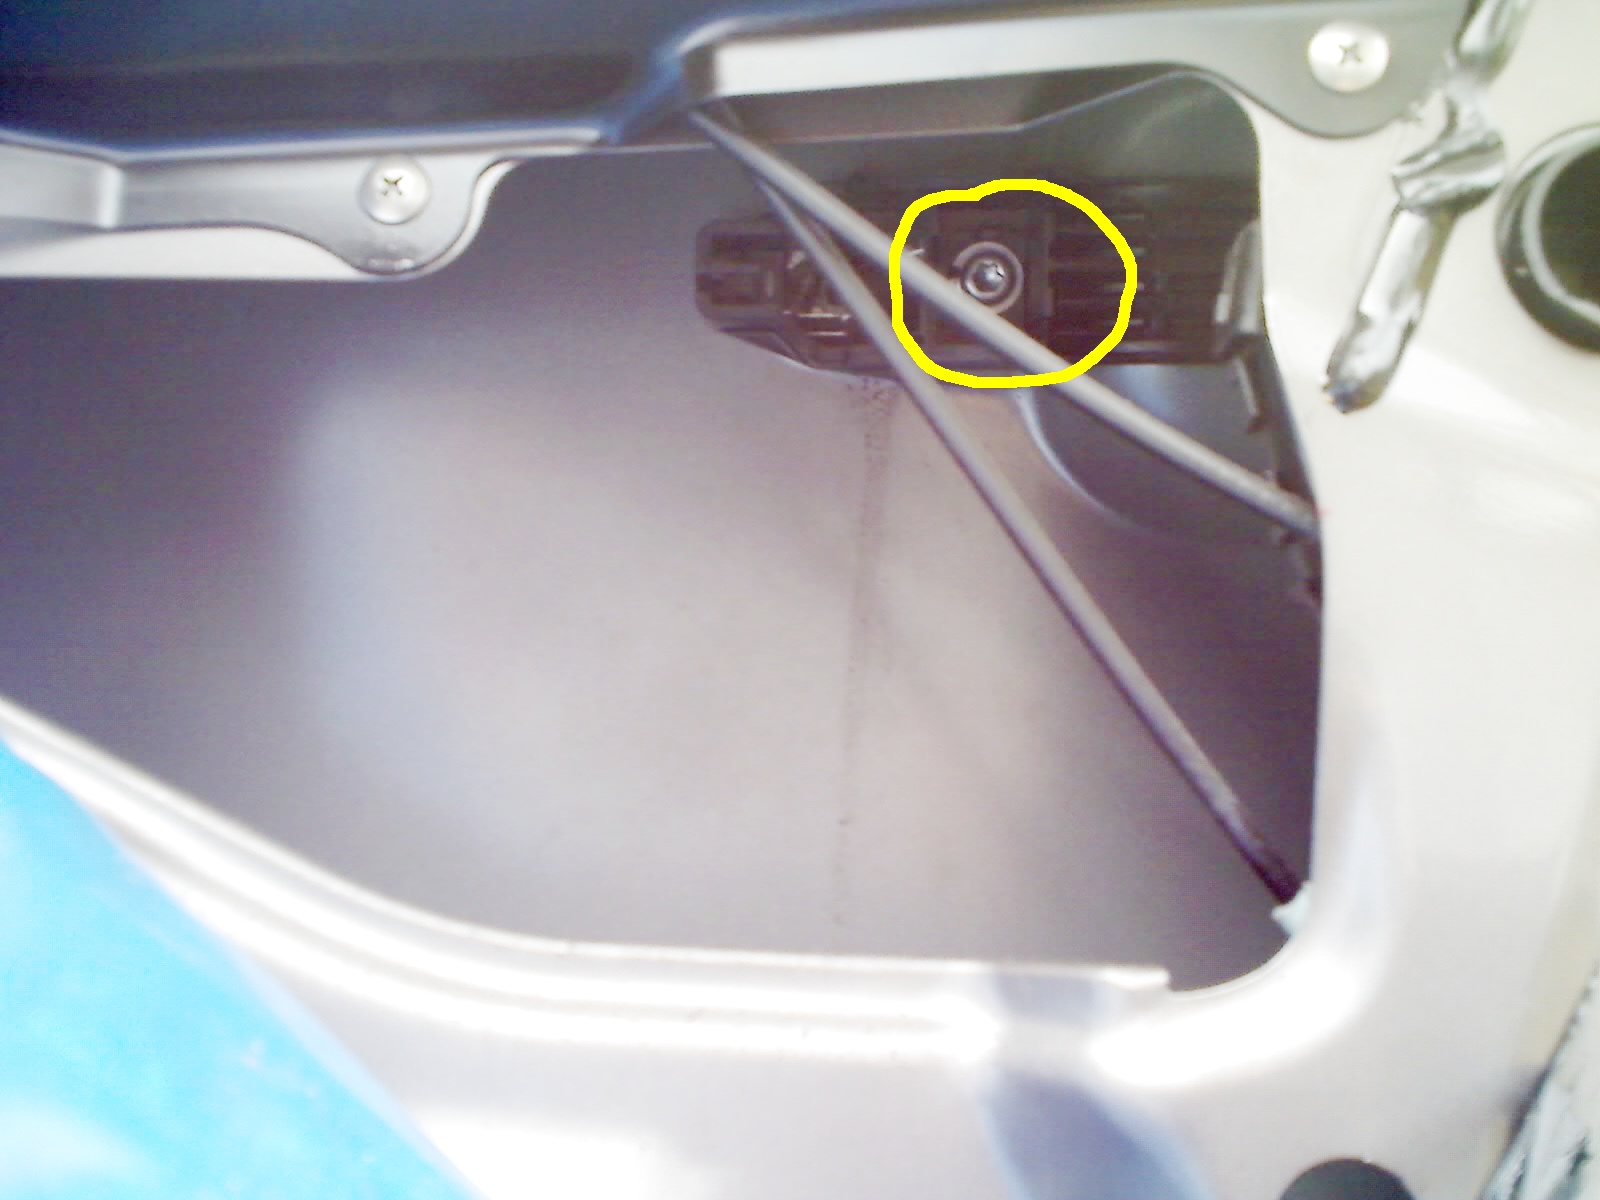
Remove Phillips (star) screw behind interior door handle
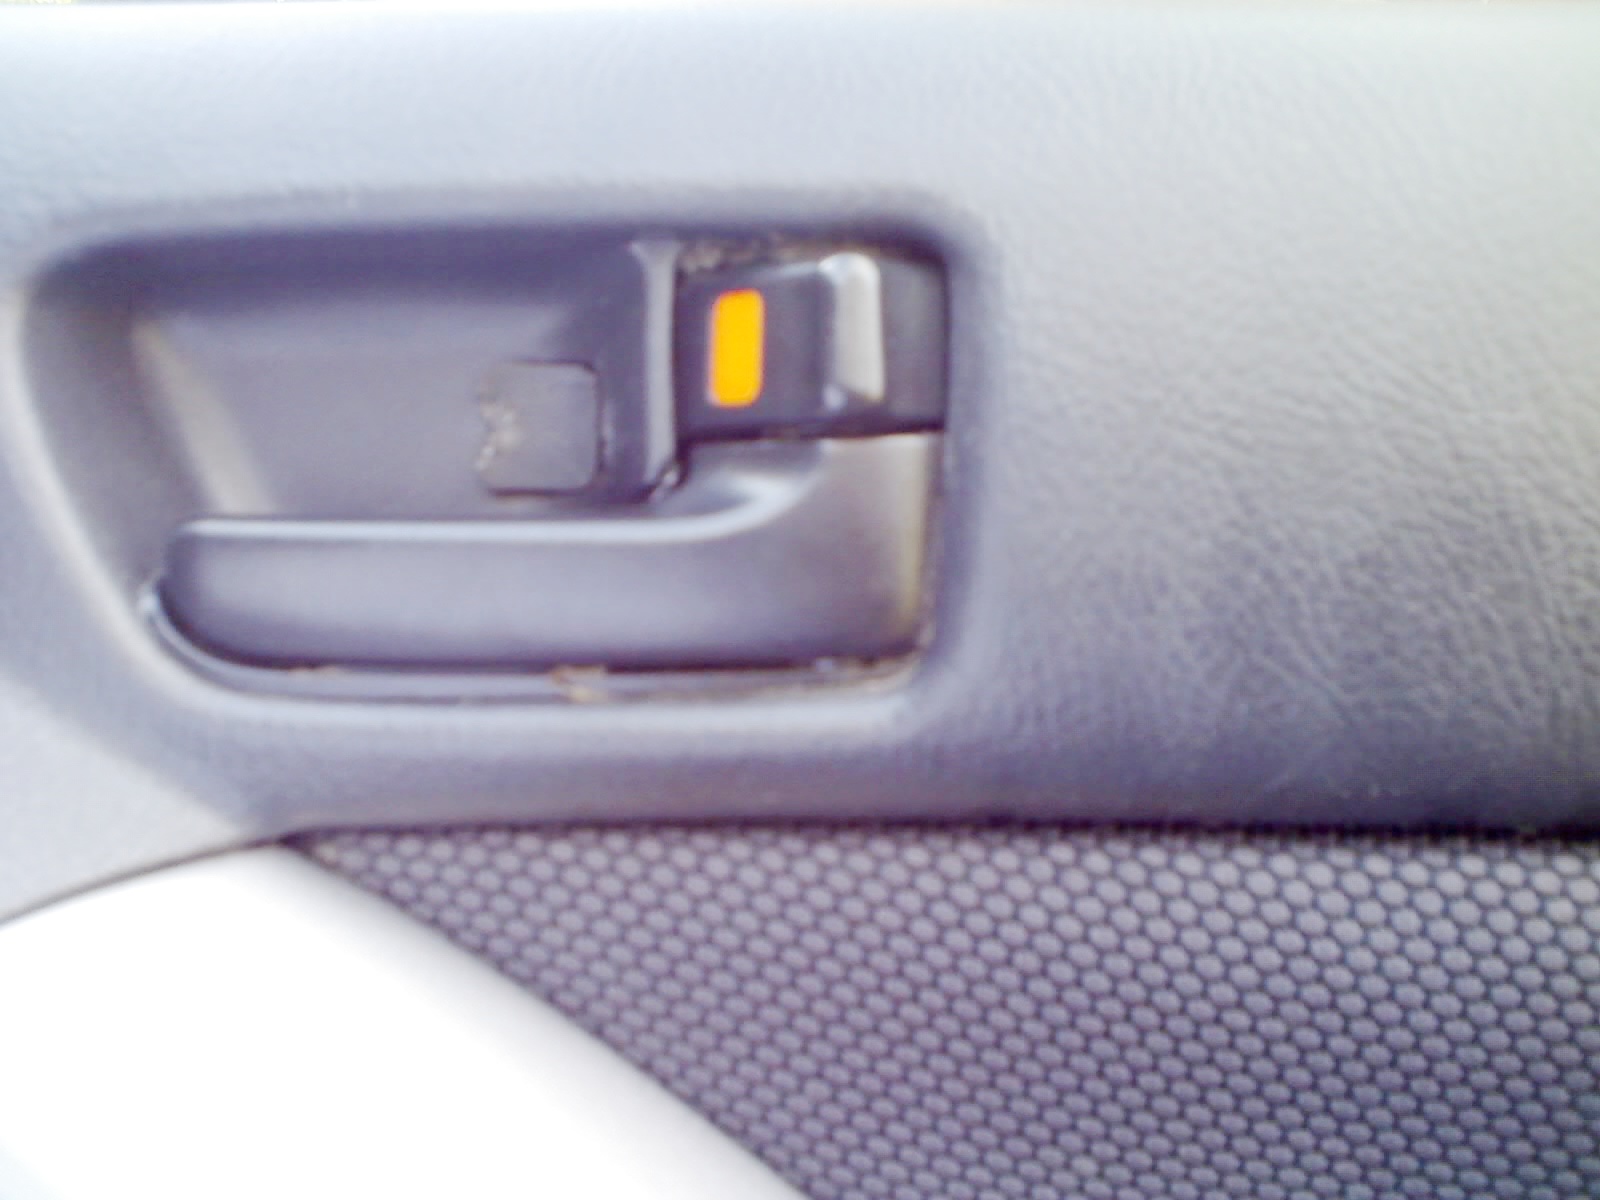
Result after screw was removed
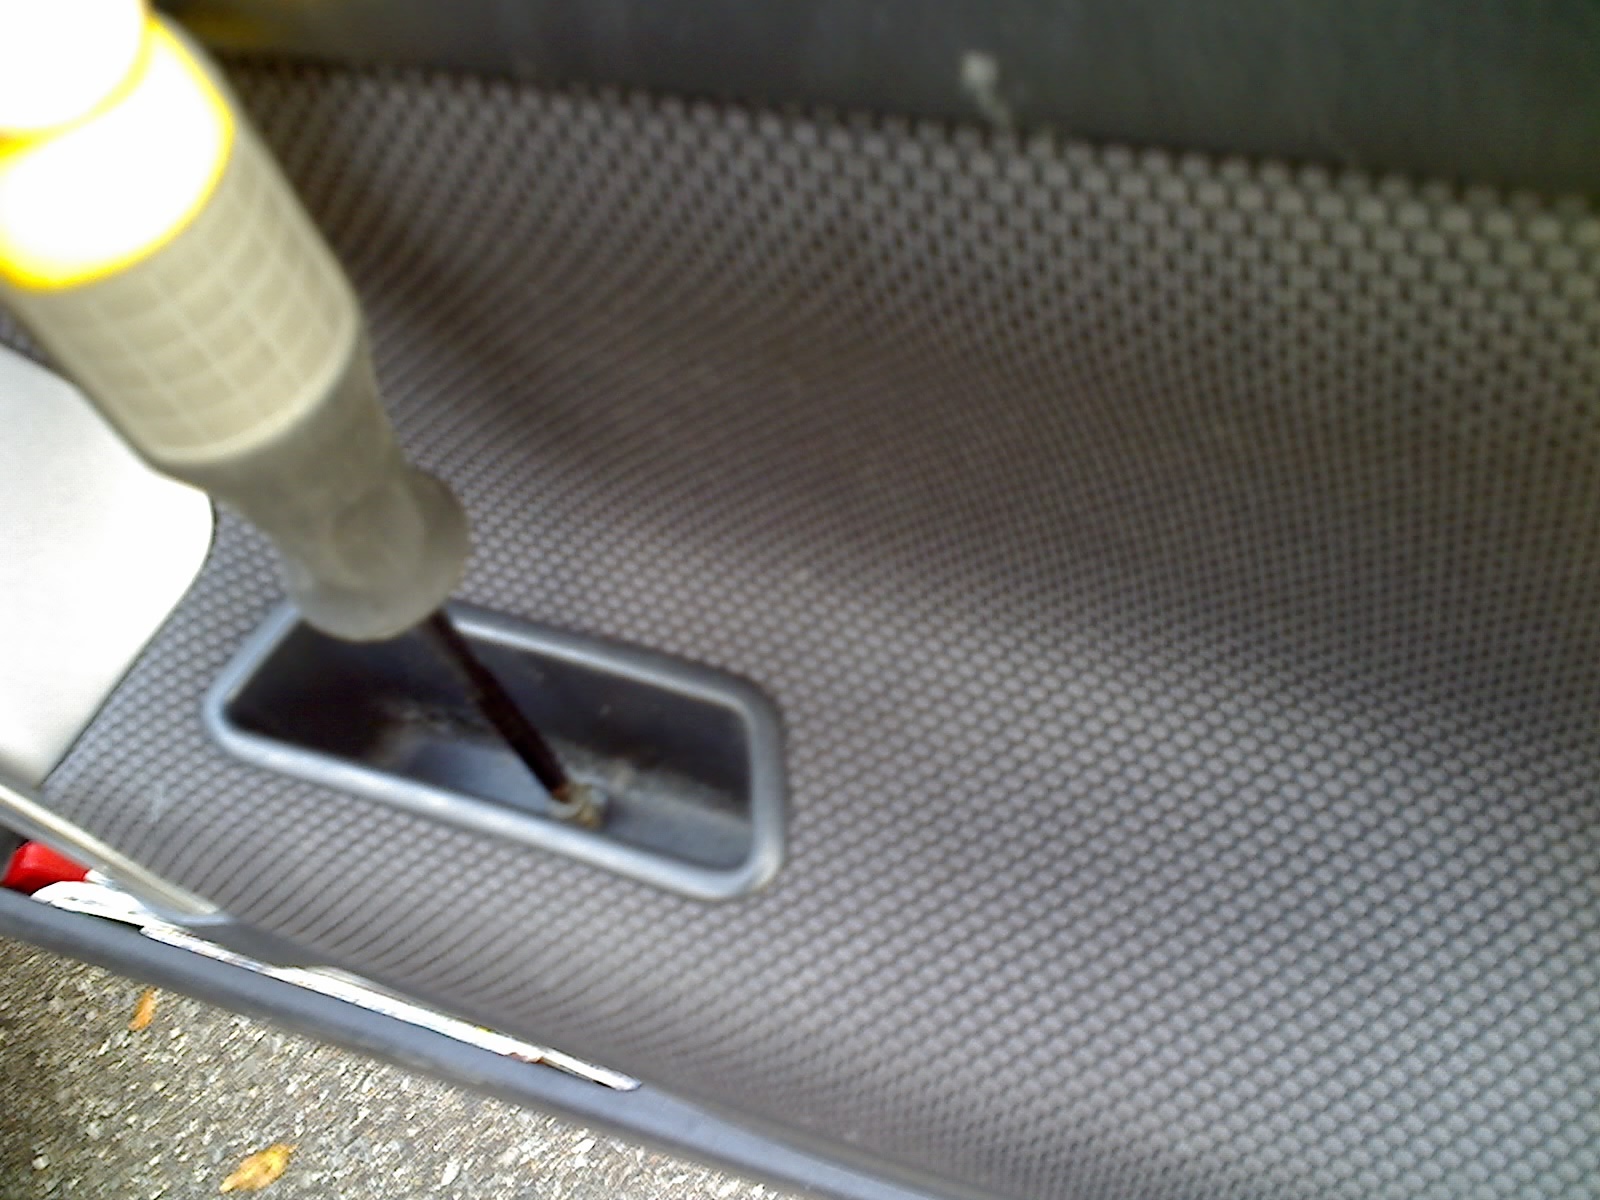
Remove Phillips (star) screw in bottom of interior door pull and lift plastic door pull insert
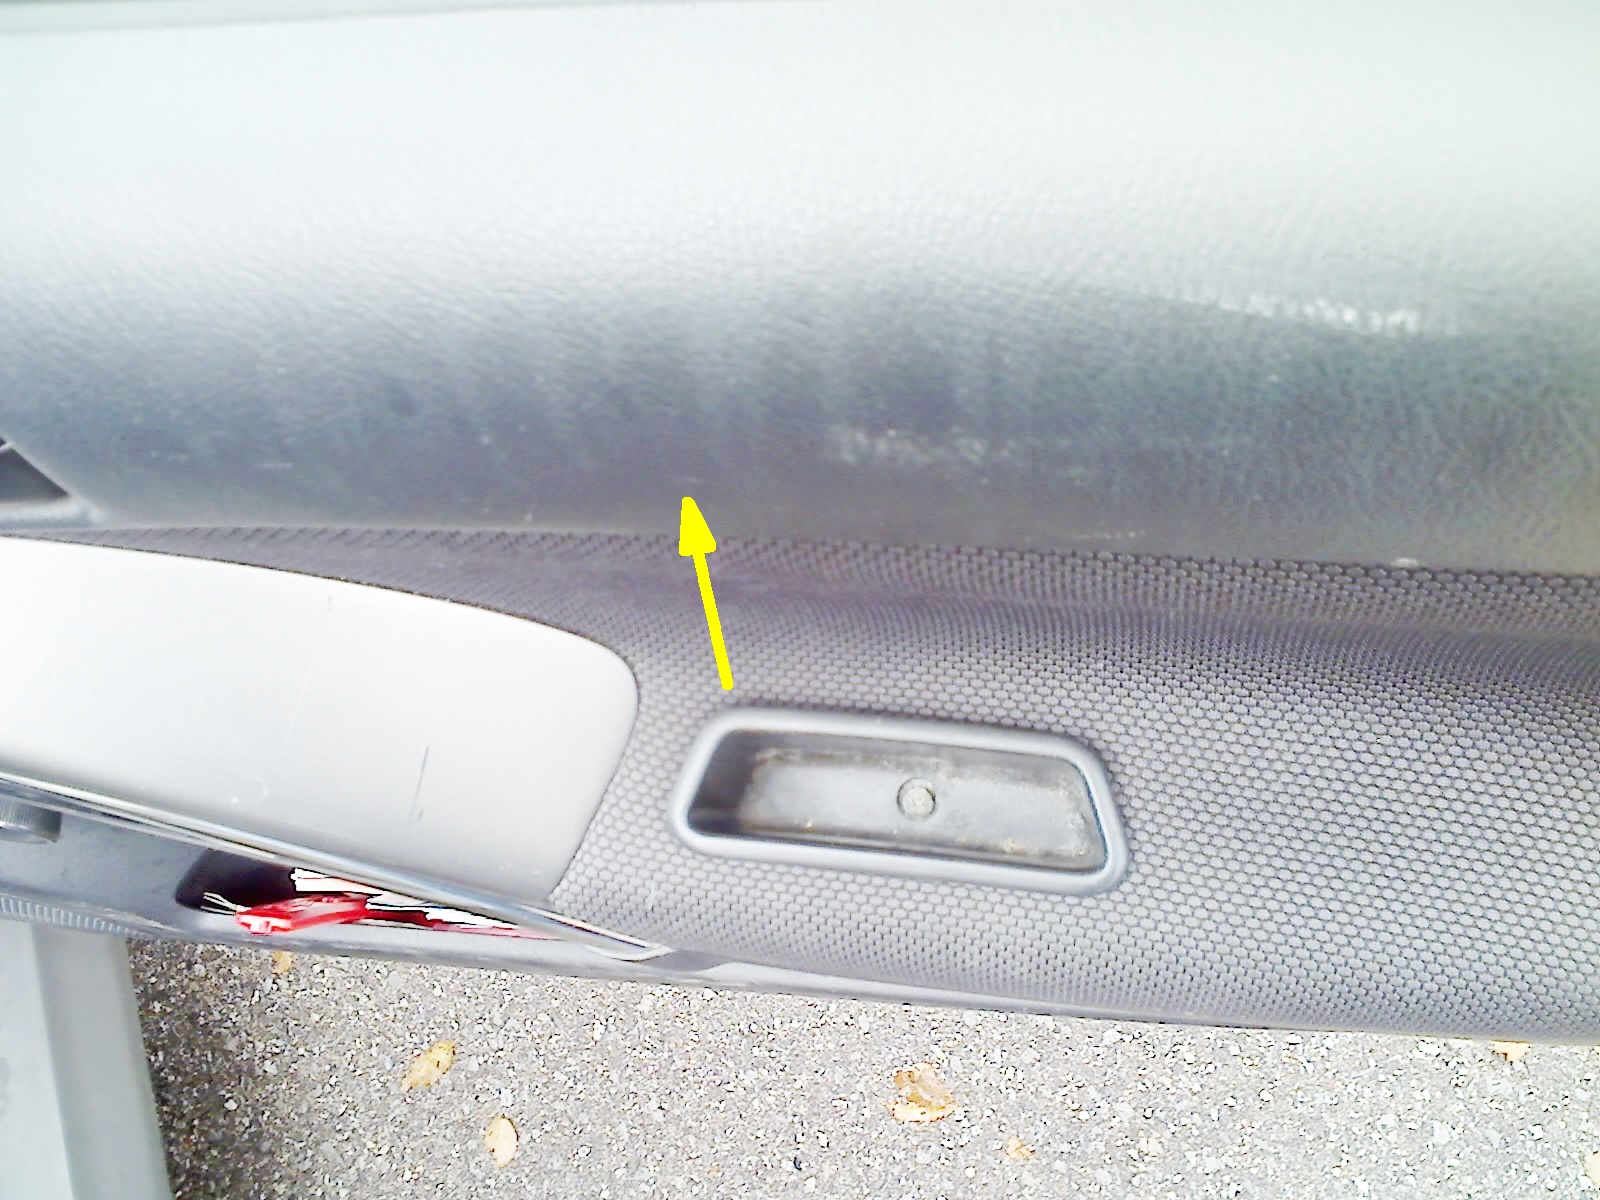
Result after door pull insert was removed
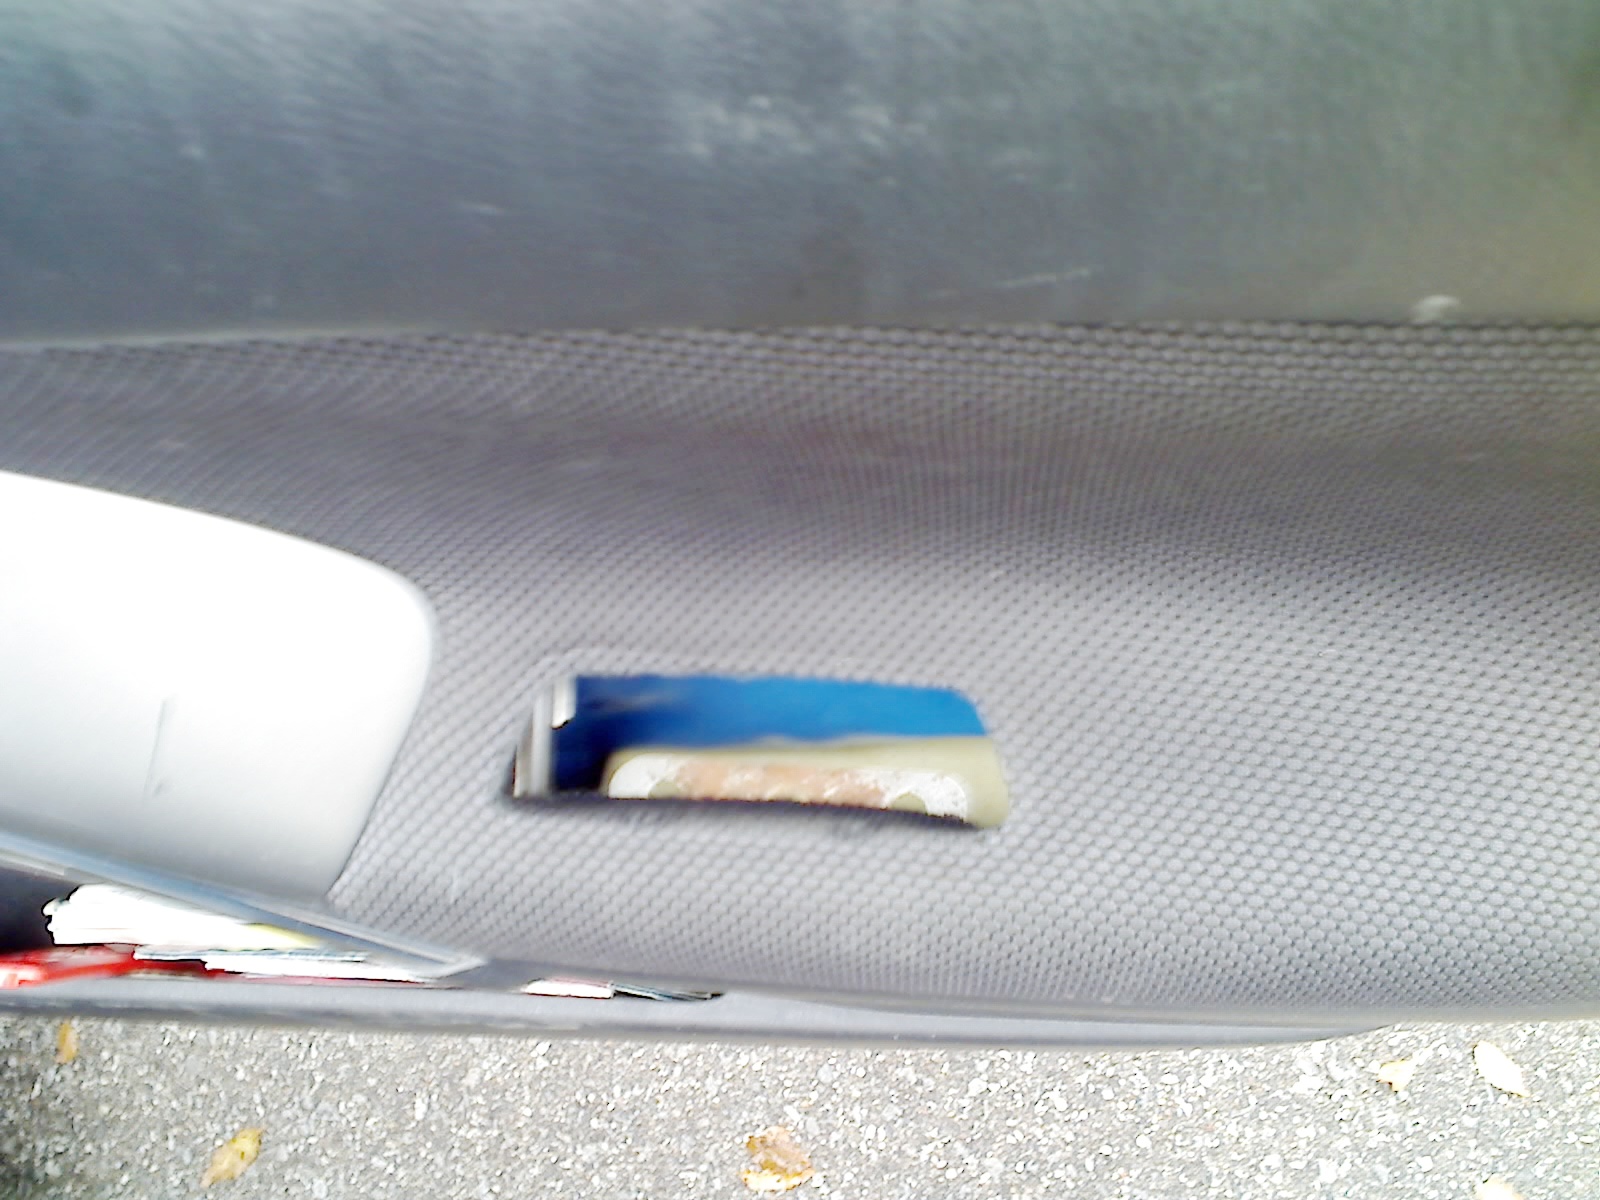
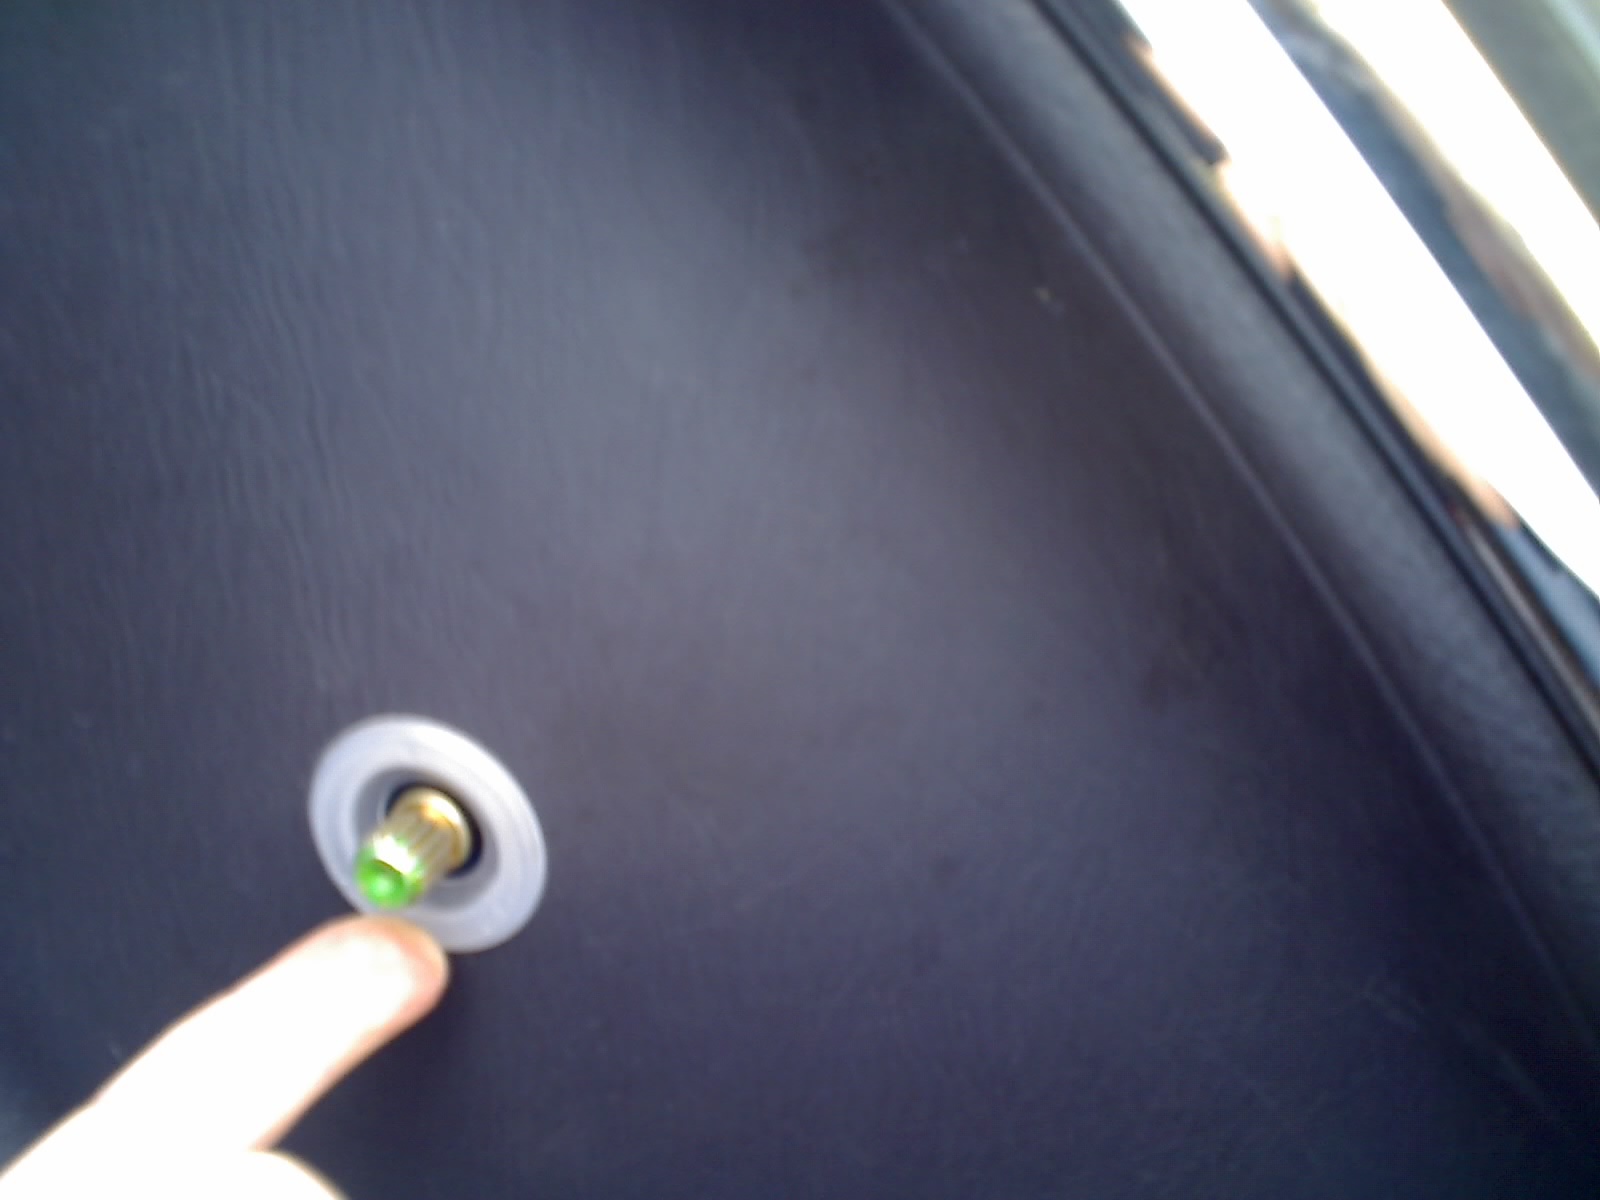
Roll window all the way down, and wedge a rag between the black manual window crank handle and the white plastic washer that separates the handle from the door panel. Move the rag back and forth while pulling with two hands on either side of the spindle until rag is well wedged in.
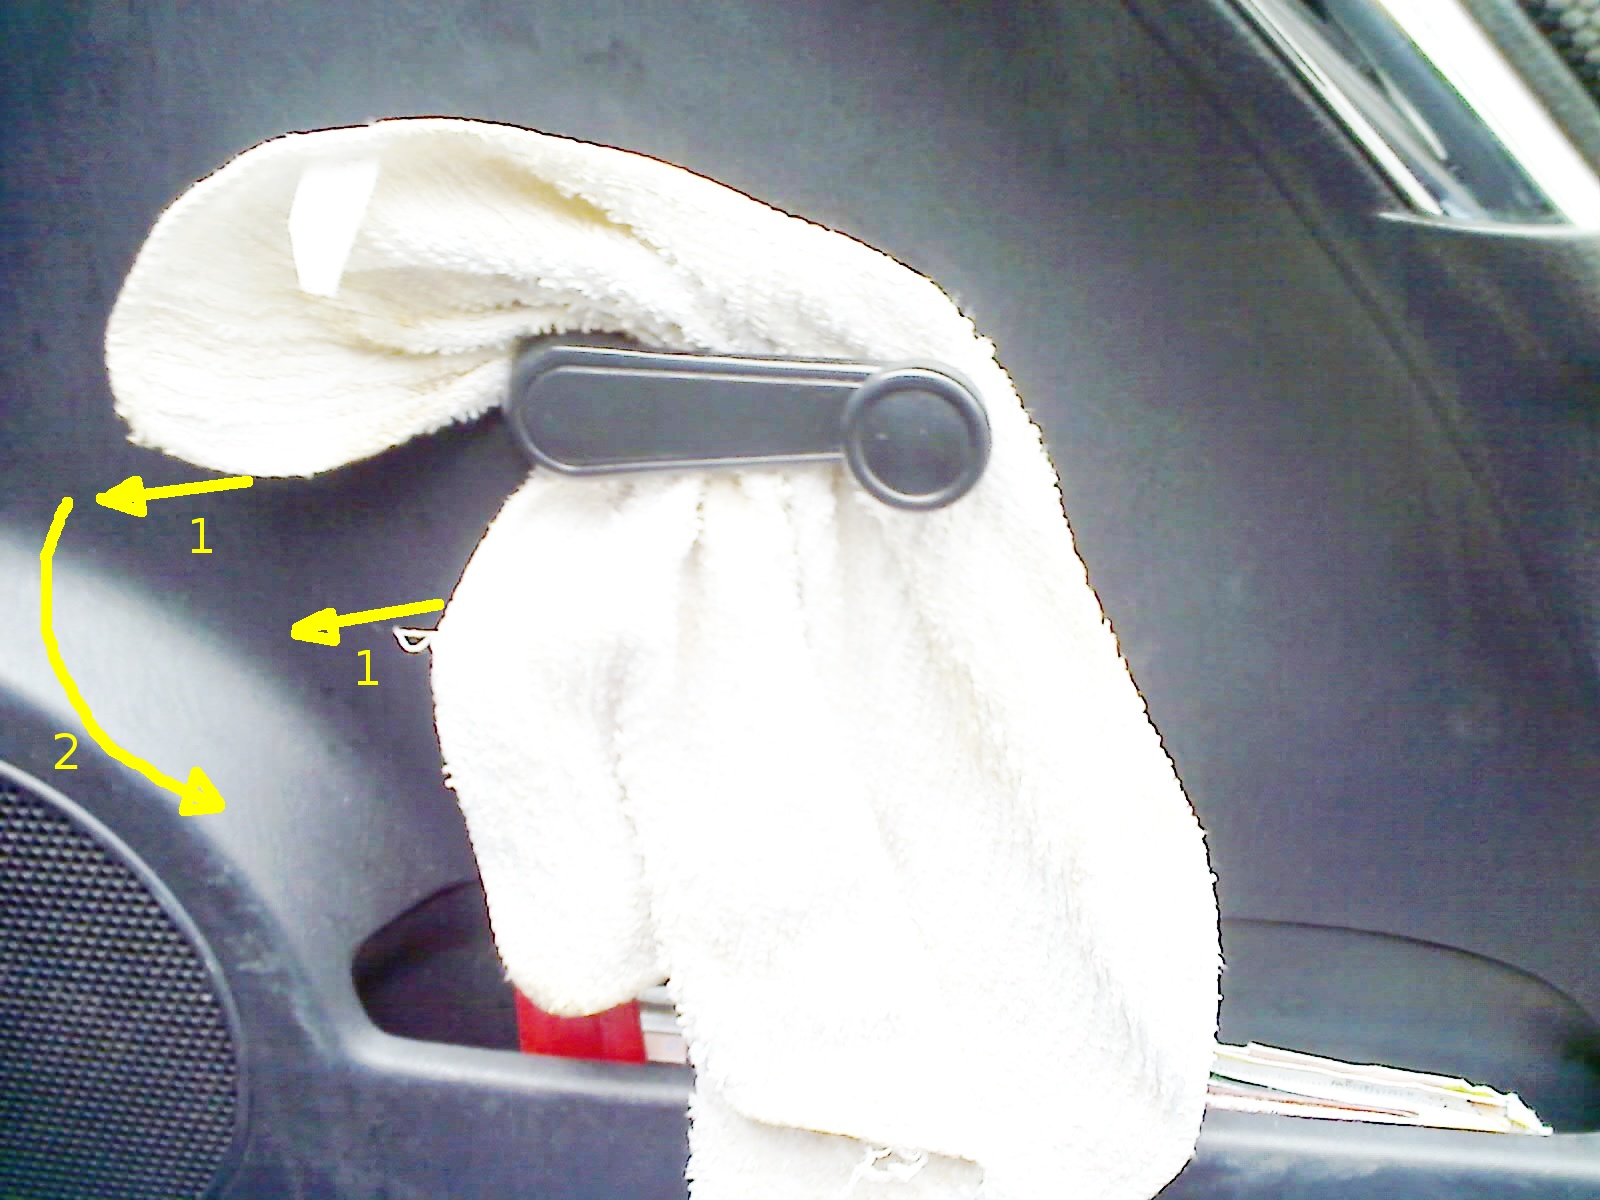
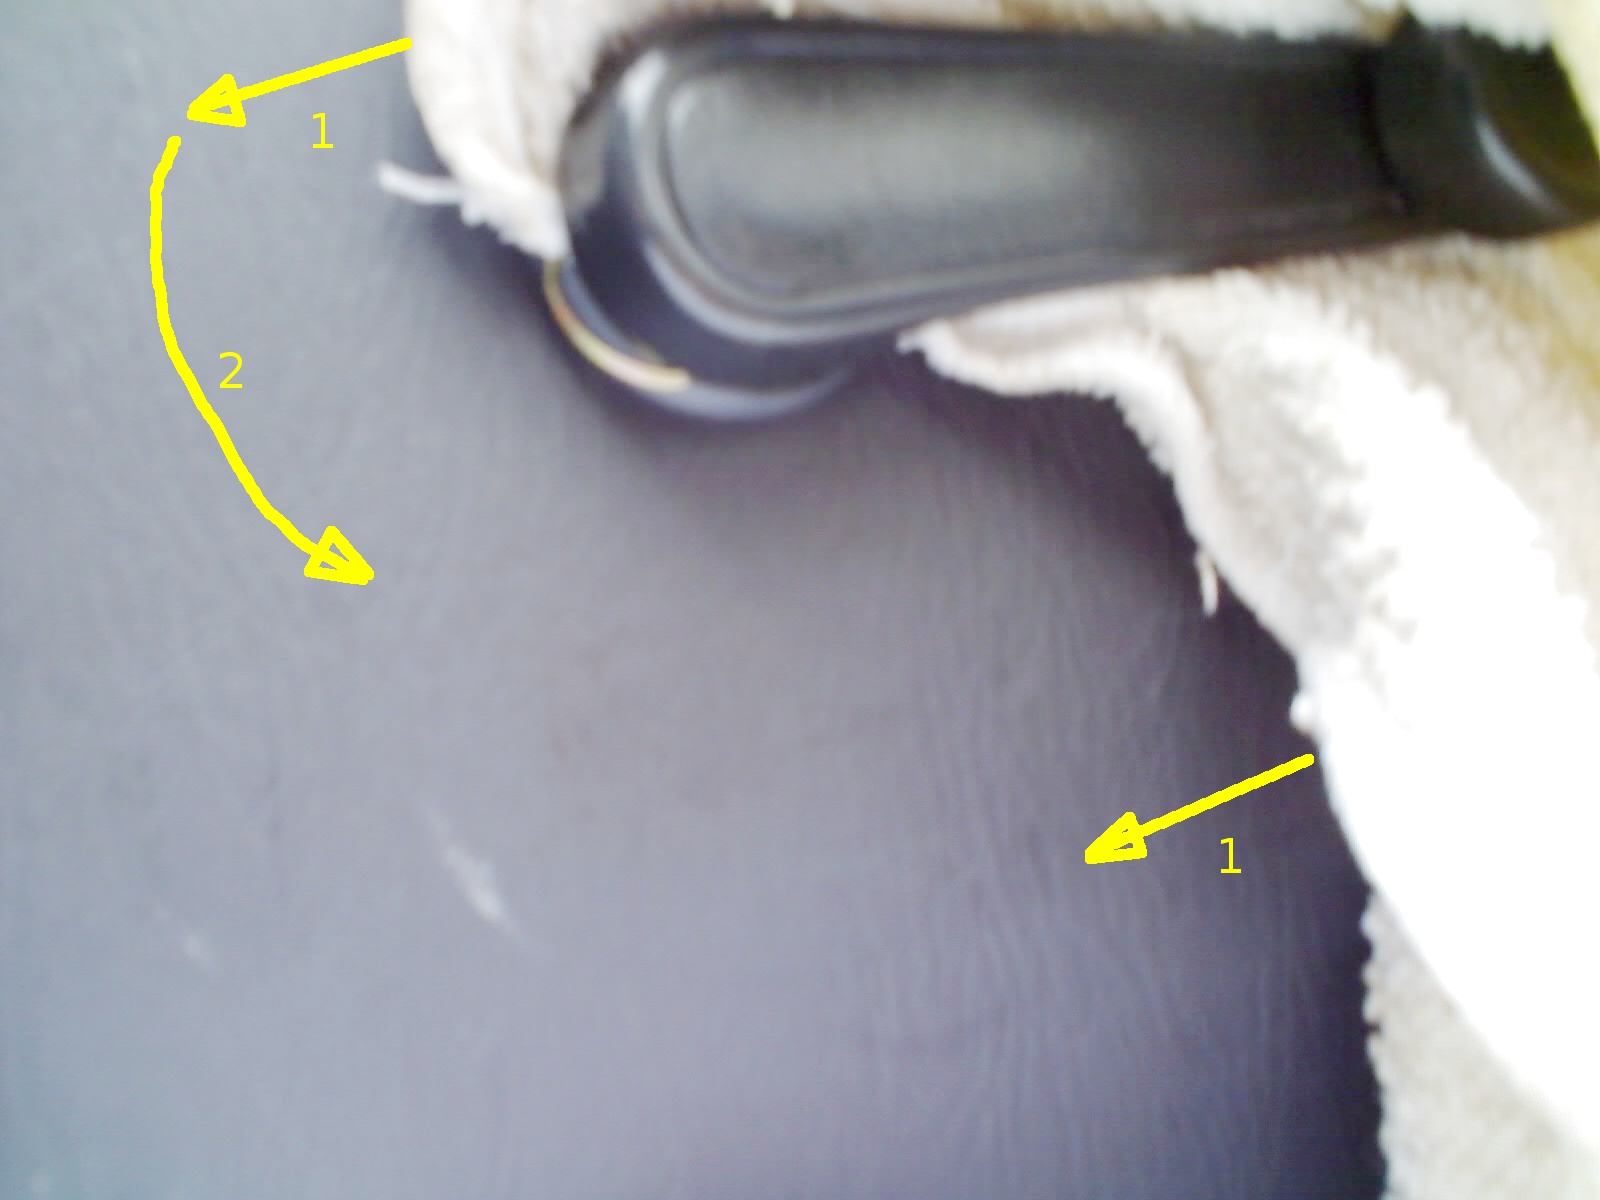
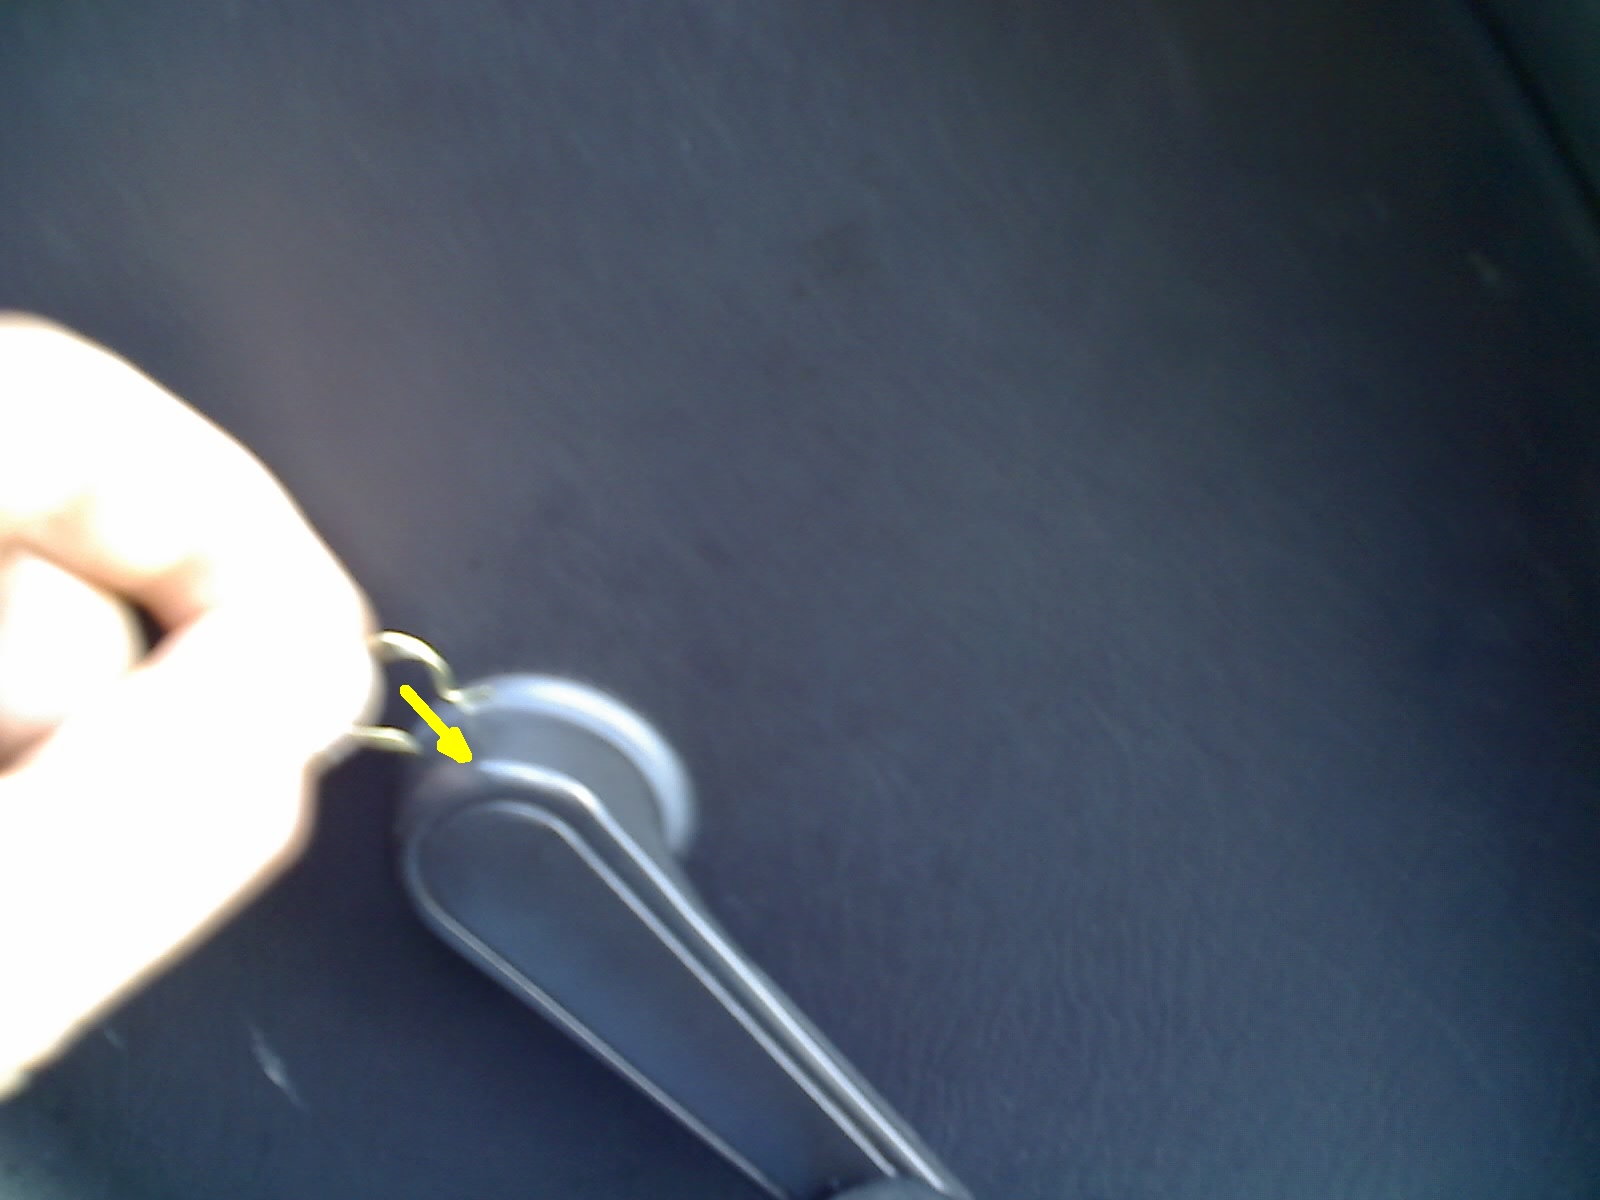
Keeping sideways tension on the rag with both hands, give it more counter-clockwise rotation (rolling-down-the-window direction), and since the window is already at the bottom, the crank won't rotate any more, but the rag will hook on the C-clip and pop it off of the spindle.
If you're lucky you can just grab the C-clip once the rag gets it most of the way out. More likely it will spring off into the bushes or fall down into the door side pocket : - (
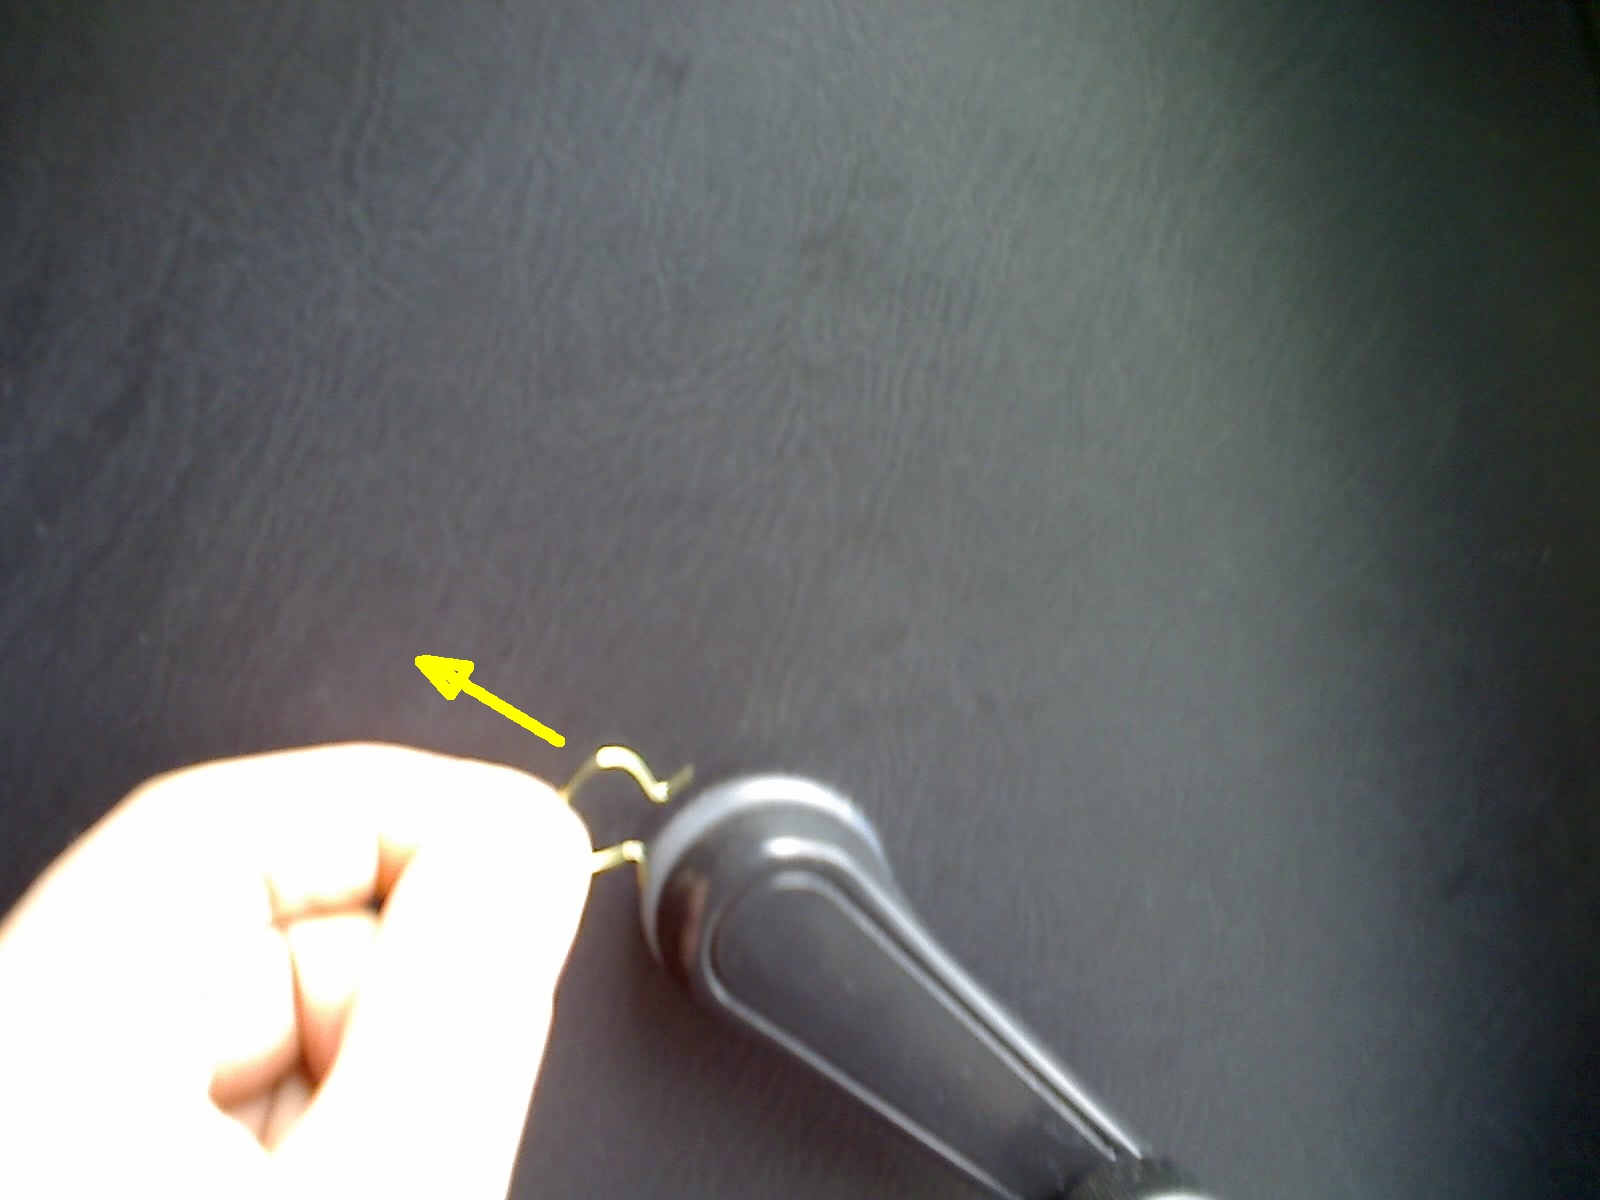
Remove window crank handle and white plastic washer.
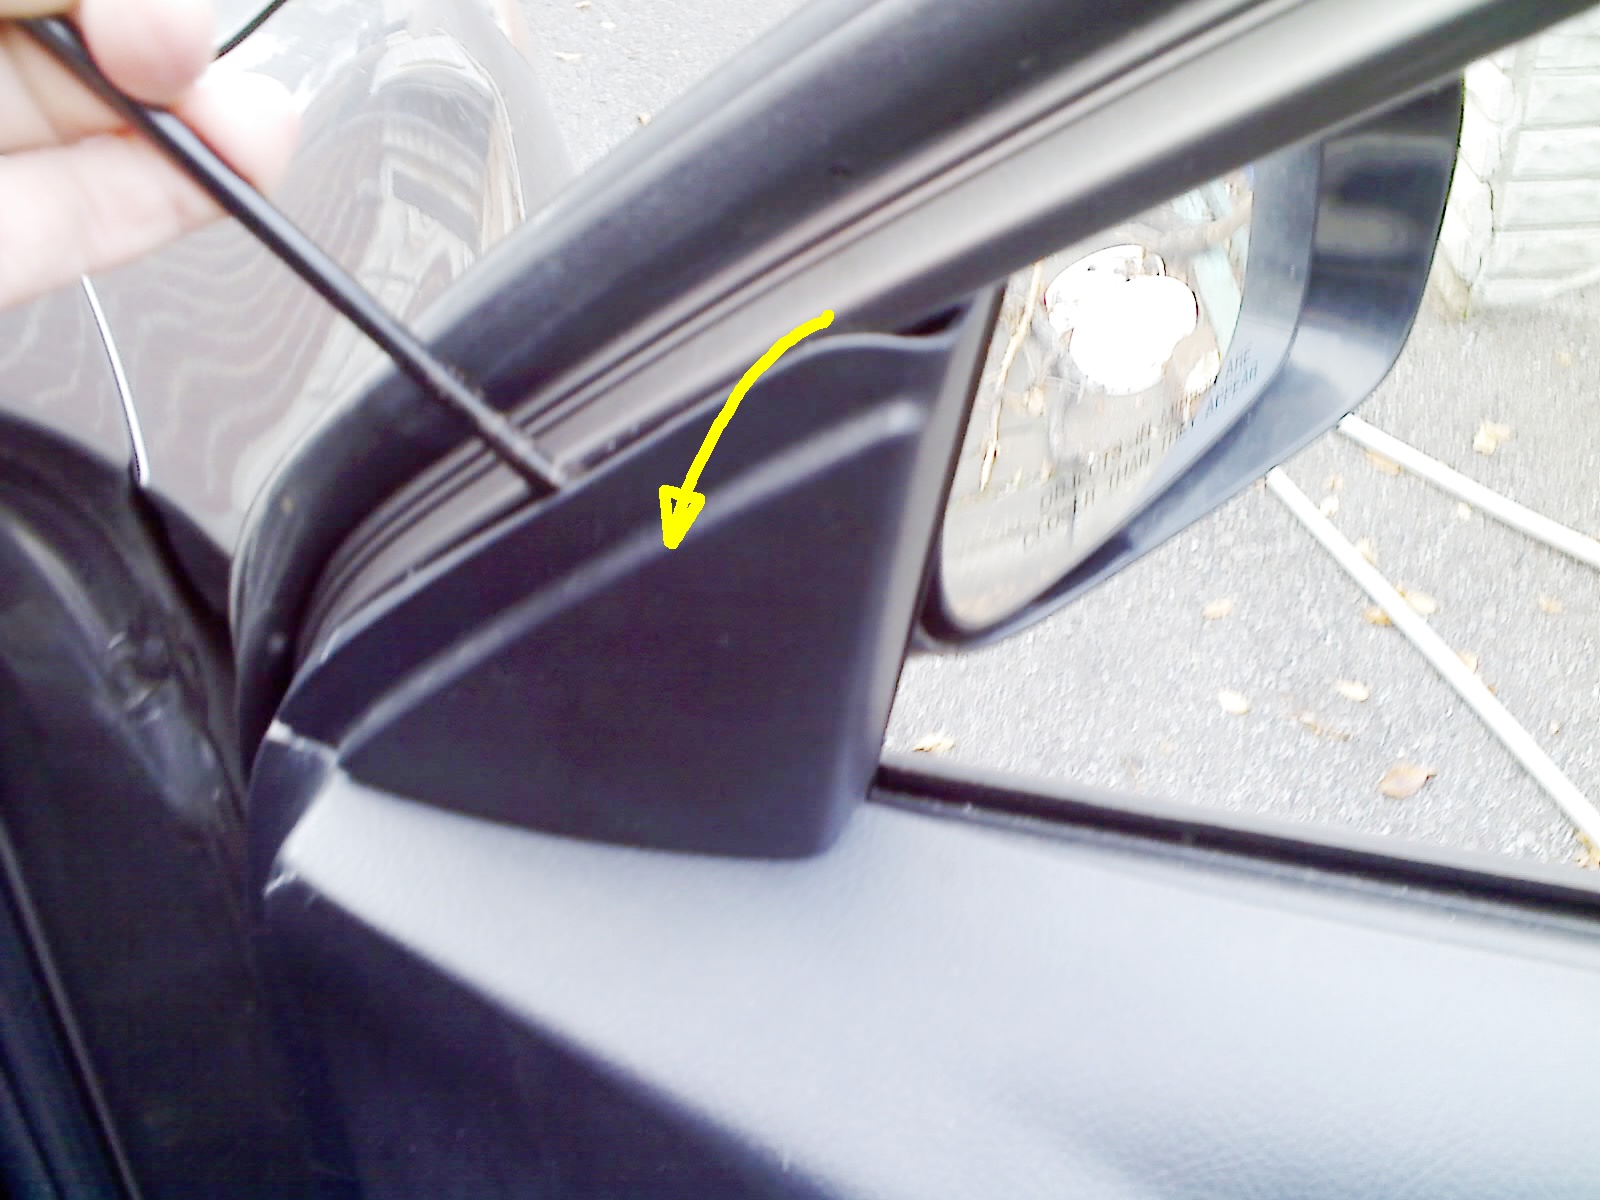
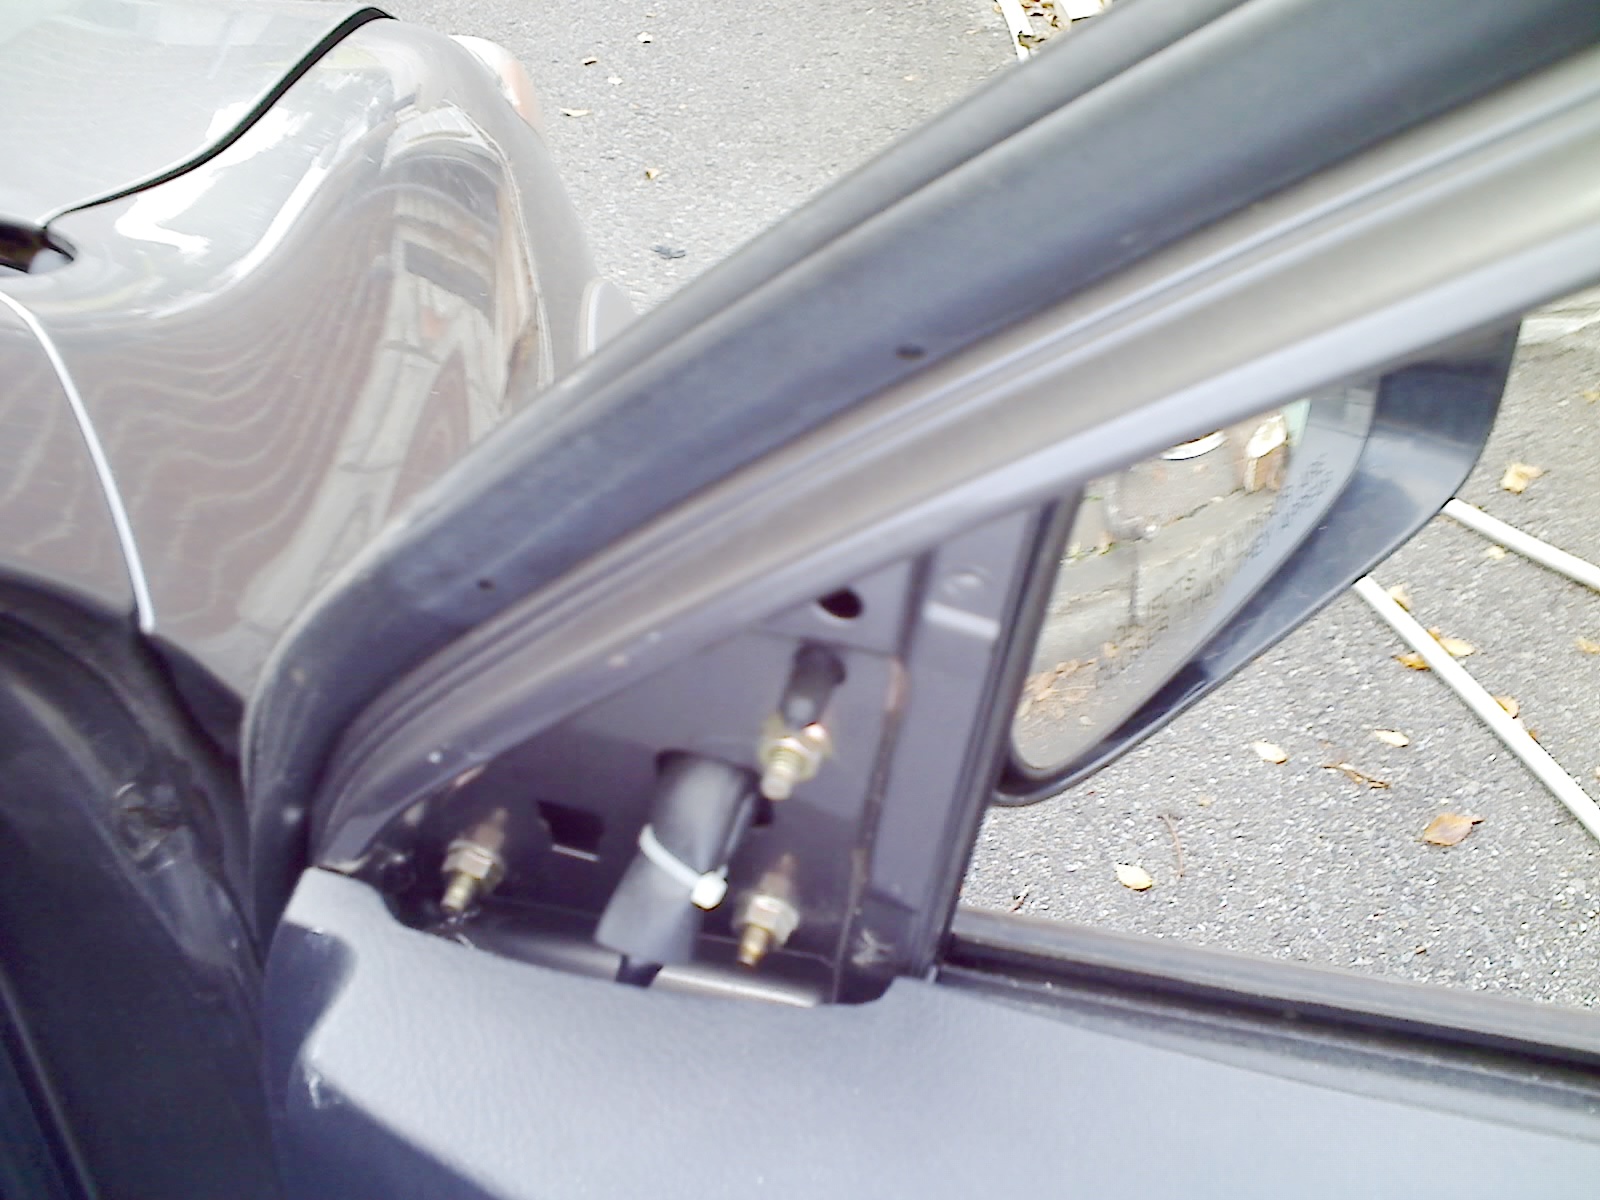
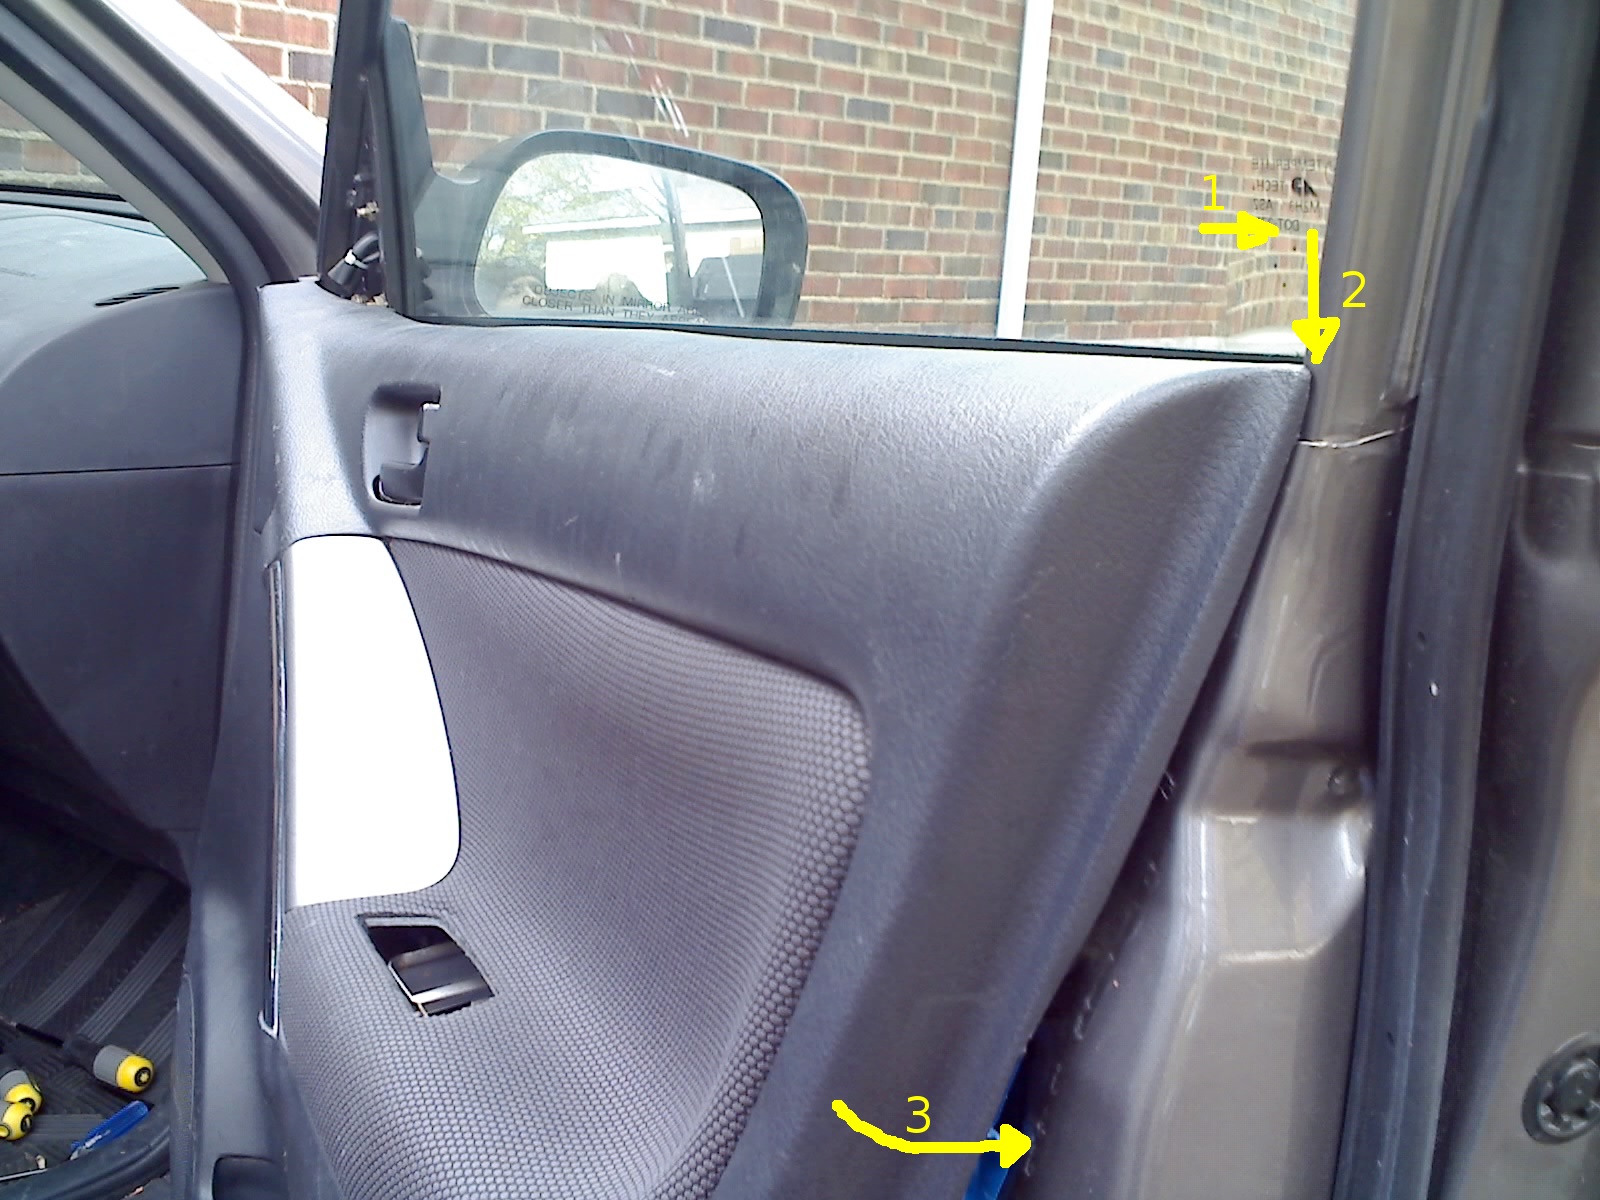
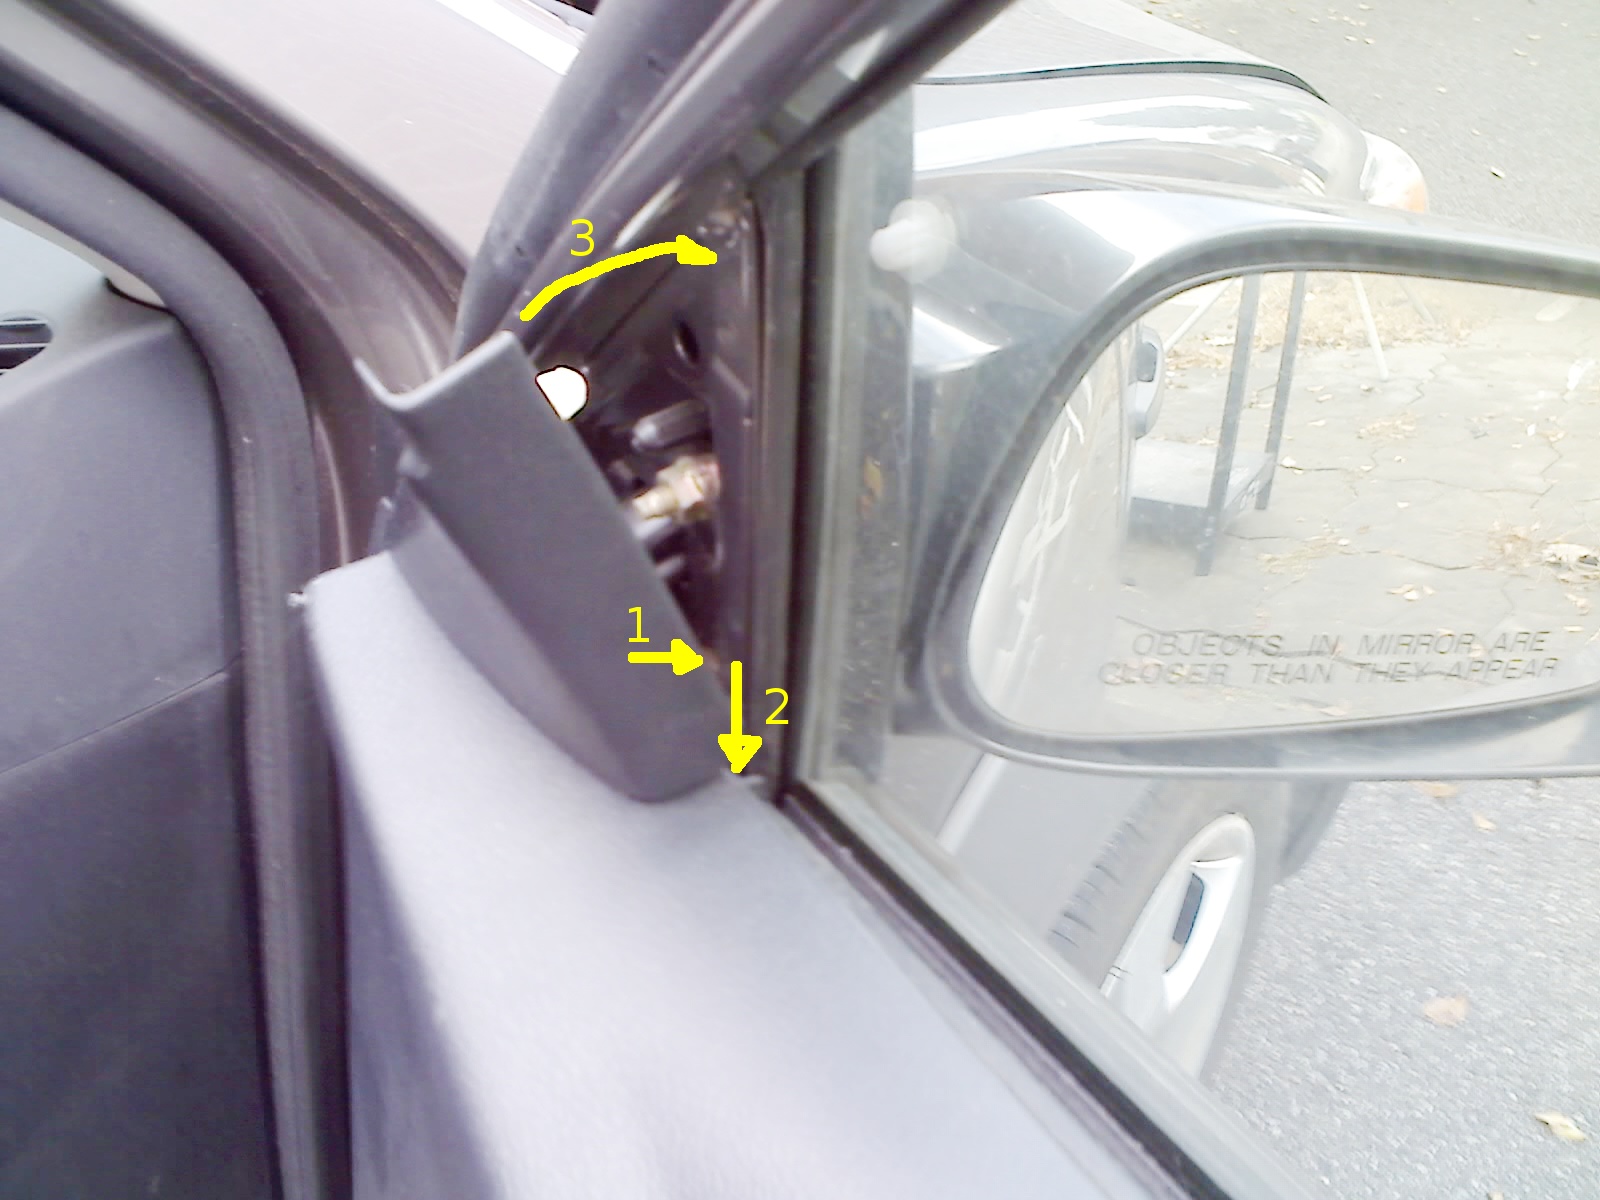
Pry (from top) triangular plastic panel on interior where side-view mirror is.
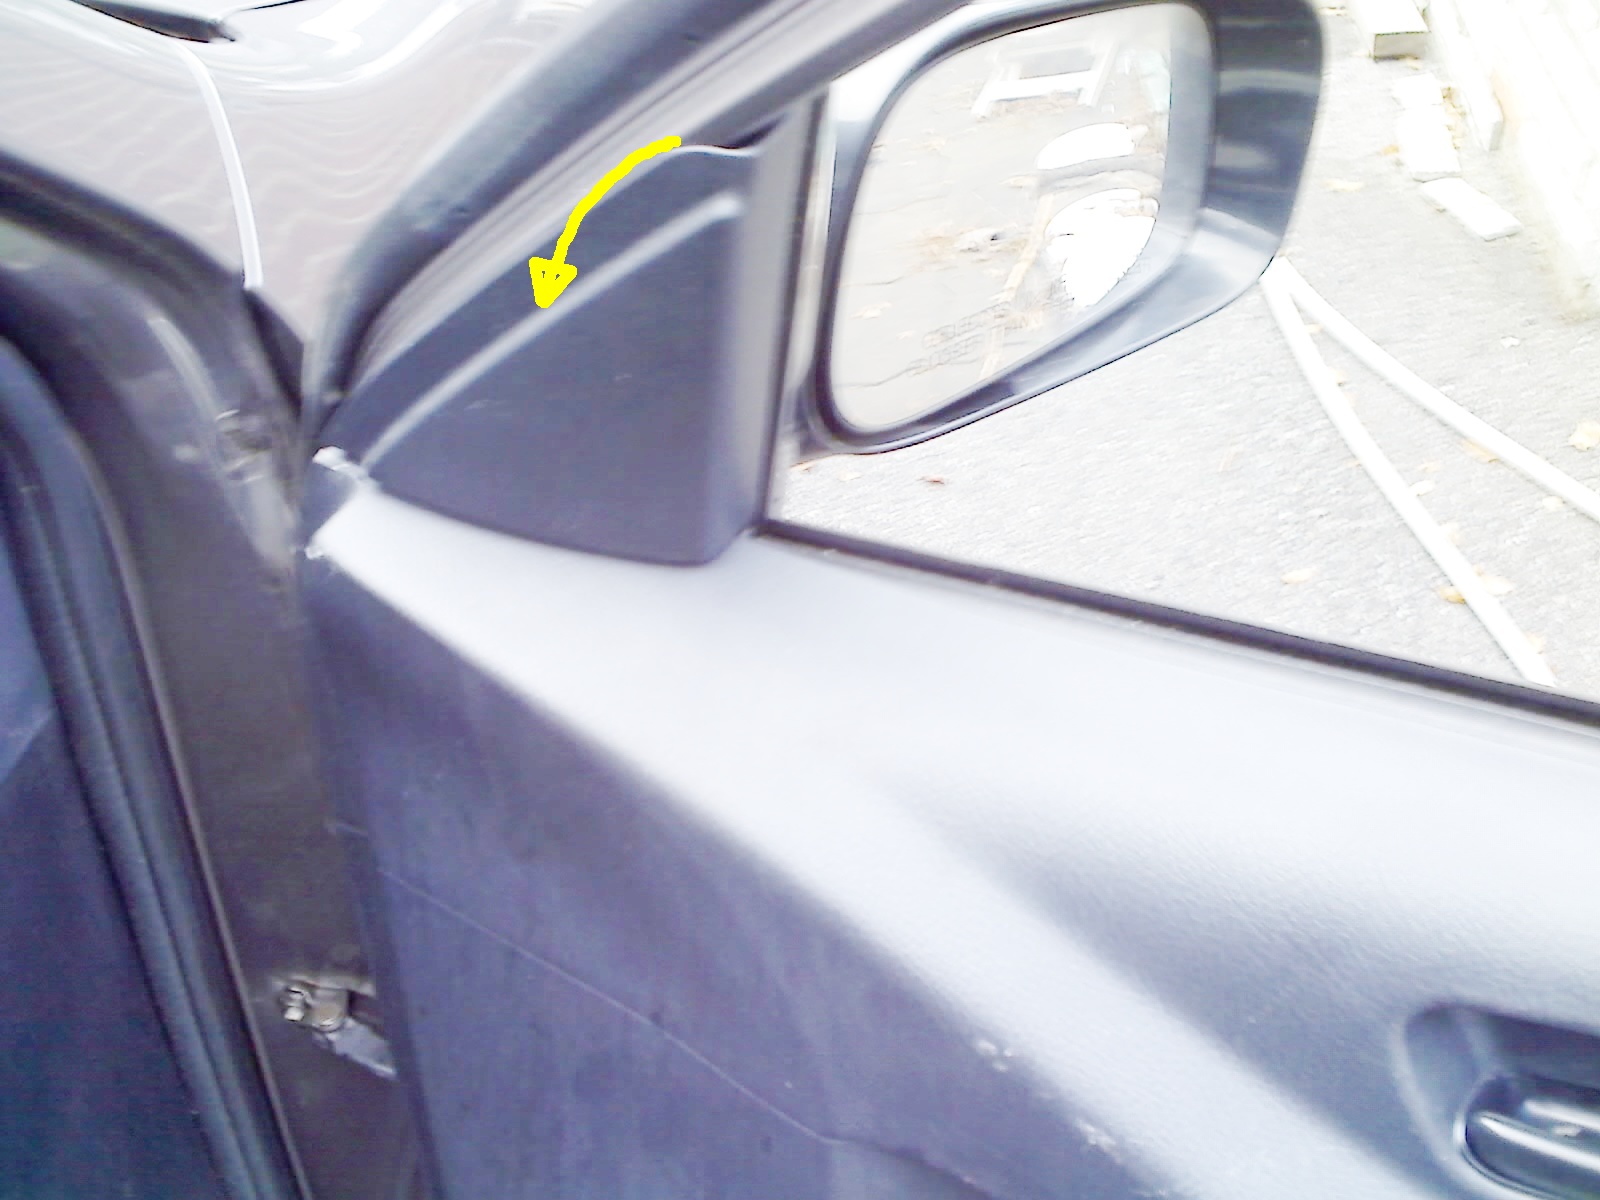
If you have any strong plastic tool that you can pry with, it may scratch the paint less than using a flat screwdriver, as I did : - (
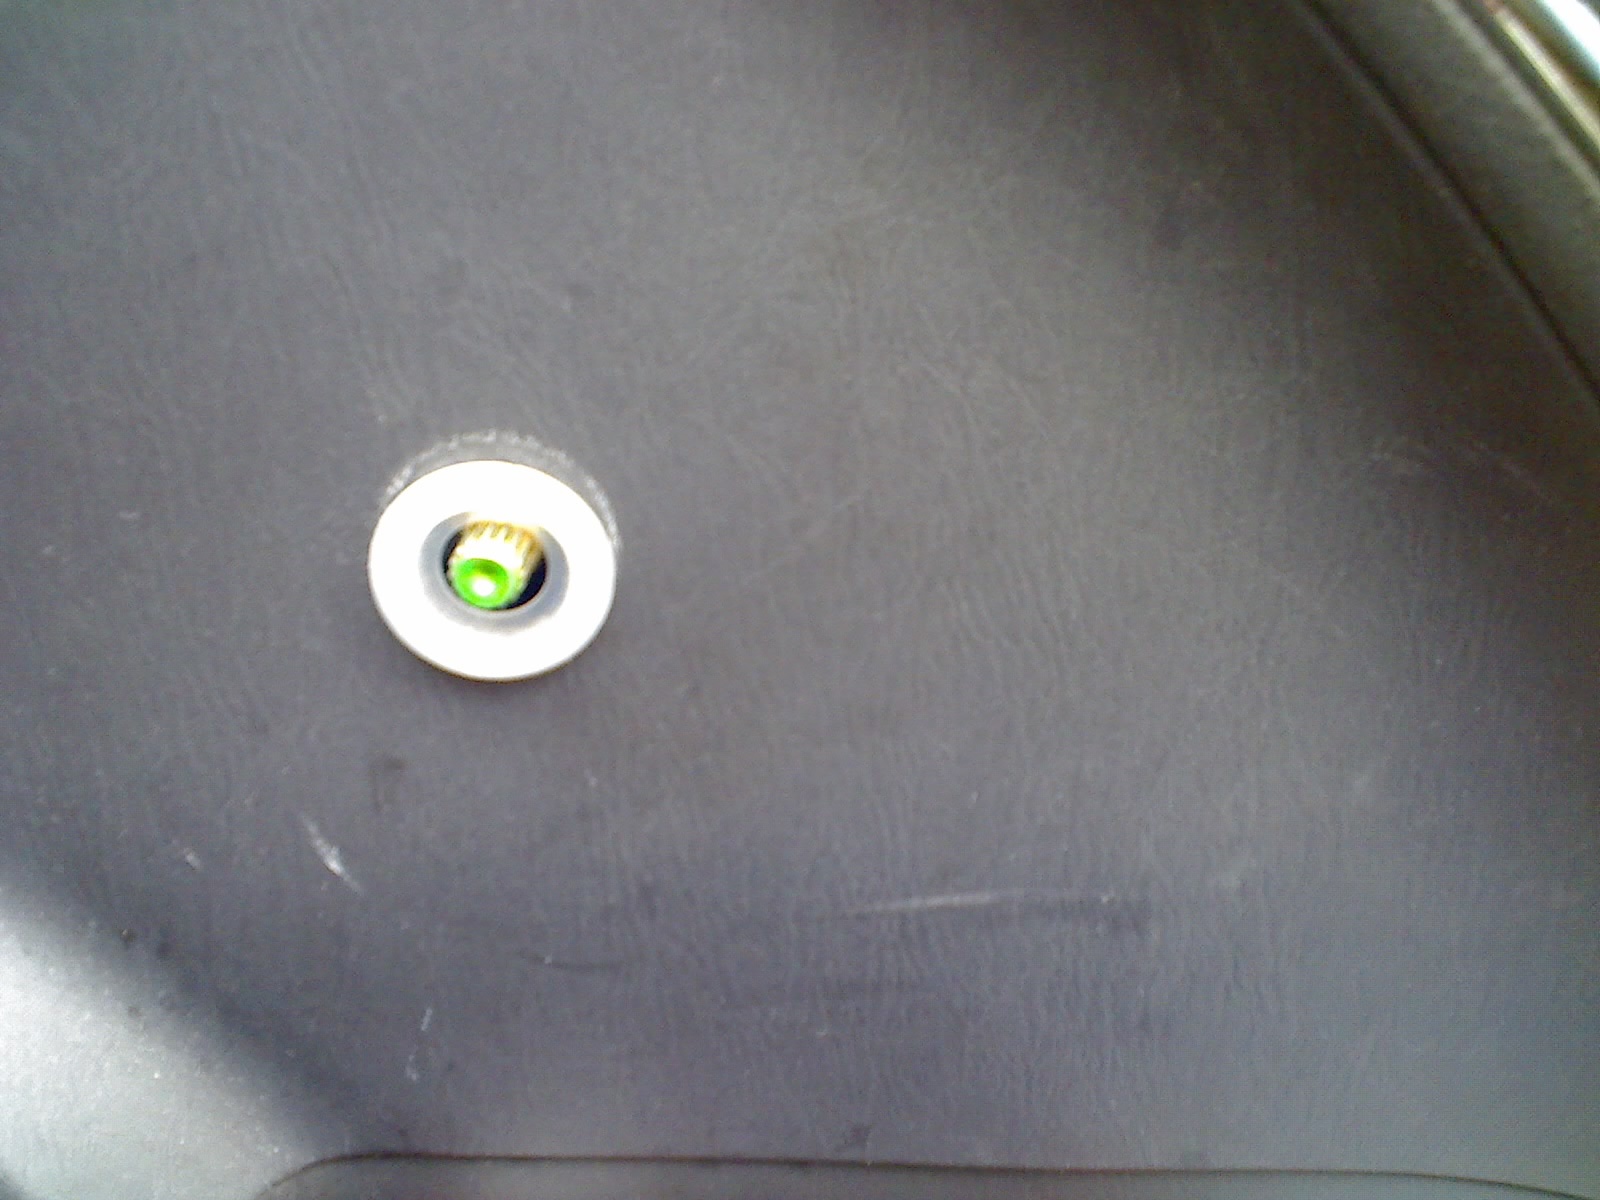
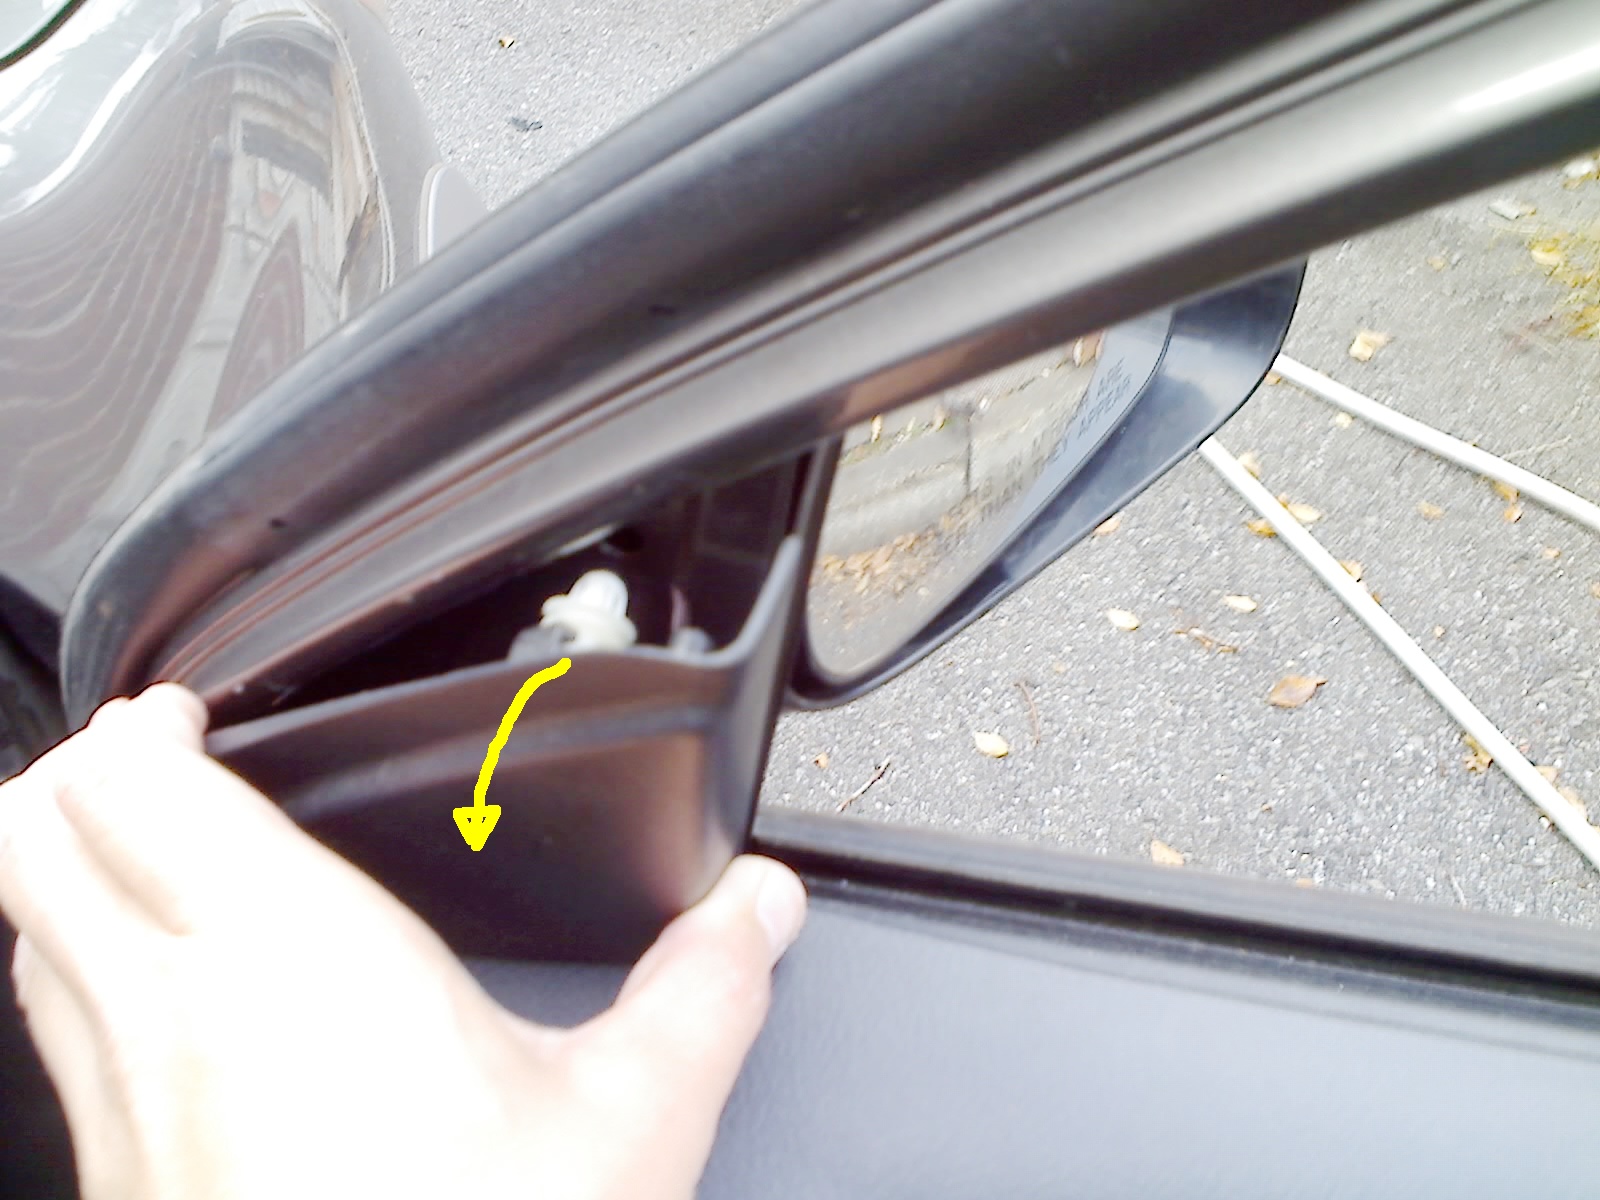
Once the white plastic clip pops out of its metal hole, the plastic triangle tips outwards at the top and can then be lifted up.
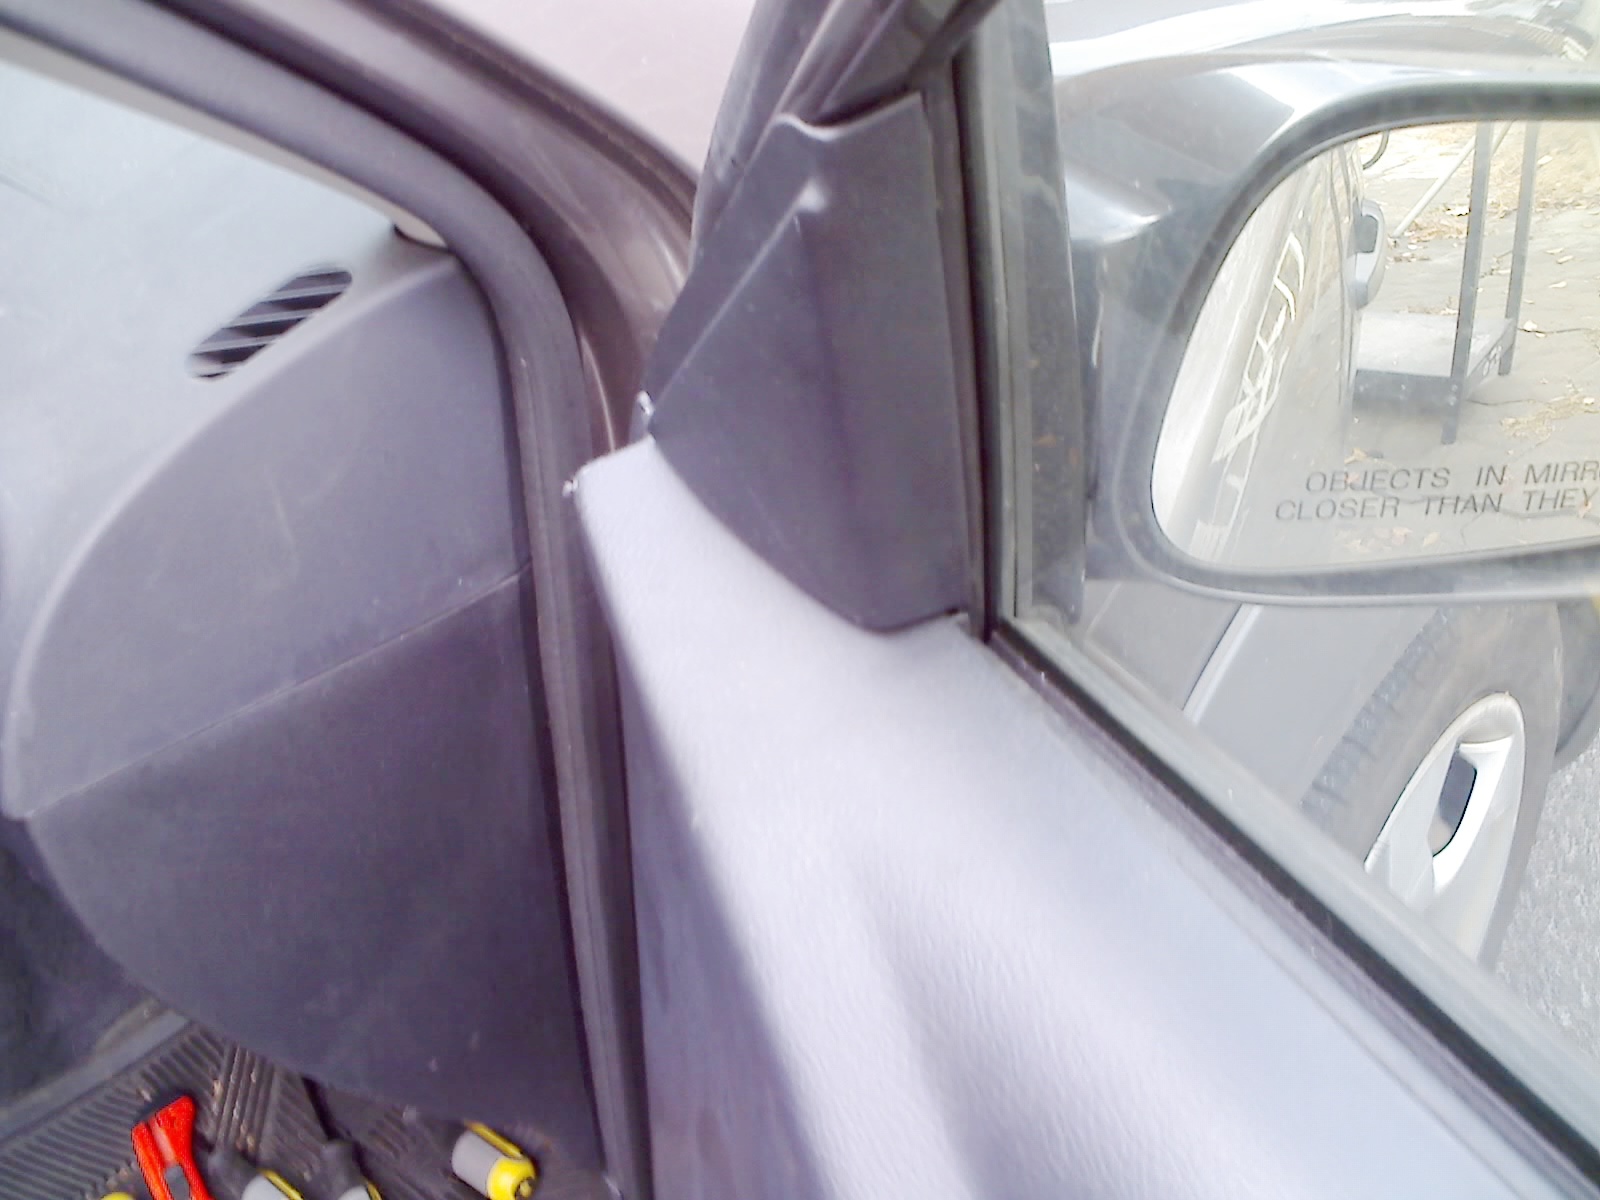
Result after removing plastic triangle near side-view mirror.
Pull interior door panel out from anywhere you can get a grip along the bottom edge.
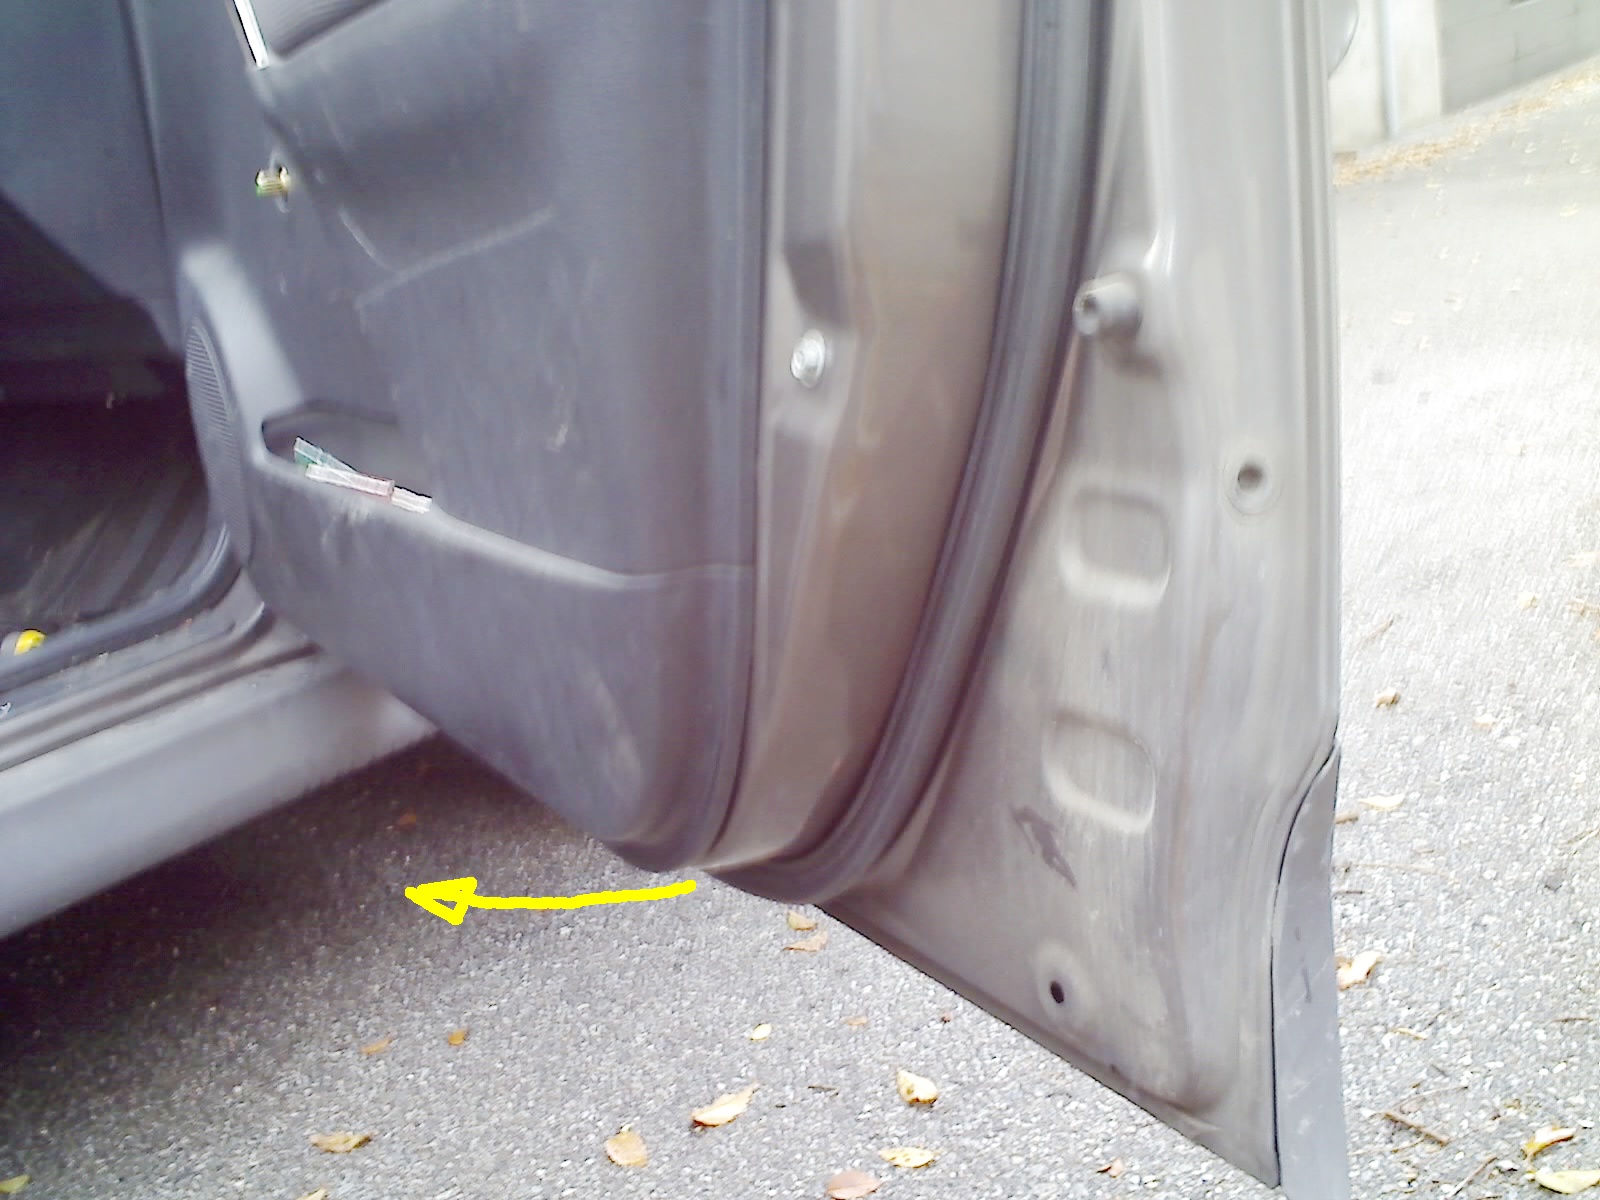
There are eight white plastic clips around three edges (left, right, bottom) of the door panel, which will pop and then the panel can be lifted upwards to unhook from the top edge.
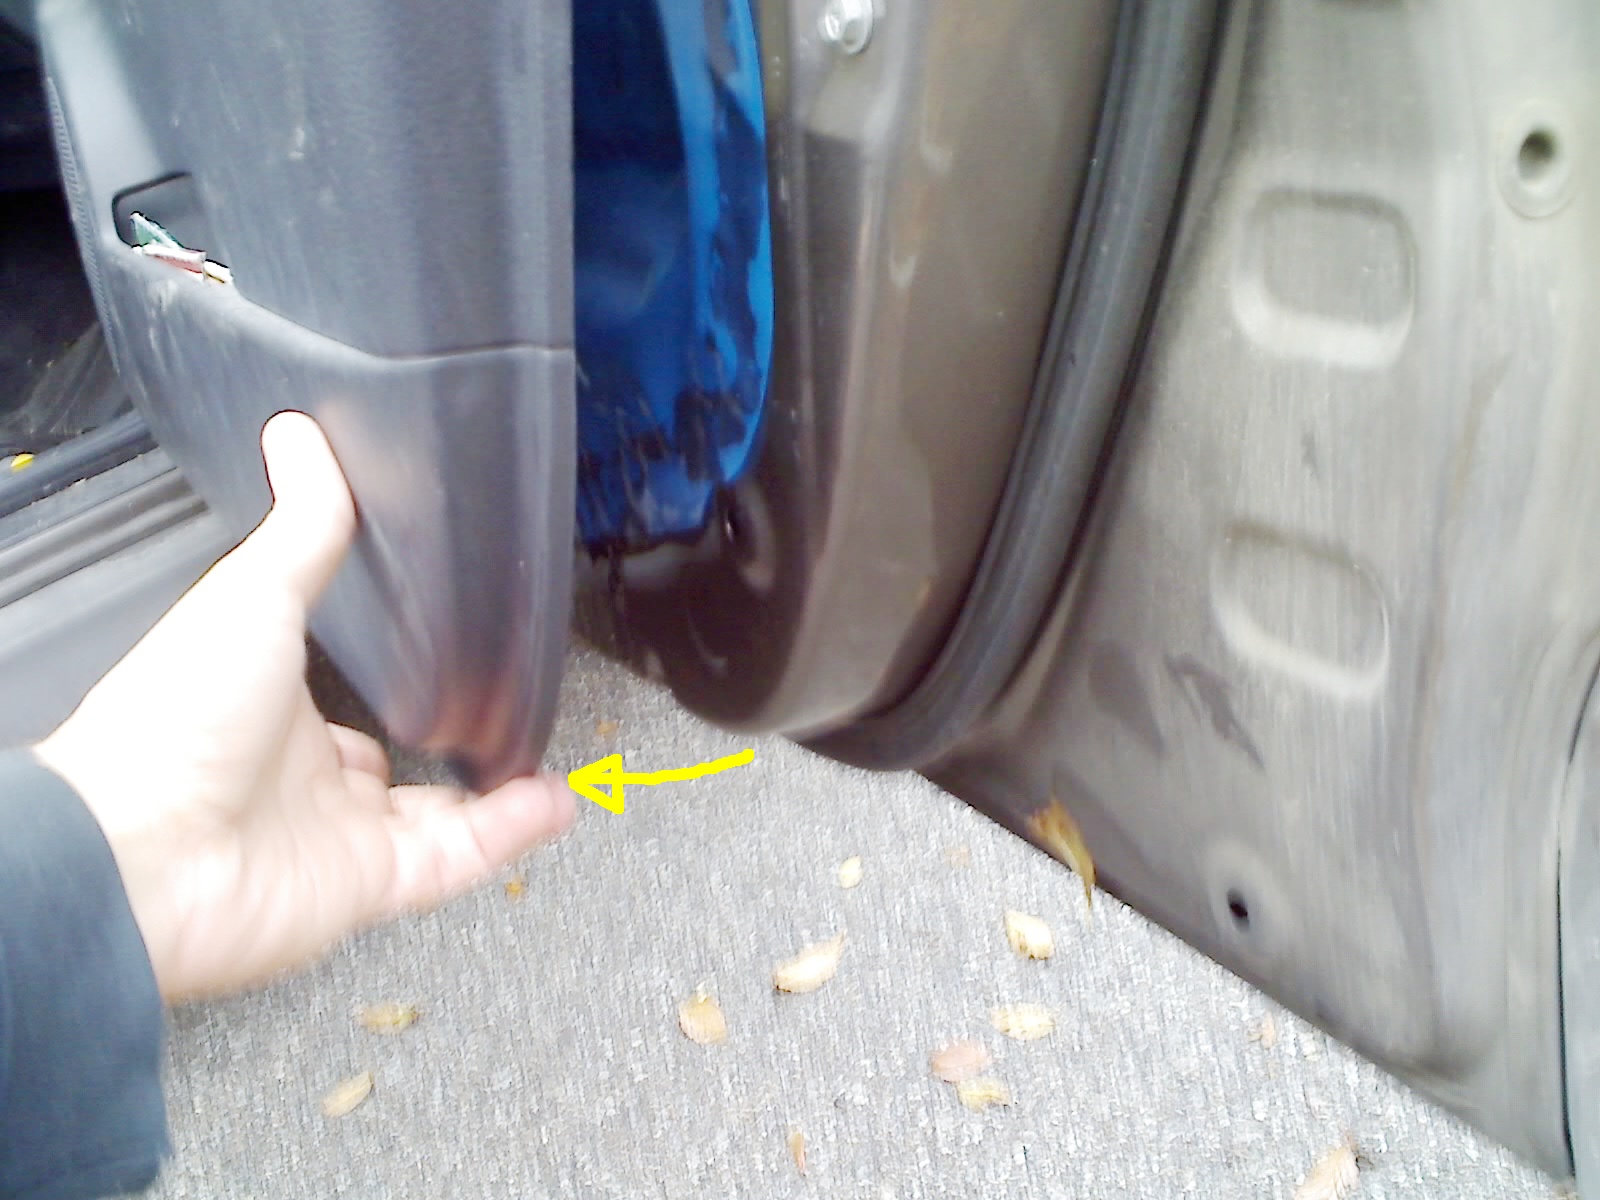
Keep pulling outwards, keeping top edge in place until last, then lift upwards.
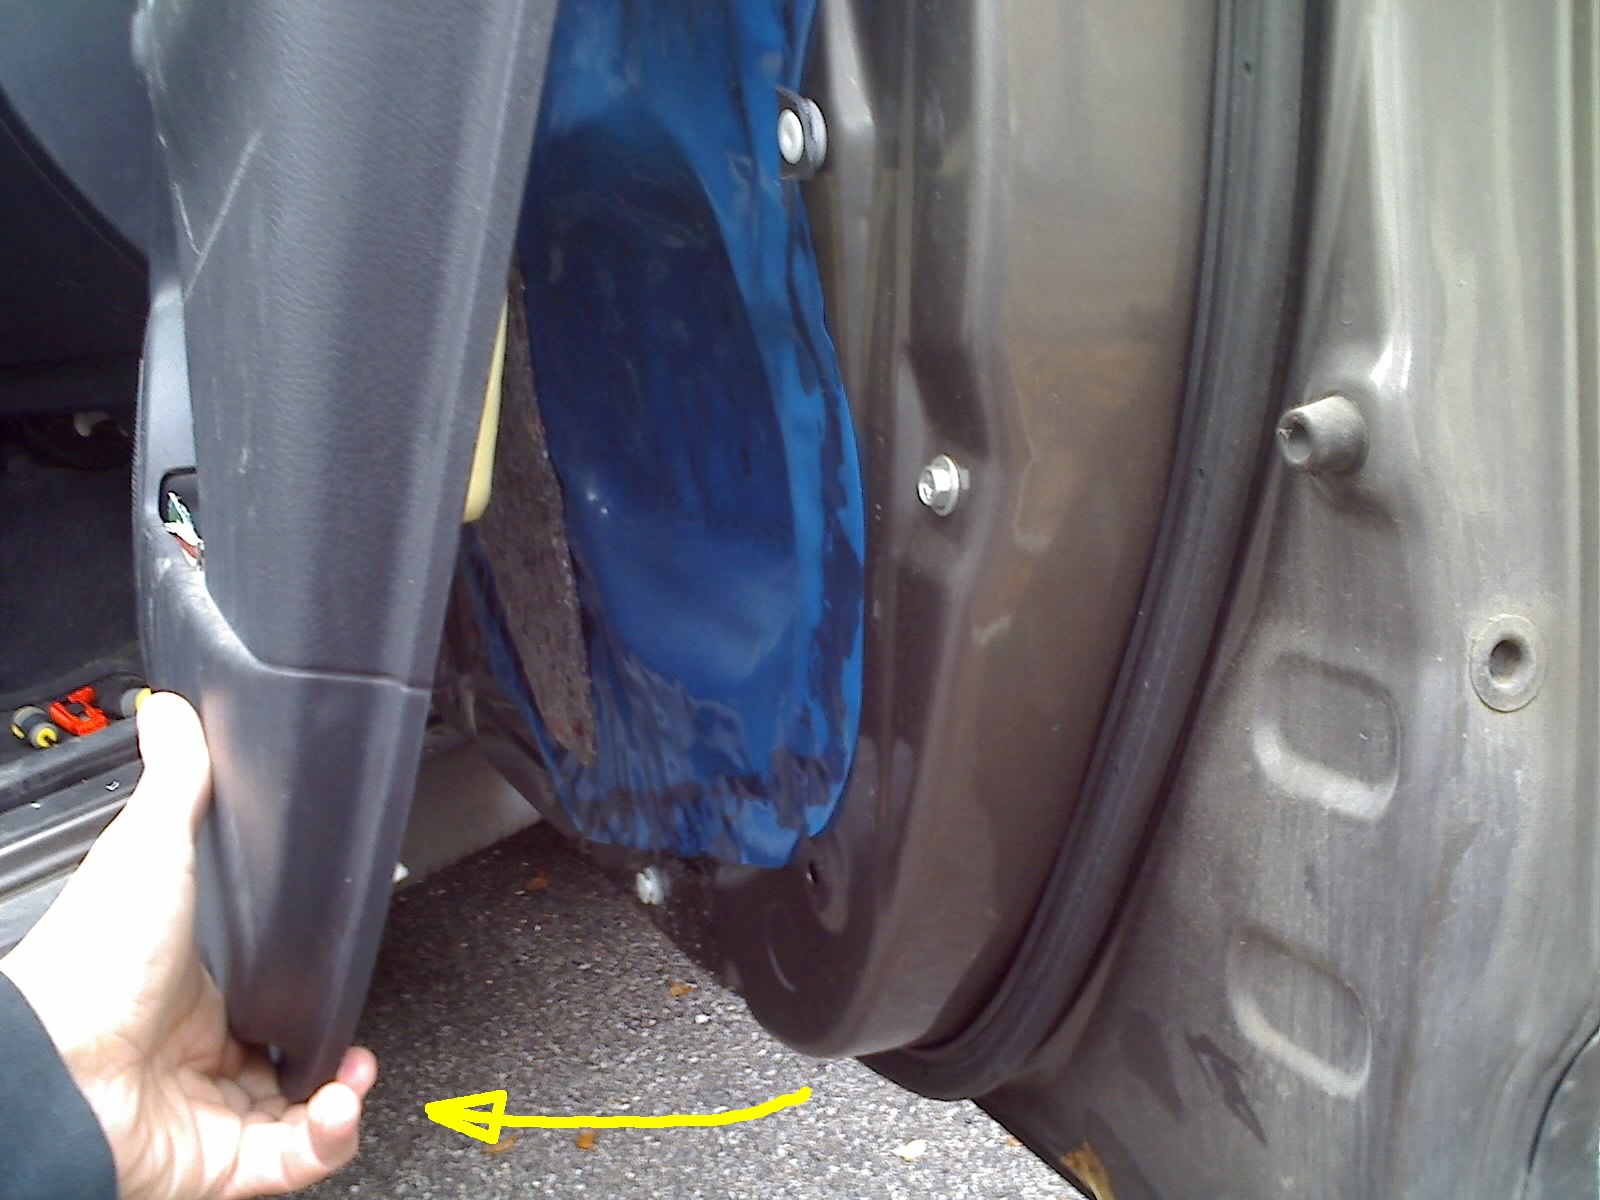
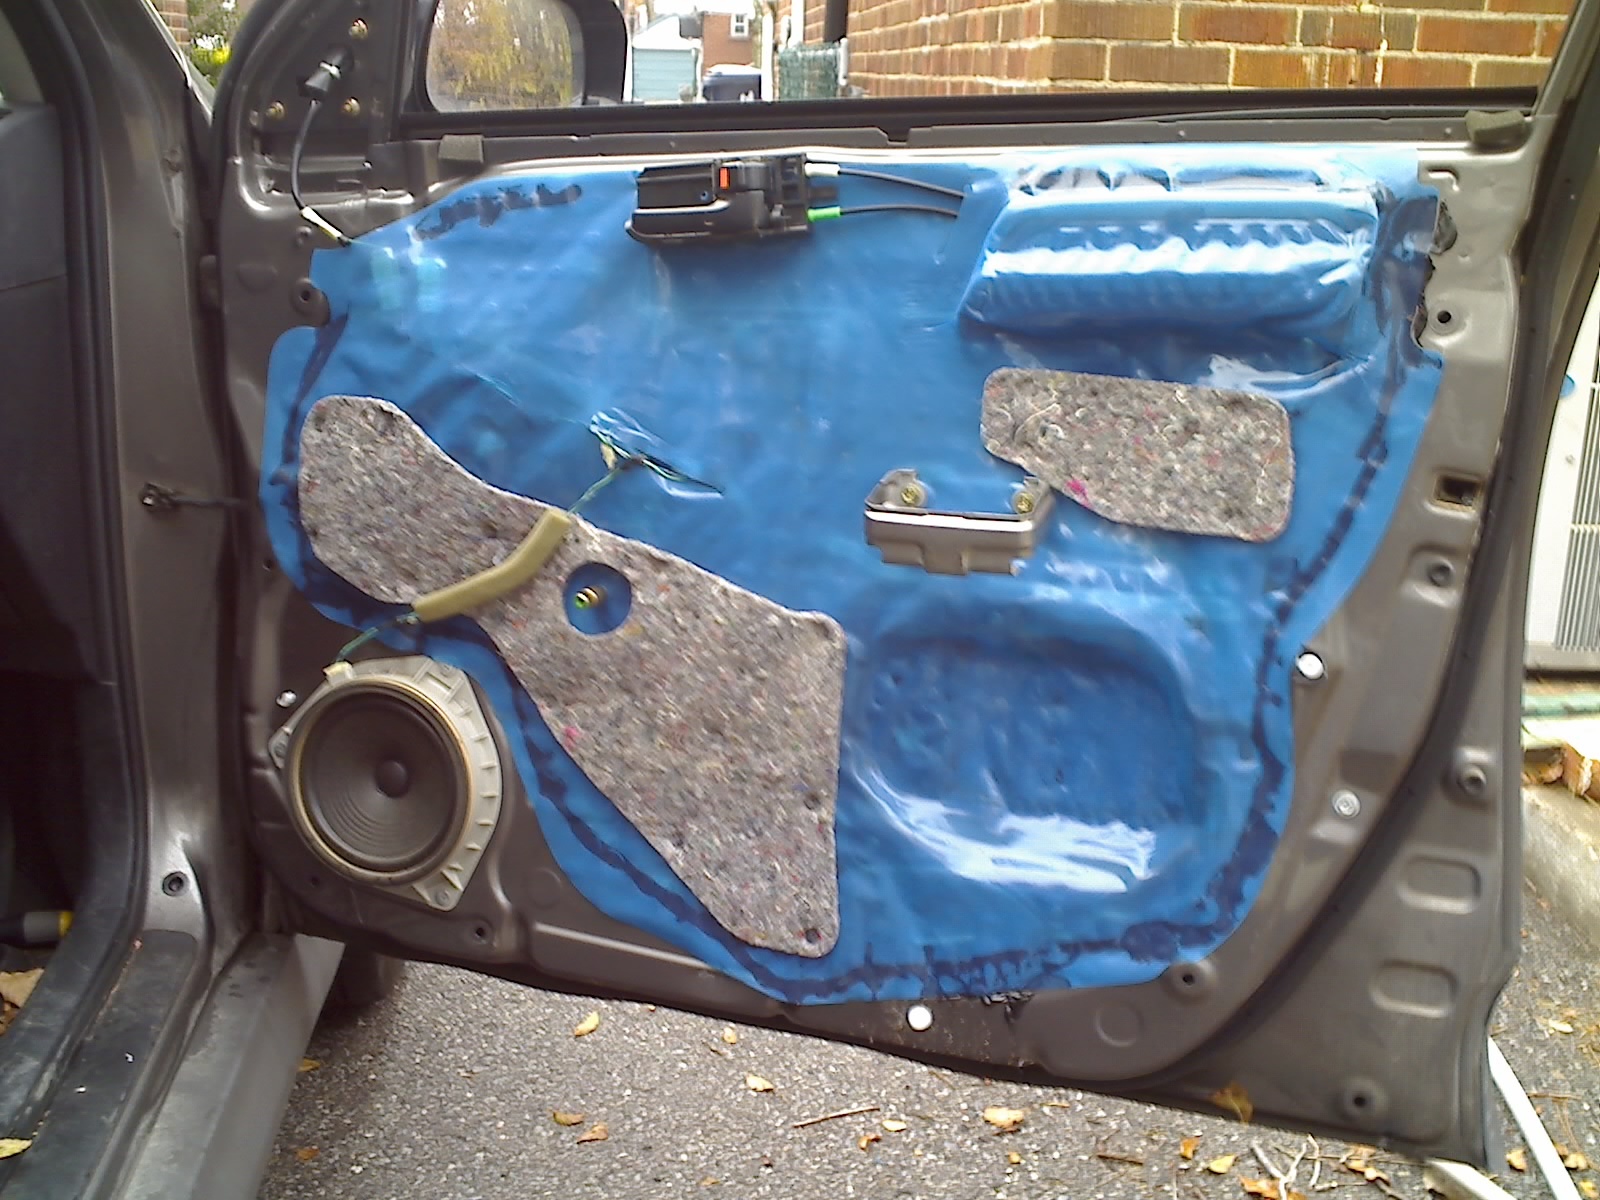
Result of removing interior door panel. Two out of my eight white plastic clips broke at their attachment to the door panel rather than popping out of their holes : - (
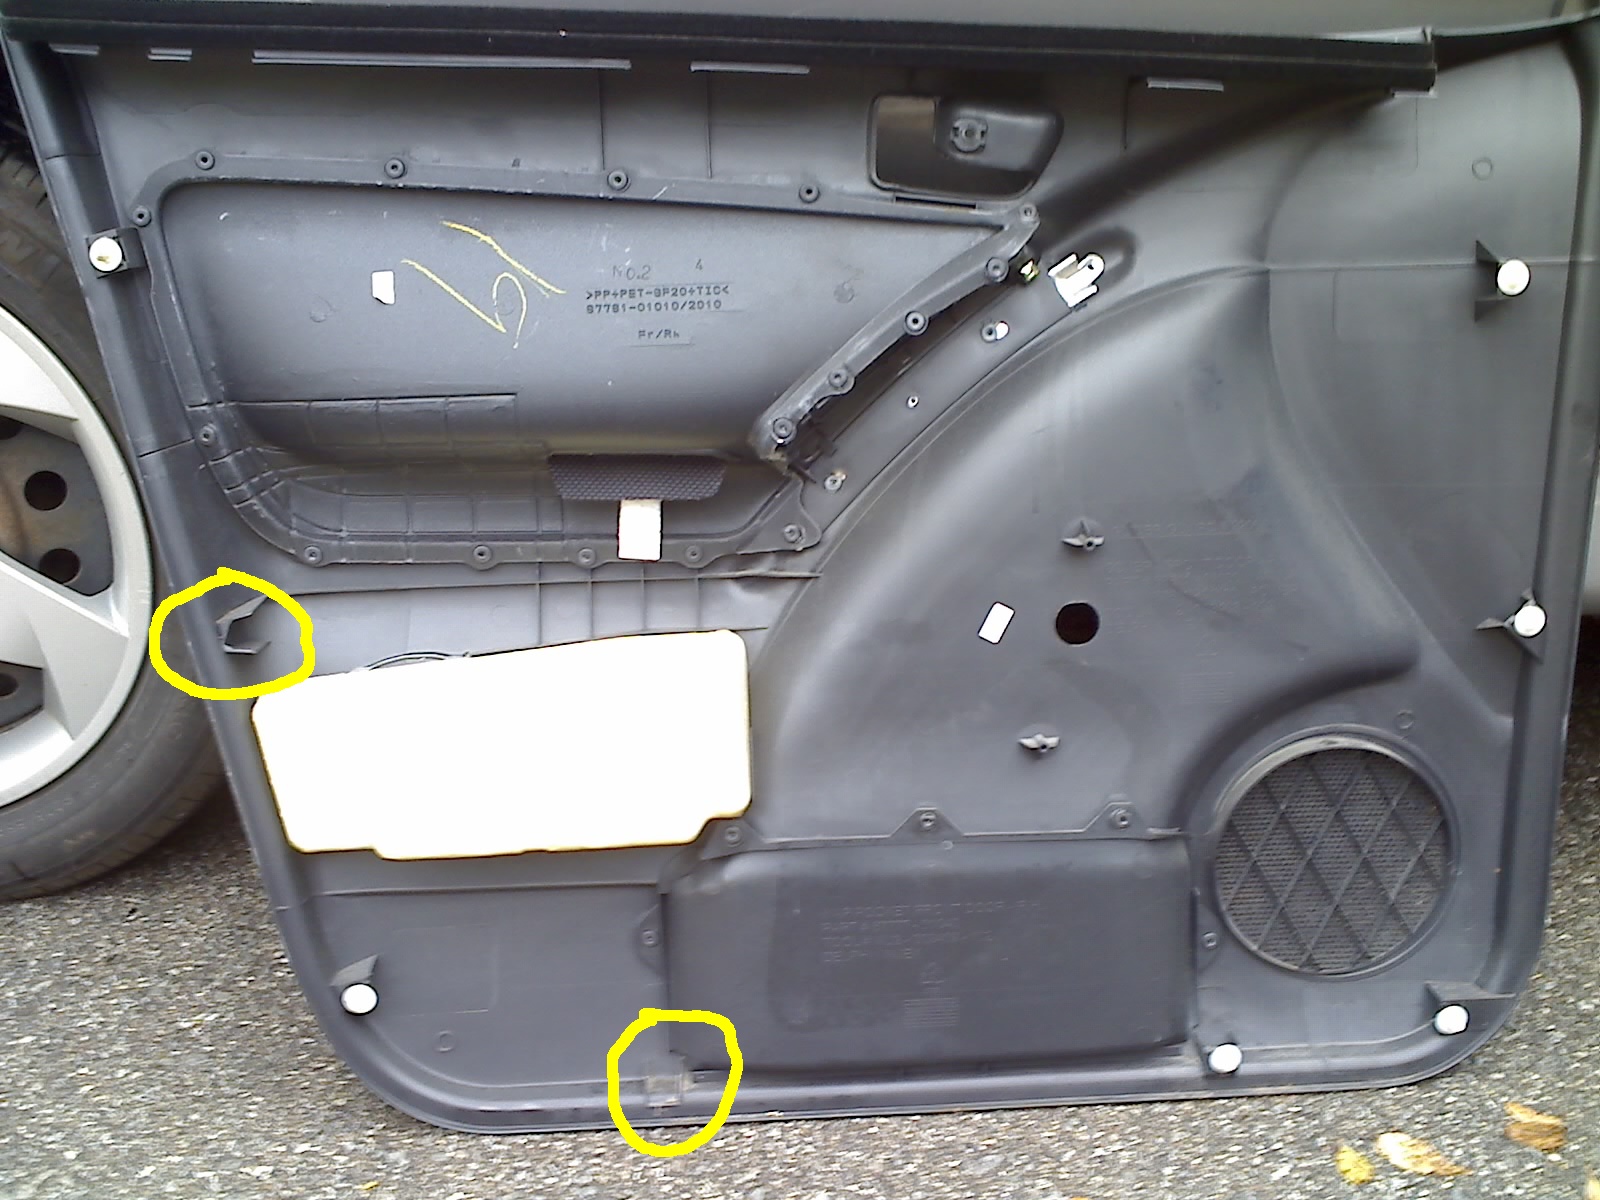
Result of removing interior door panel.
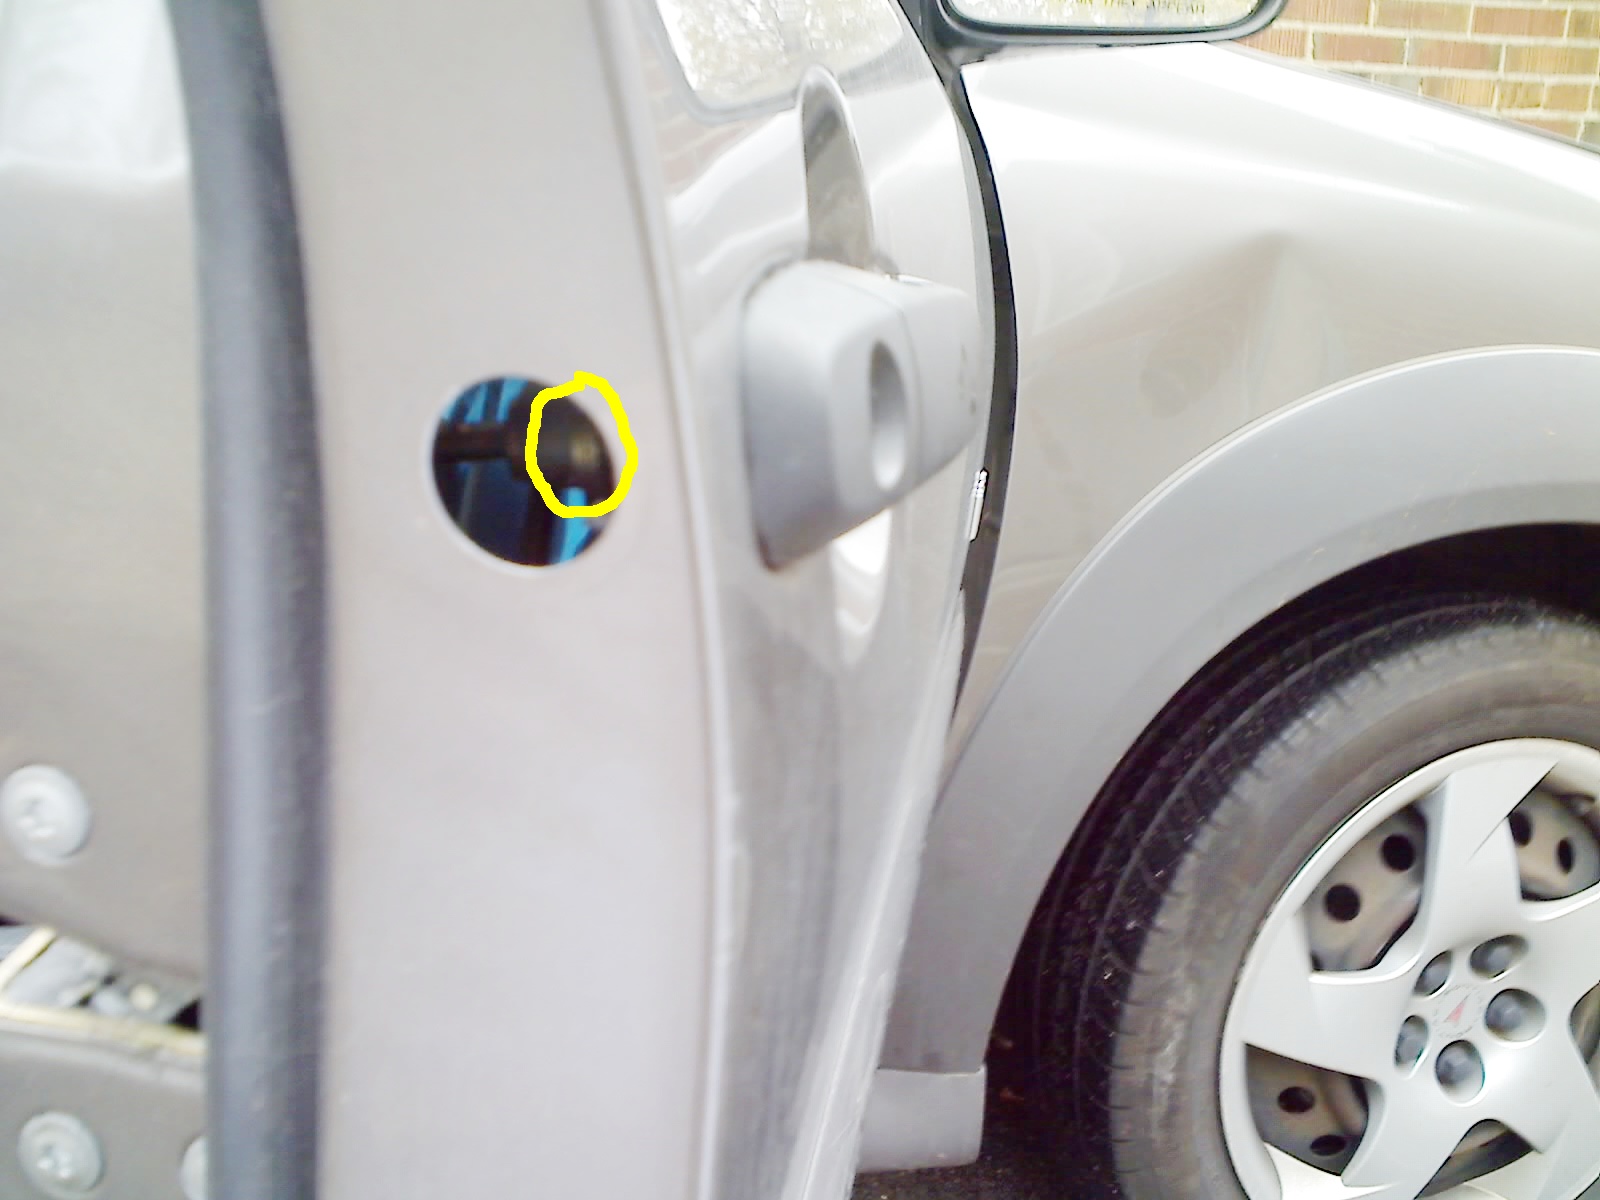
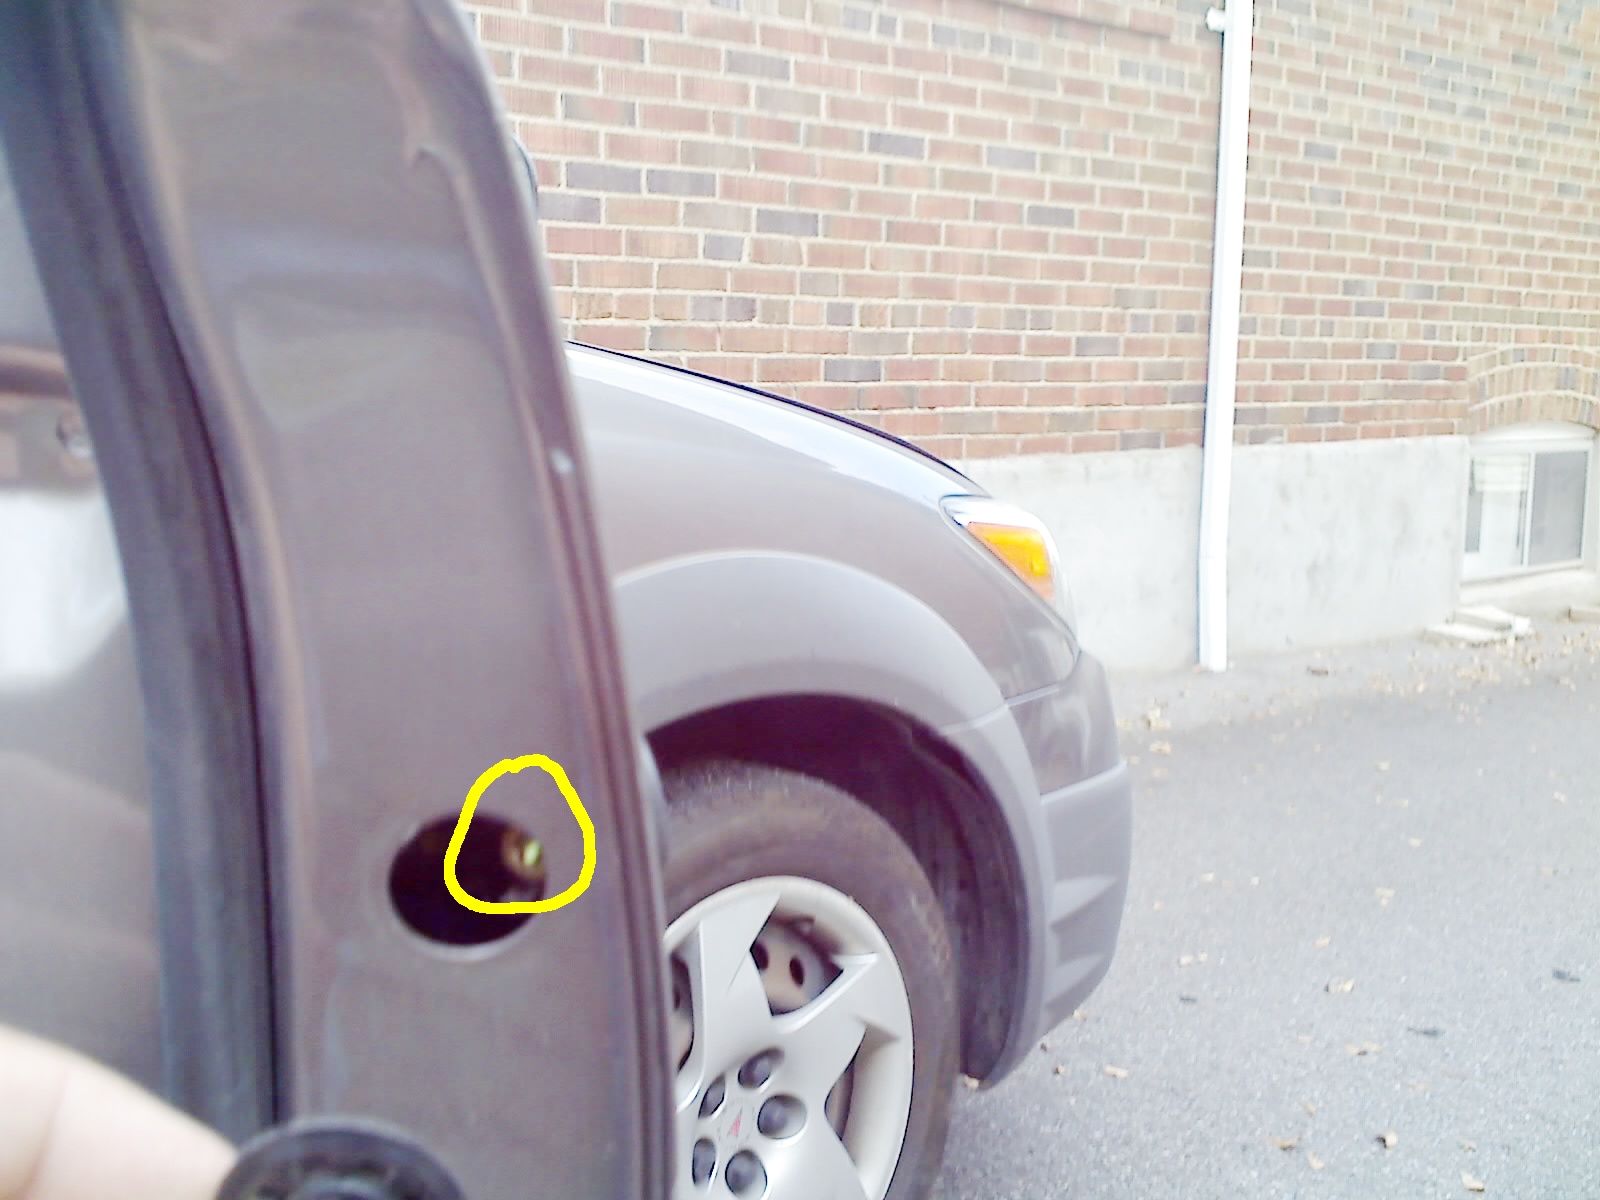
Remove black circular plastic cover on rear edge of door.
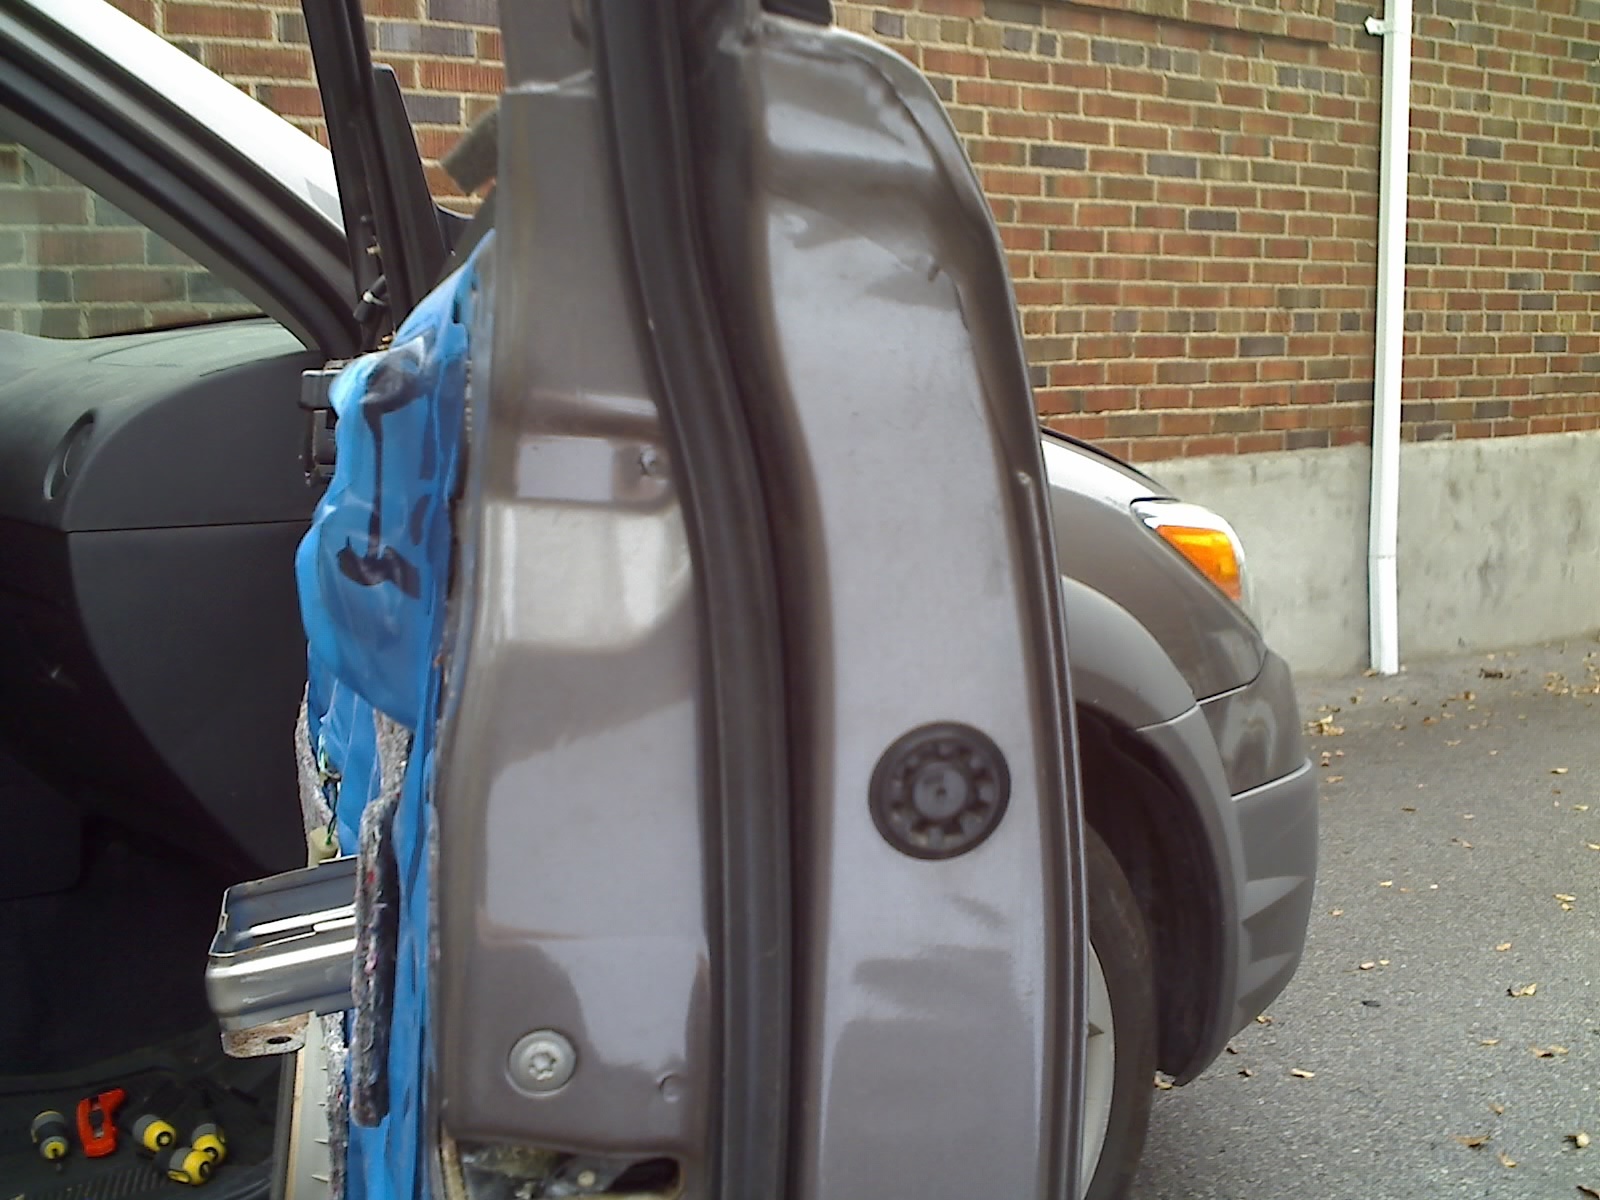
I used the blunt end of a nail file to get under it, which hopefully scratched the paint less than a flat screwdriver would have.

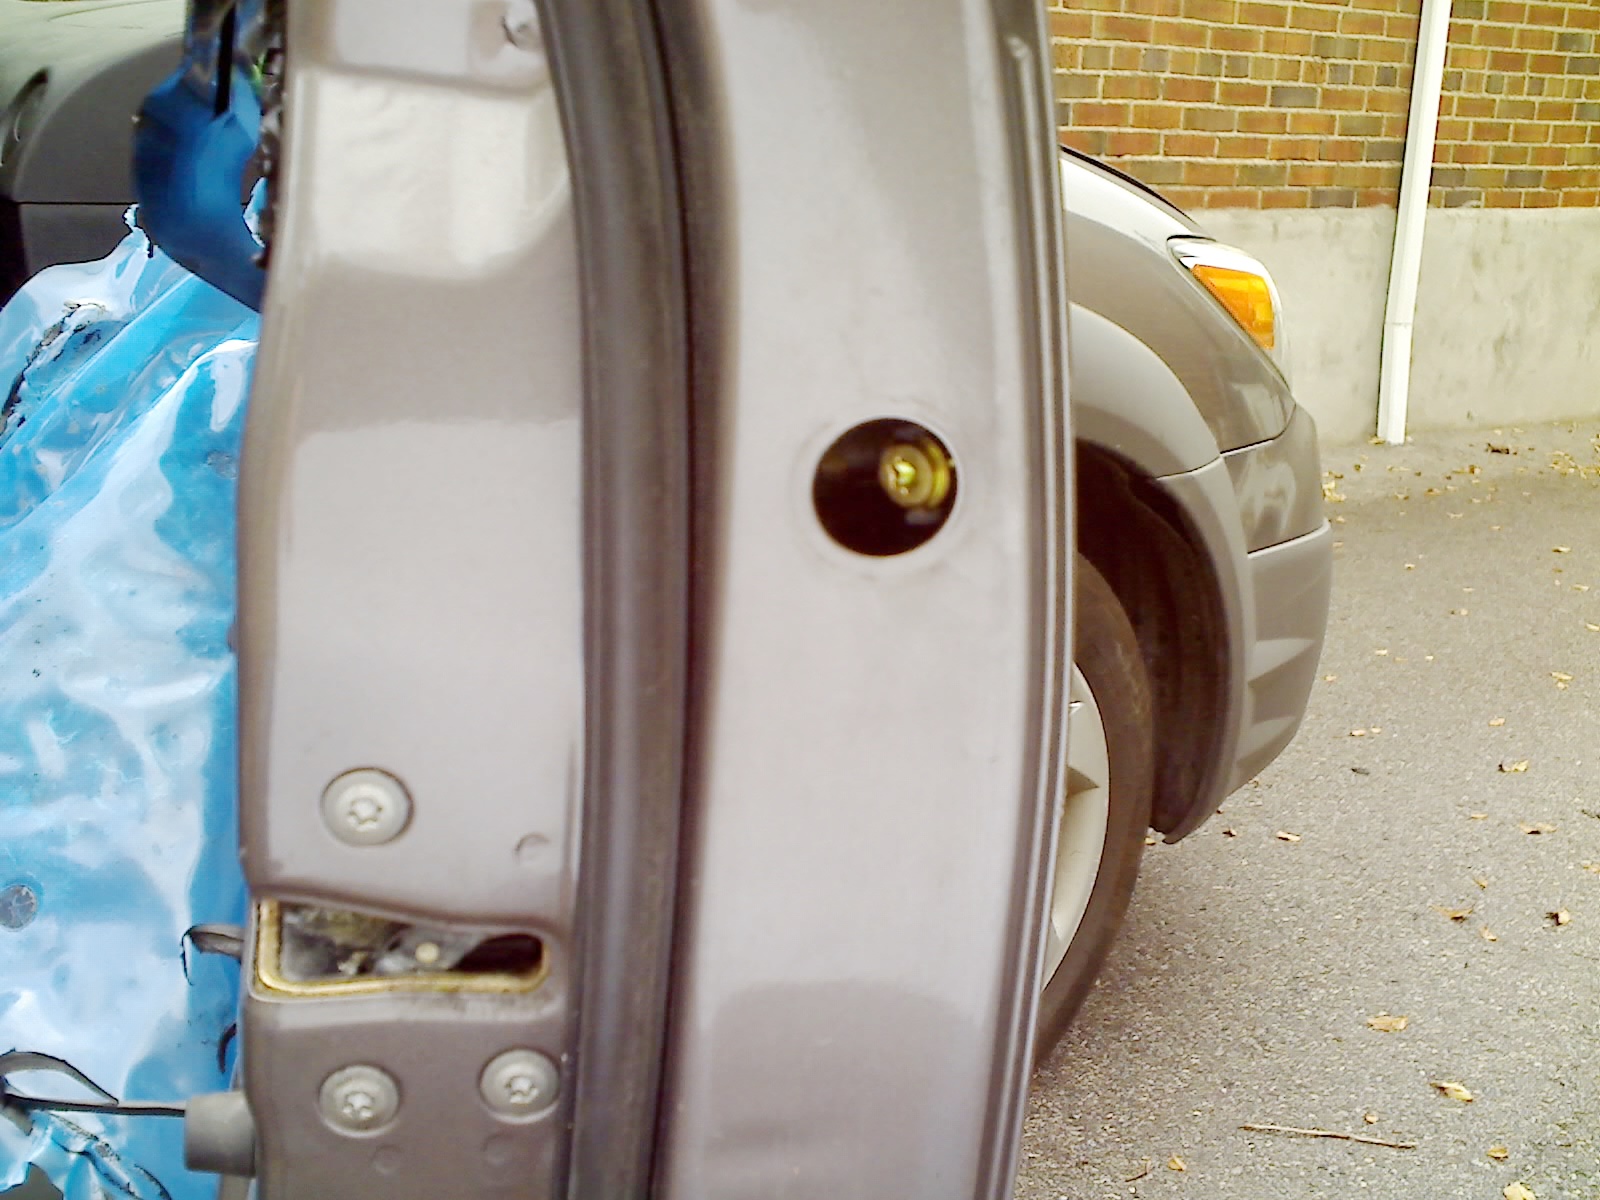
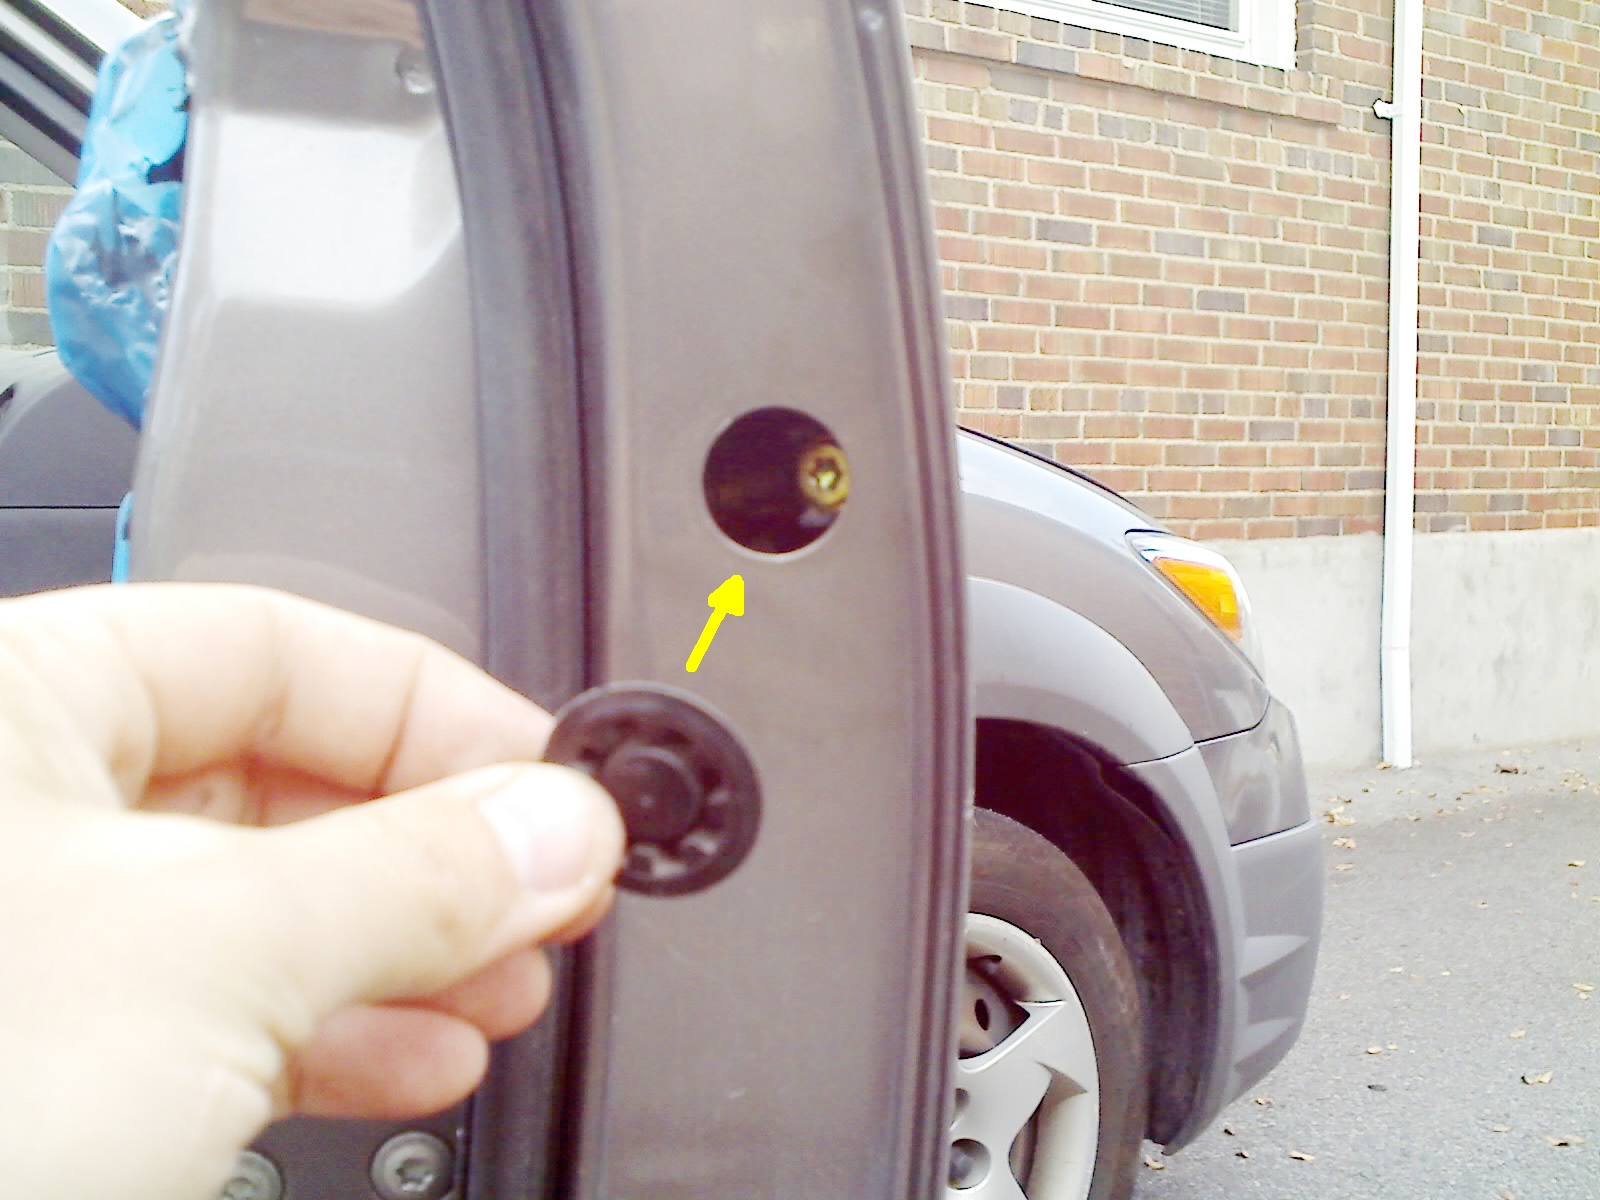
Result of removing black circular plastic cover, giving access to a Torx screw which holds the exterior key mechanism in place (the part of the exterior door handle that doesn't move when you pull the handle).
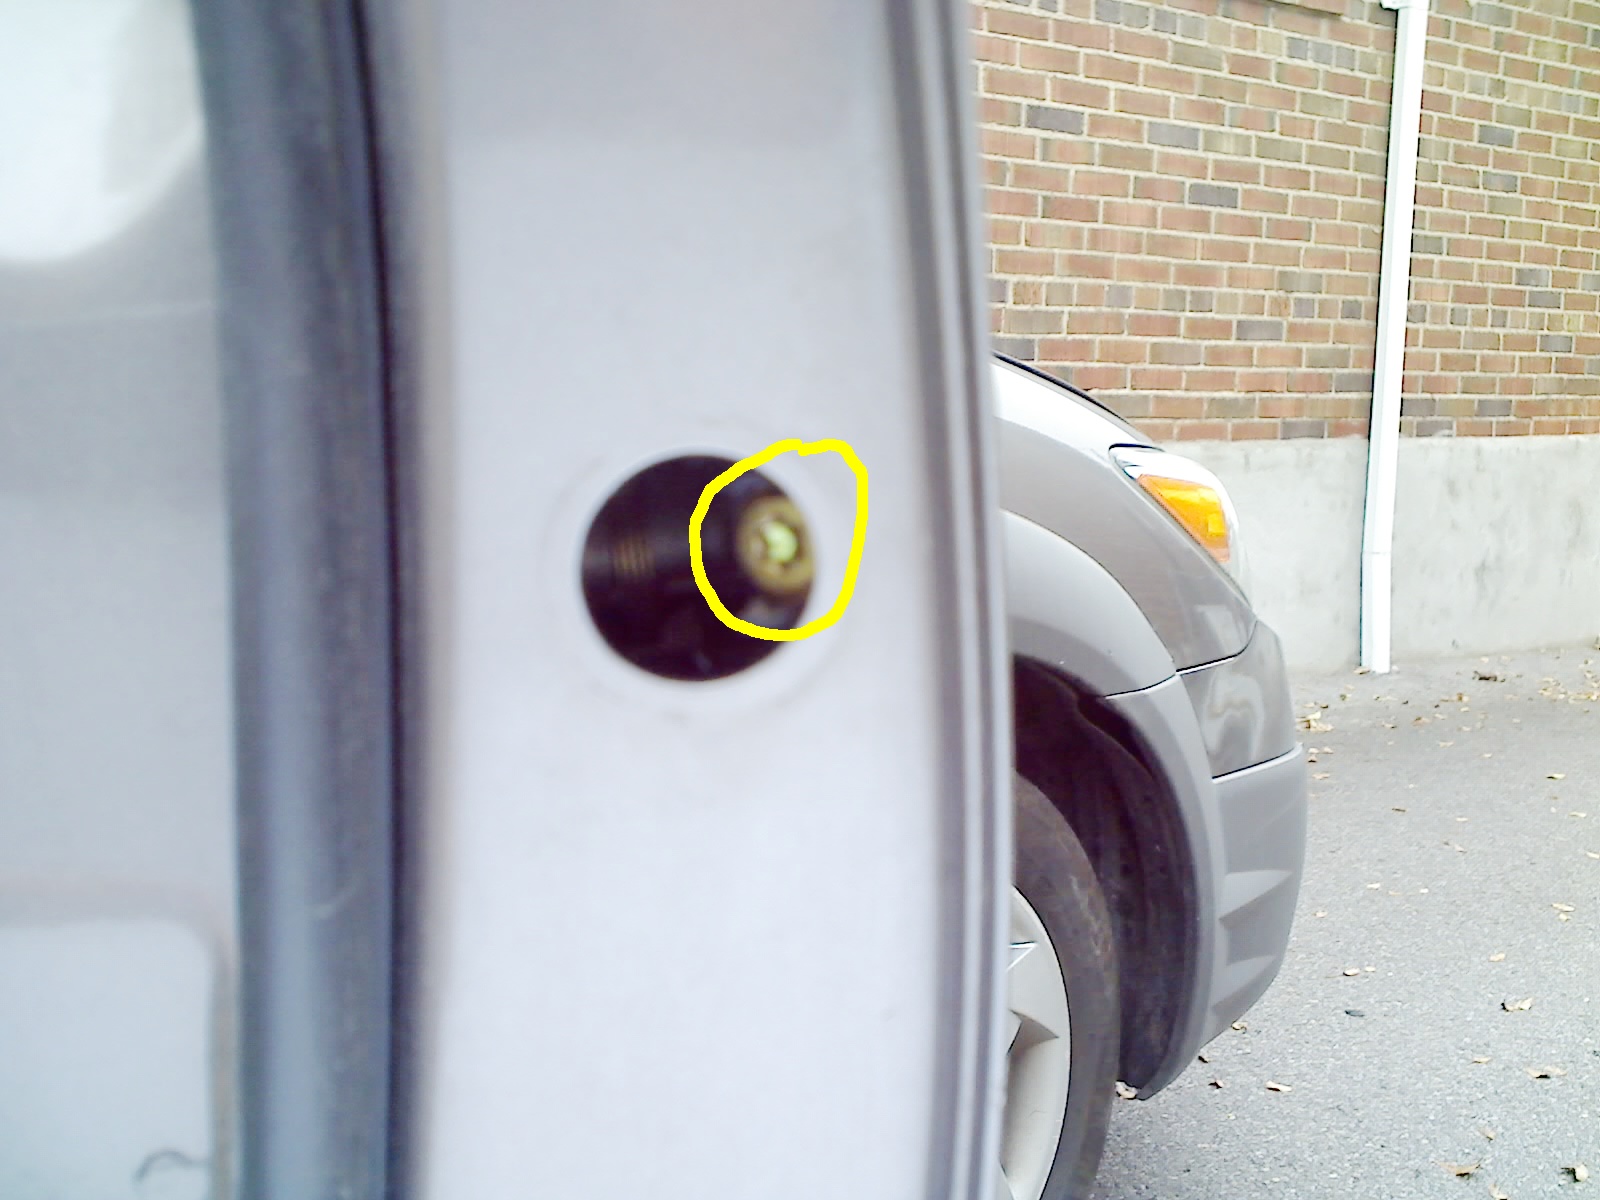
Loosen brass coloured Torx screw in rear edge of door (T30 size Torx if your screwdrivers are labelled by size). You do not need to fully remove this and you don't need to worry about dropping it, since it only loosens so far and then is somehow held in place.
The keyhole section of the exterior door handle will now be loose and can be pulled out.
It may take some wiggling to get it to slide out.
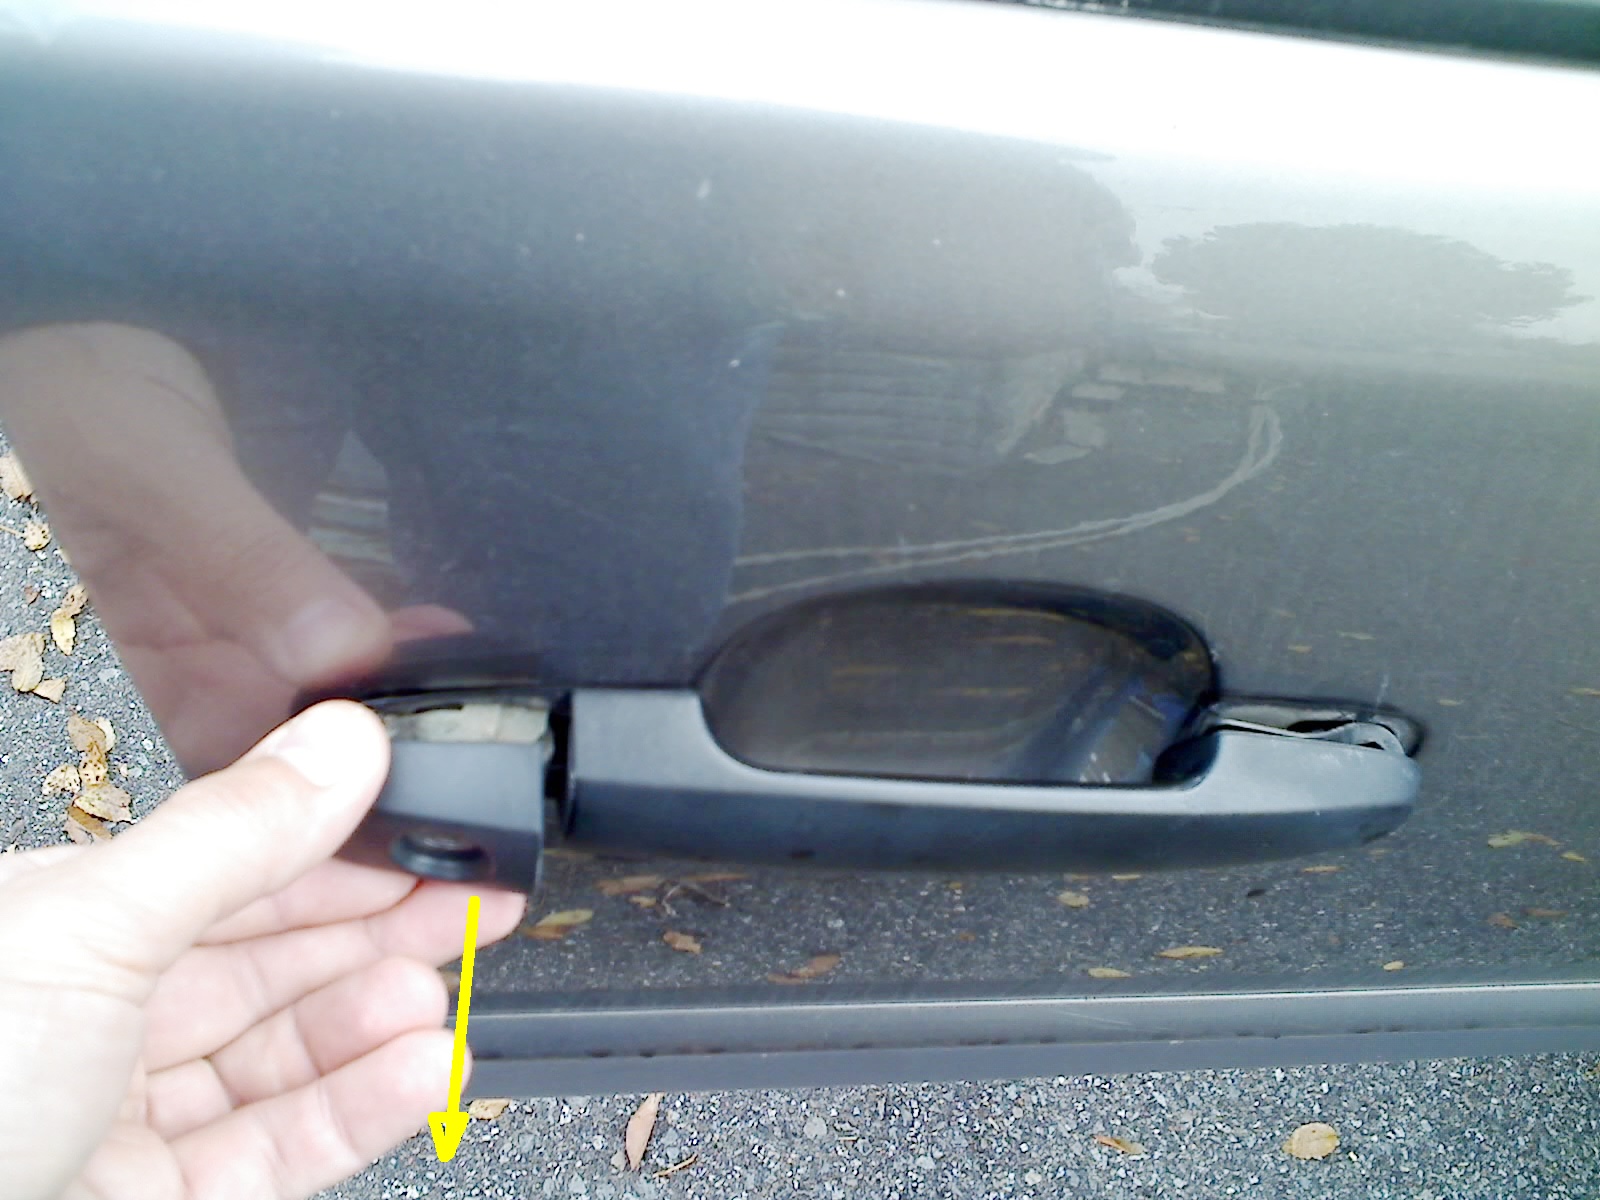
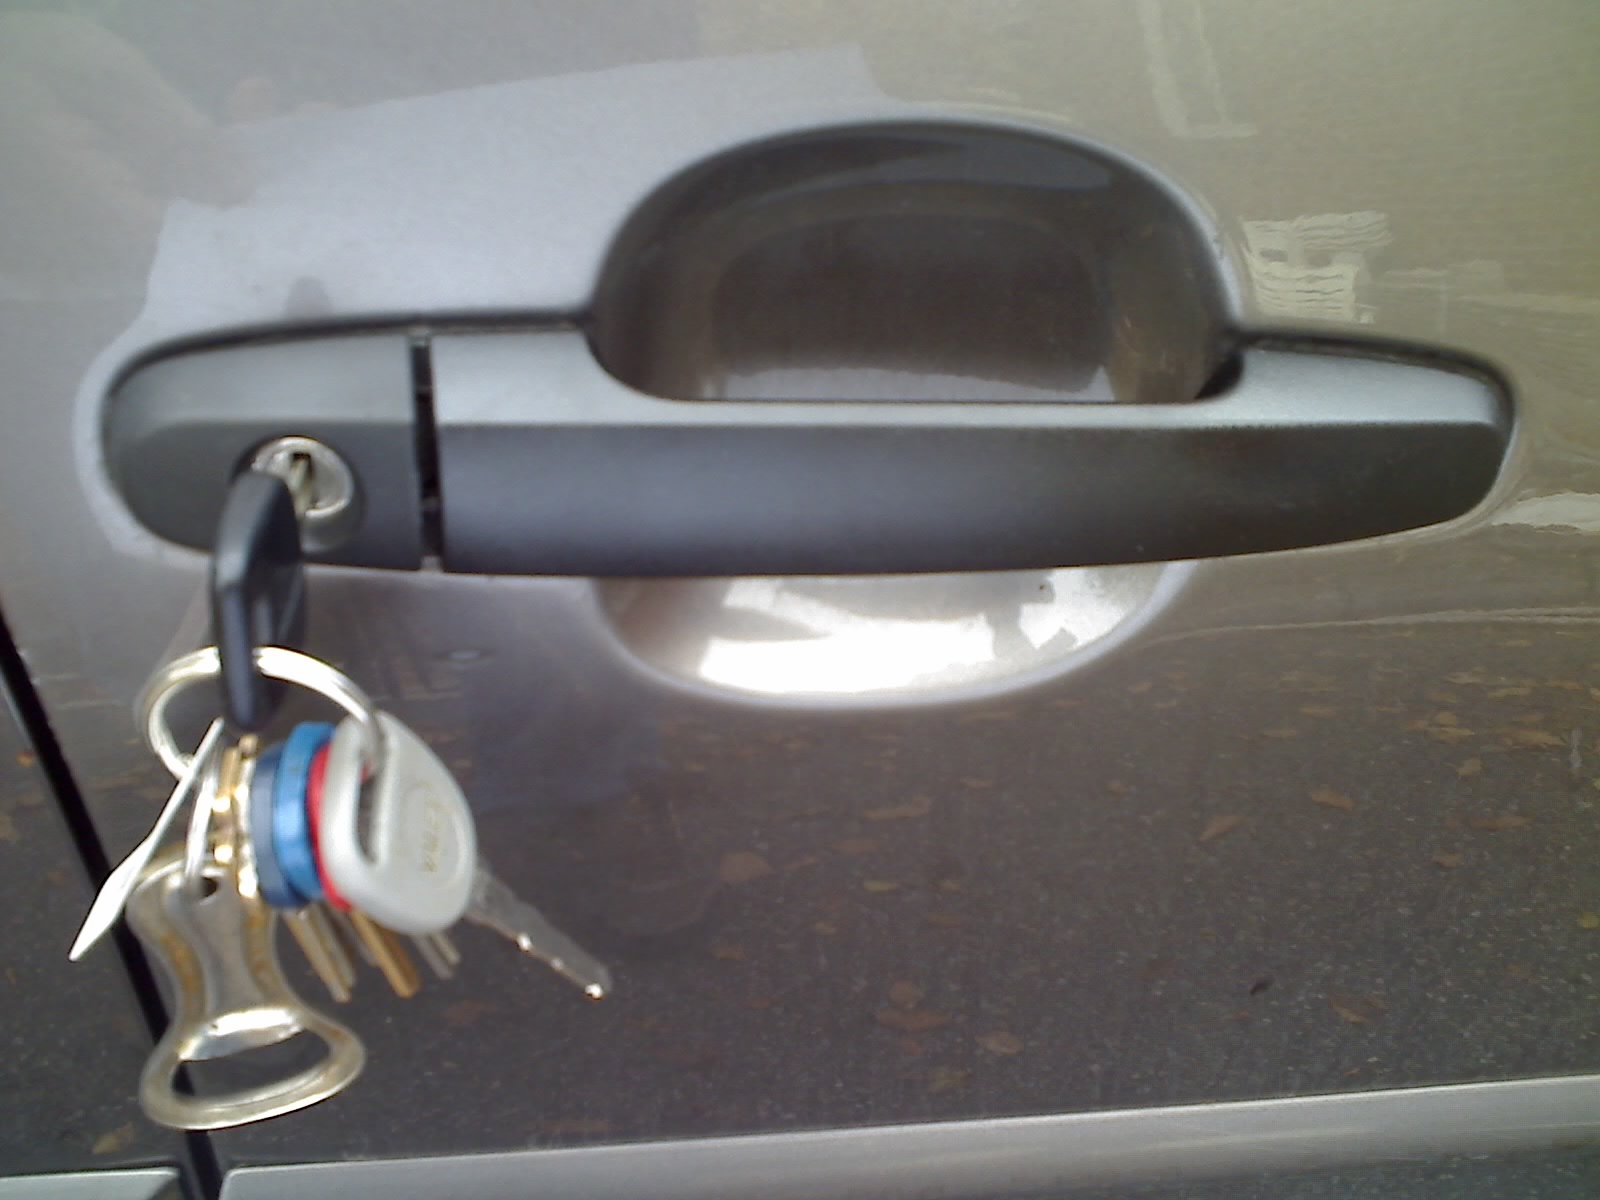
Slide out keyhole section of the exterior door handle.
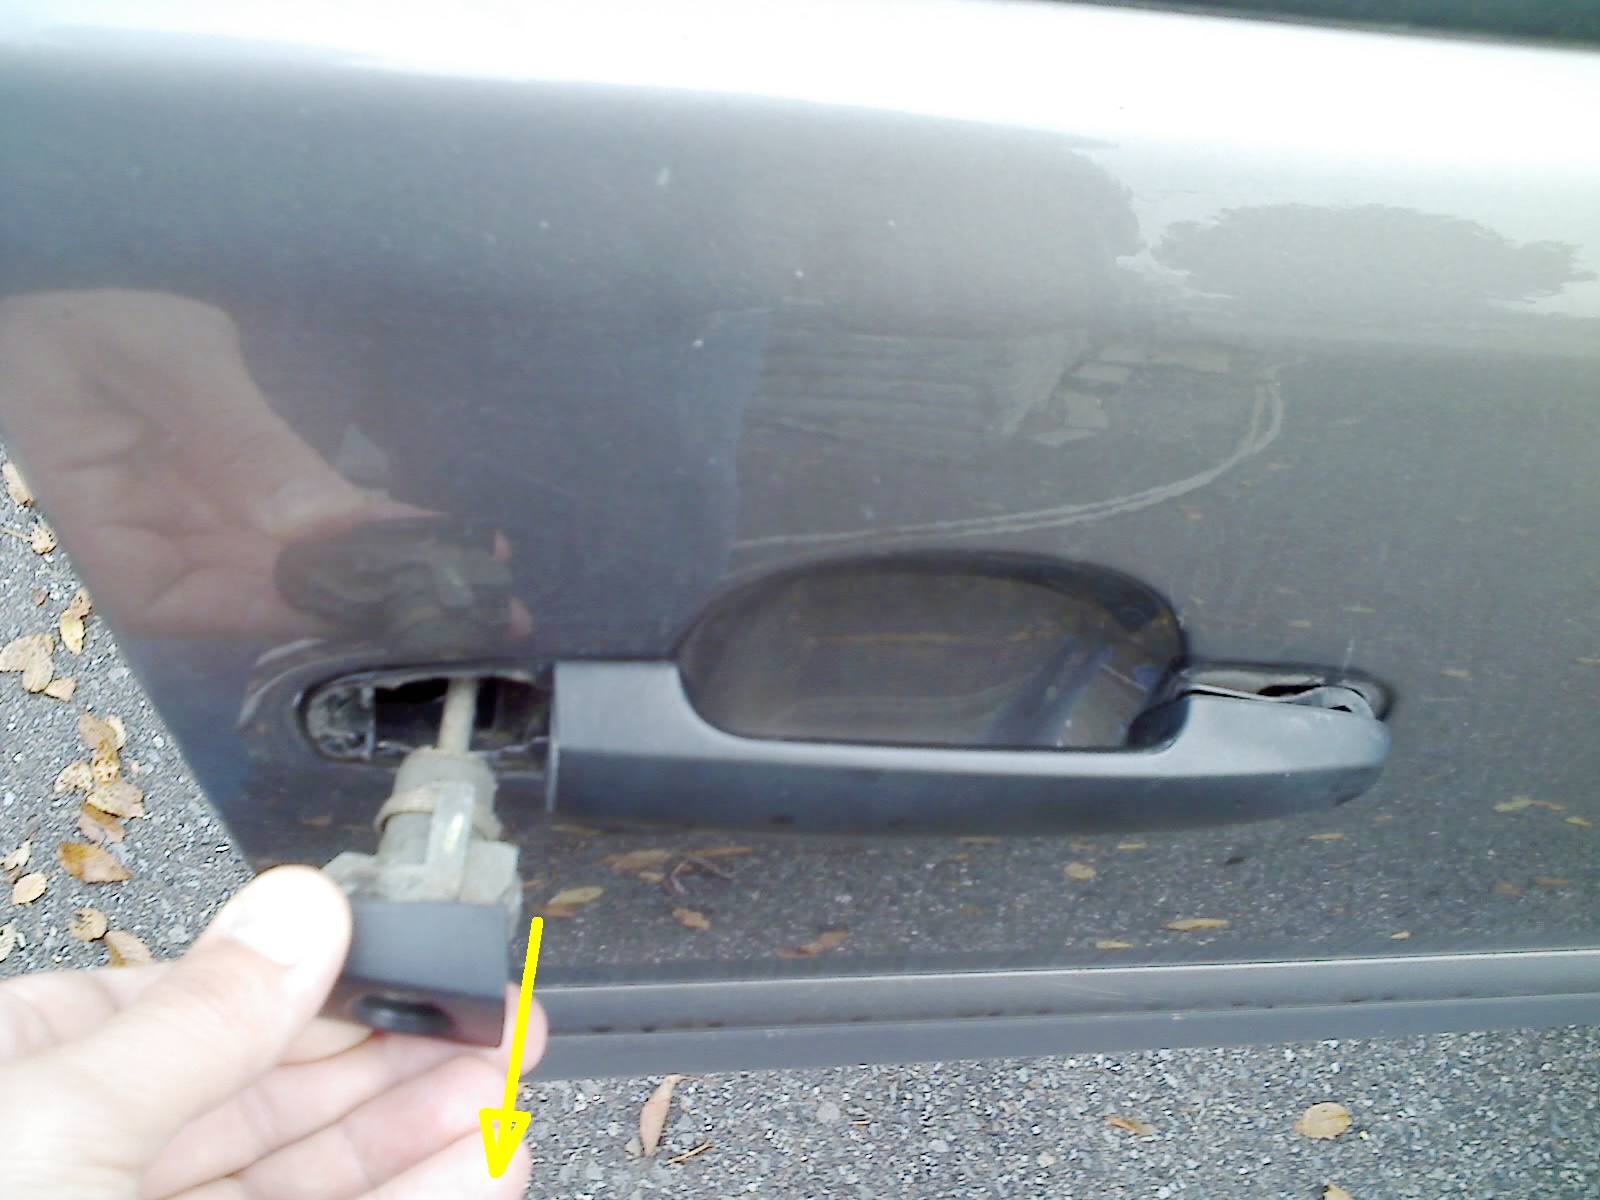
Keyhole section of exterior door handle is quite long.
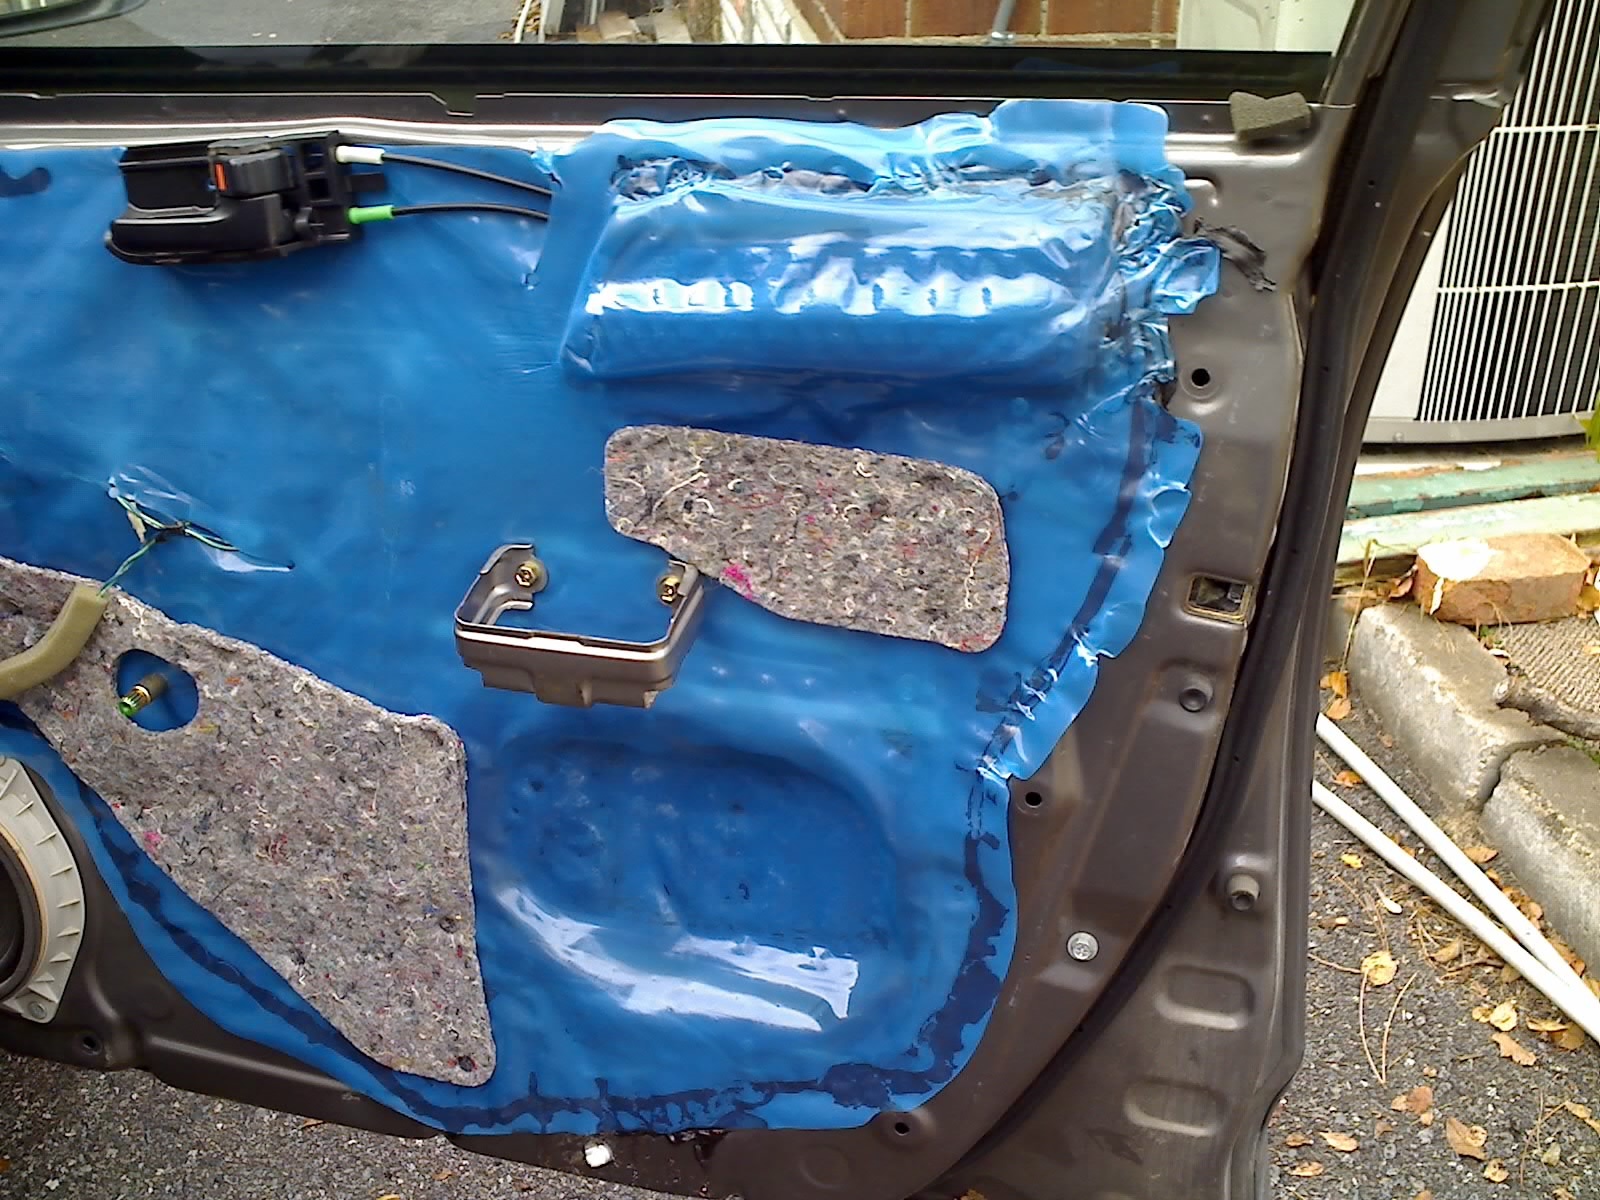
Depending where exactly the plastic of your handle broke and if the small broken piece is still lodged in there, you may not need to do this step to access a second Torx screw on the inner side of the front-wards end of the door handle... but anyway if you do, peel back the blue plastic off of the tarry black sealant that holds it to the door.
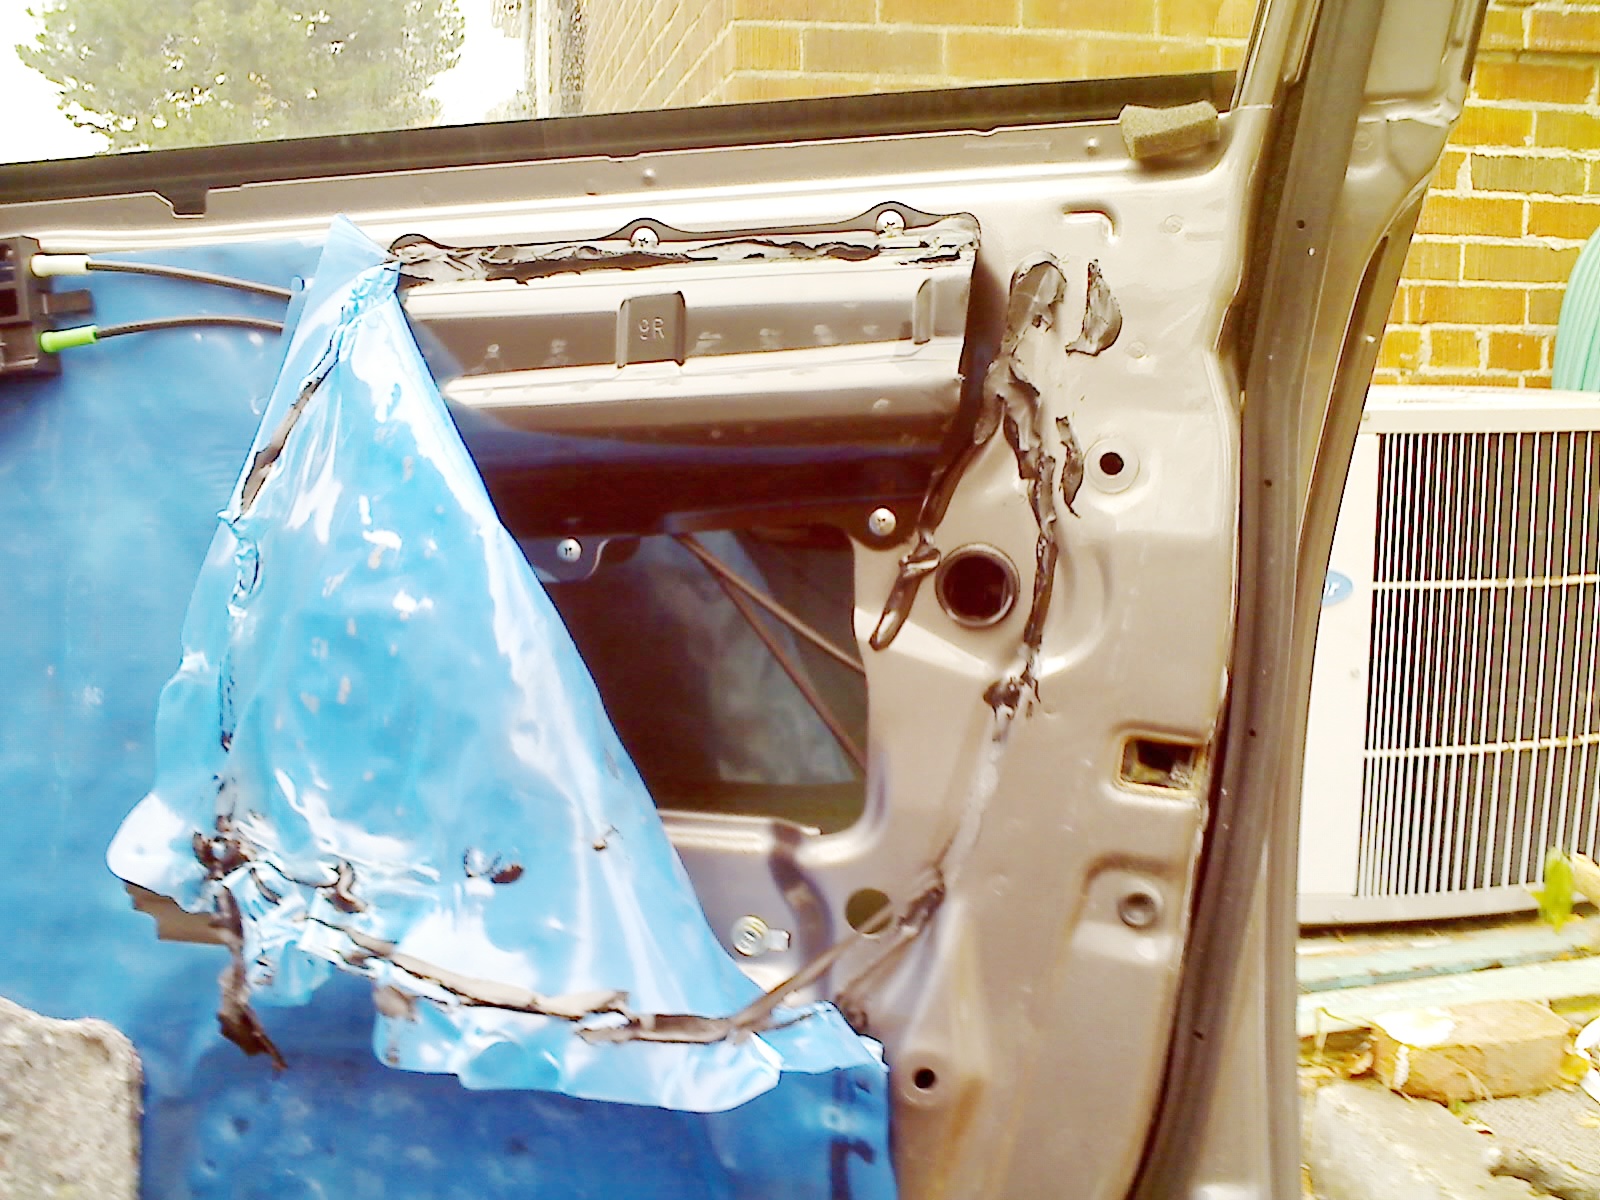
Another part of the maybe-not-needed step, loosen this Torx (T30 size) screw. Similar to the other Torx screw above, it does not seem to come out all the way so it won't fall out and get lost. Pay close attention to where that inner plastic section of the door handle is because you may have to position it back there if it flops around.
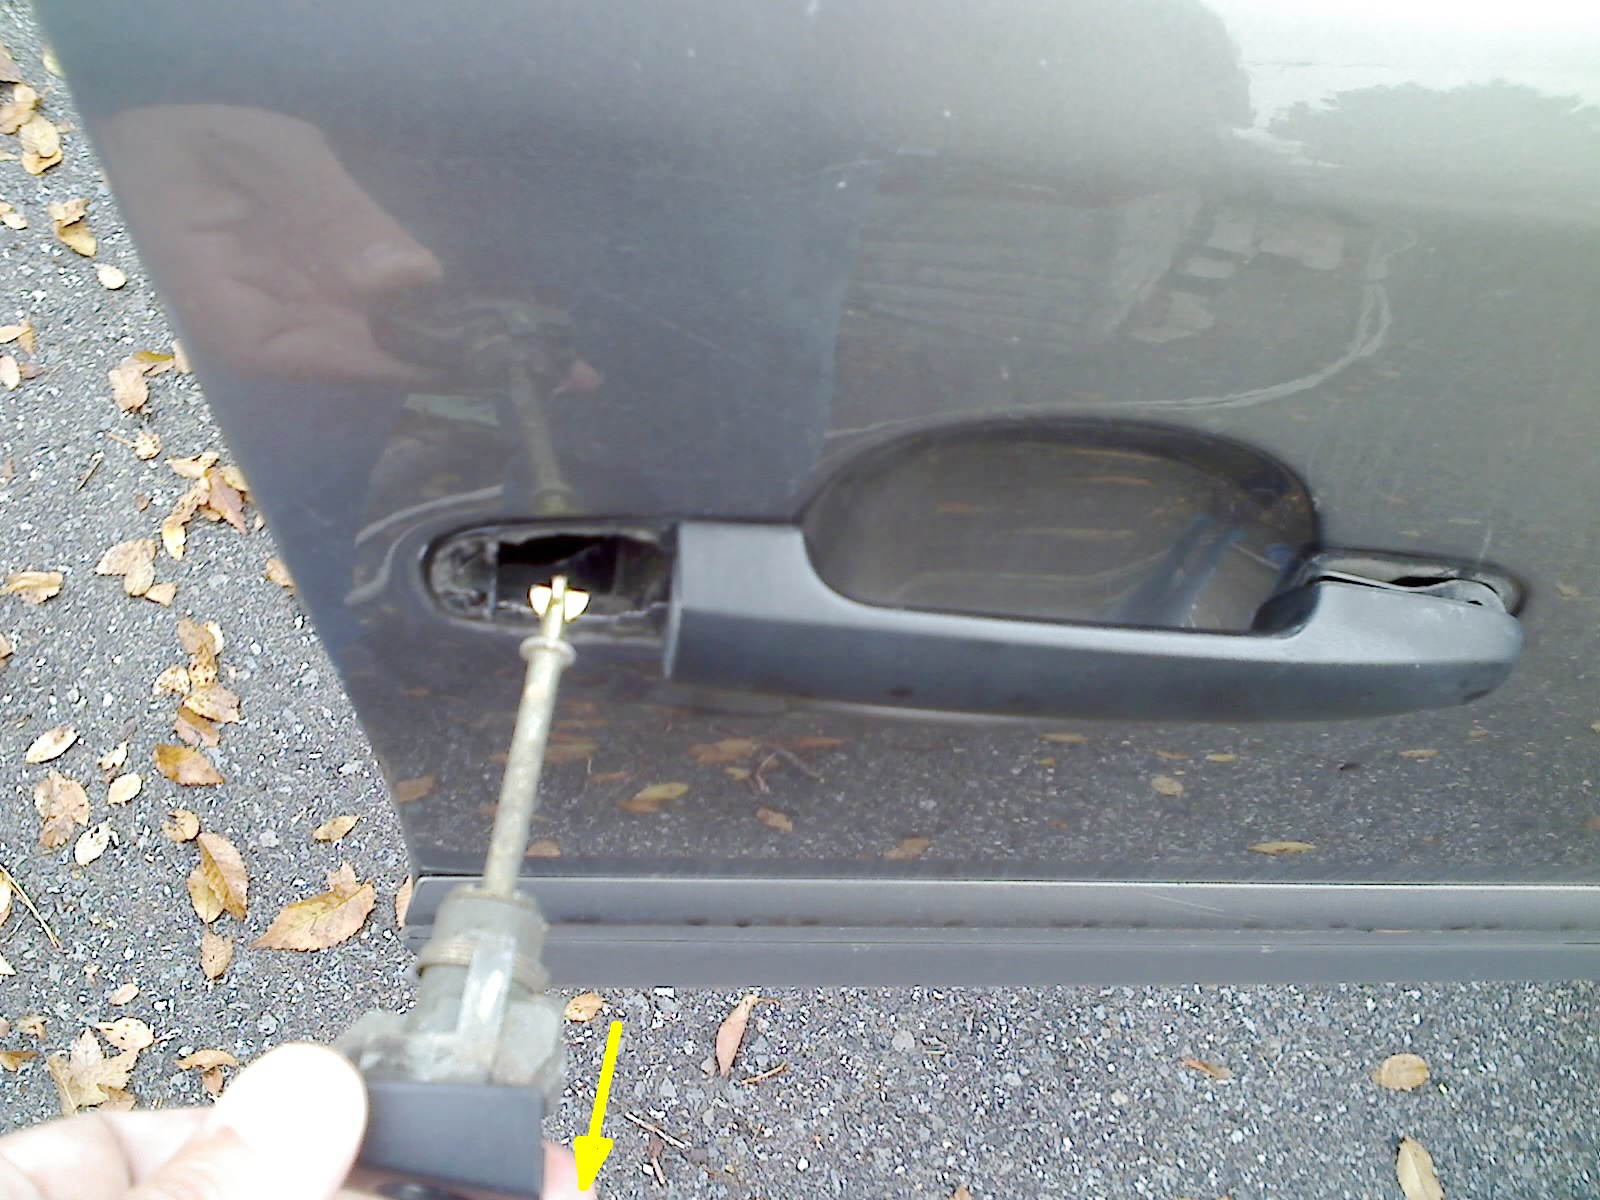
Remove old broken door handle by sliding rearwards and then pulling out.
Removing old broken Pontiac Vibe 2004 exterior front passenger side door handle. (blatant keyword repetition for search engines : - )
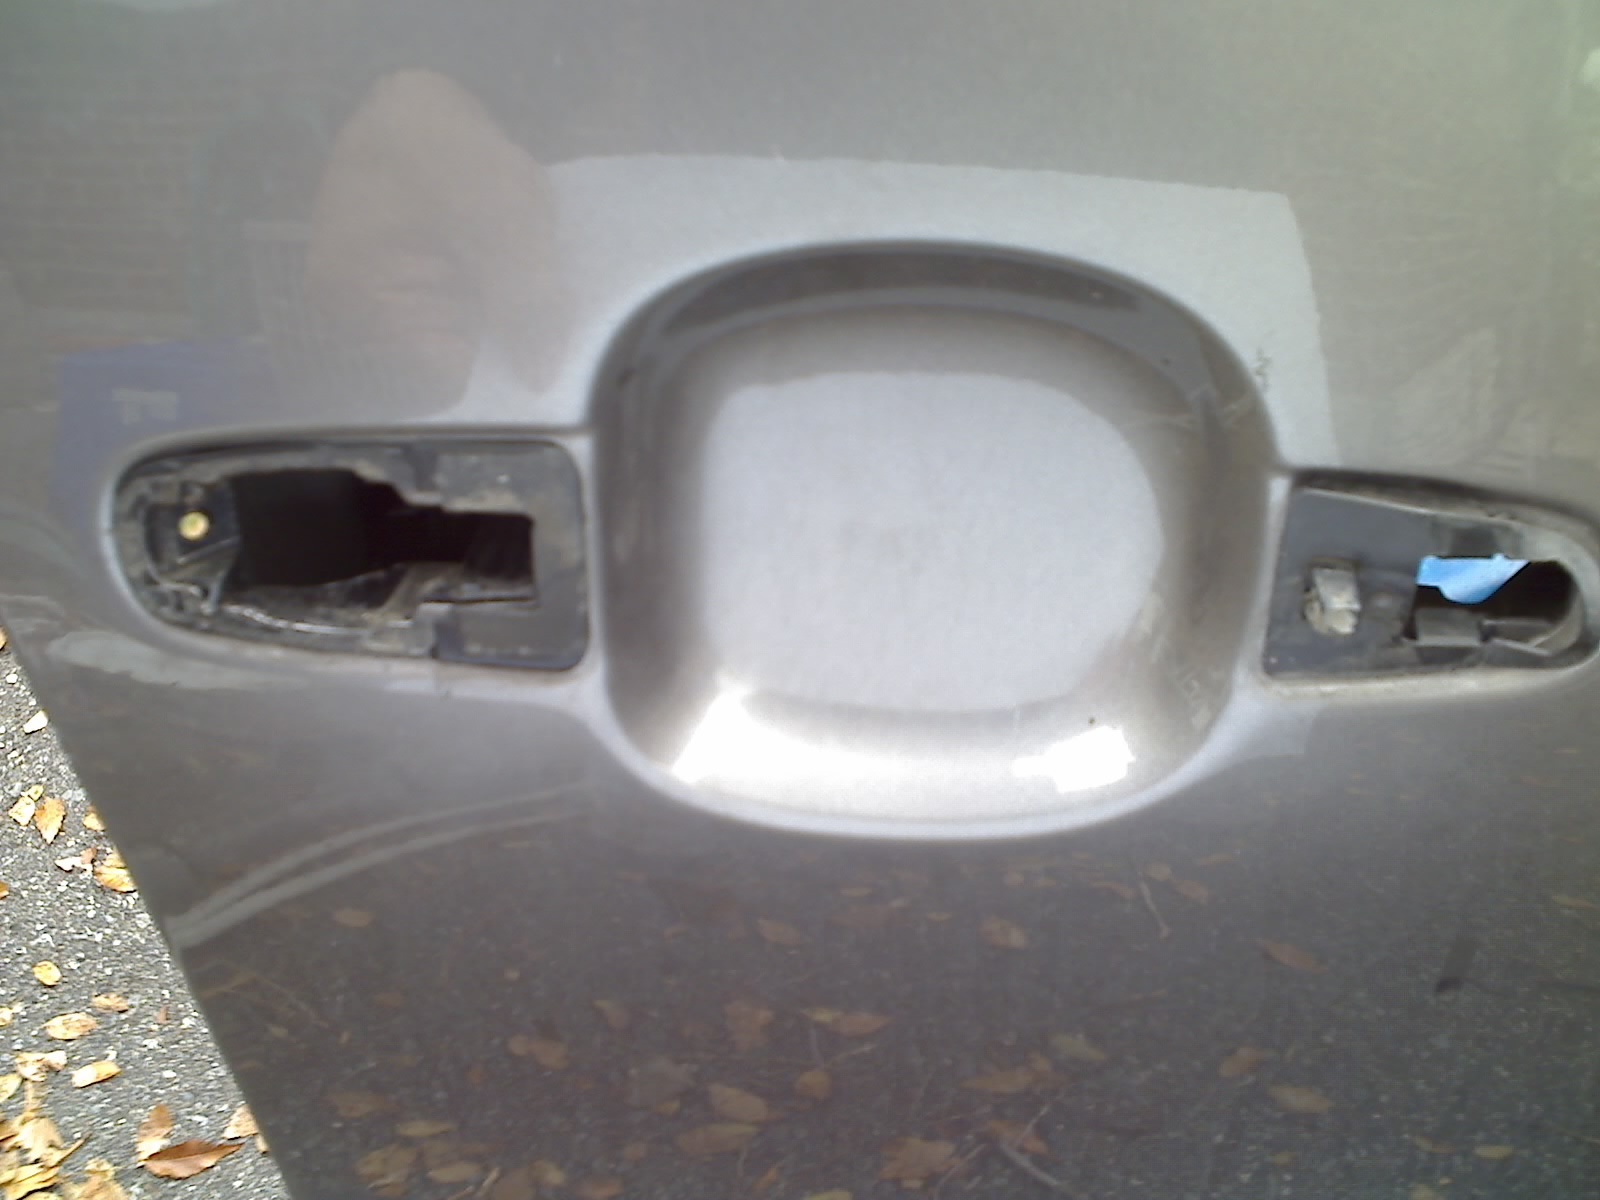
Result of removing broken door handle. Make sure the two thin black plastic gaskets remain in place. Note you can also see the wrong end of the brass coloured Torx screw that was loosened earlier.
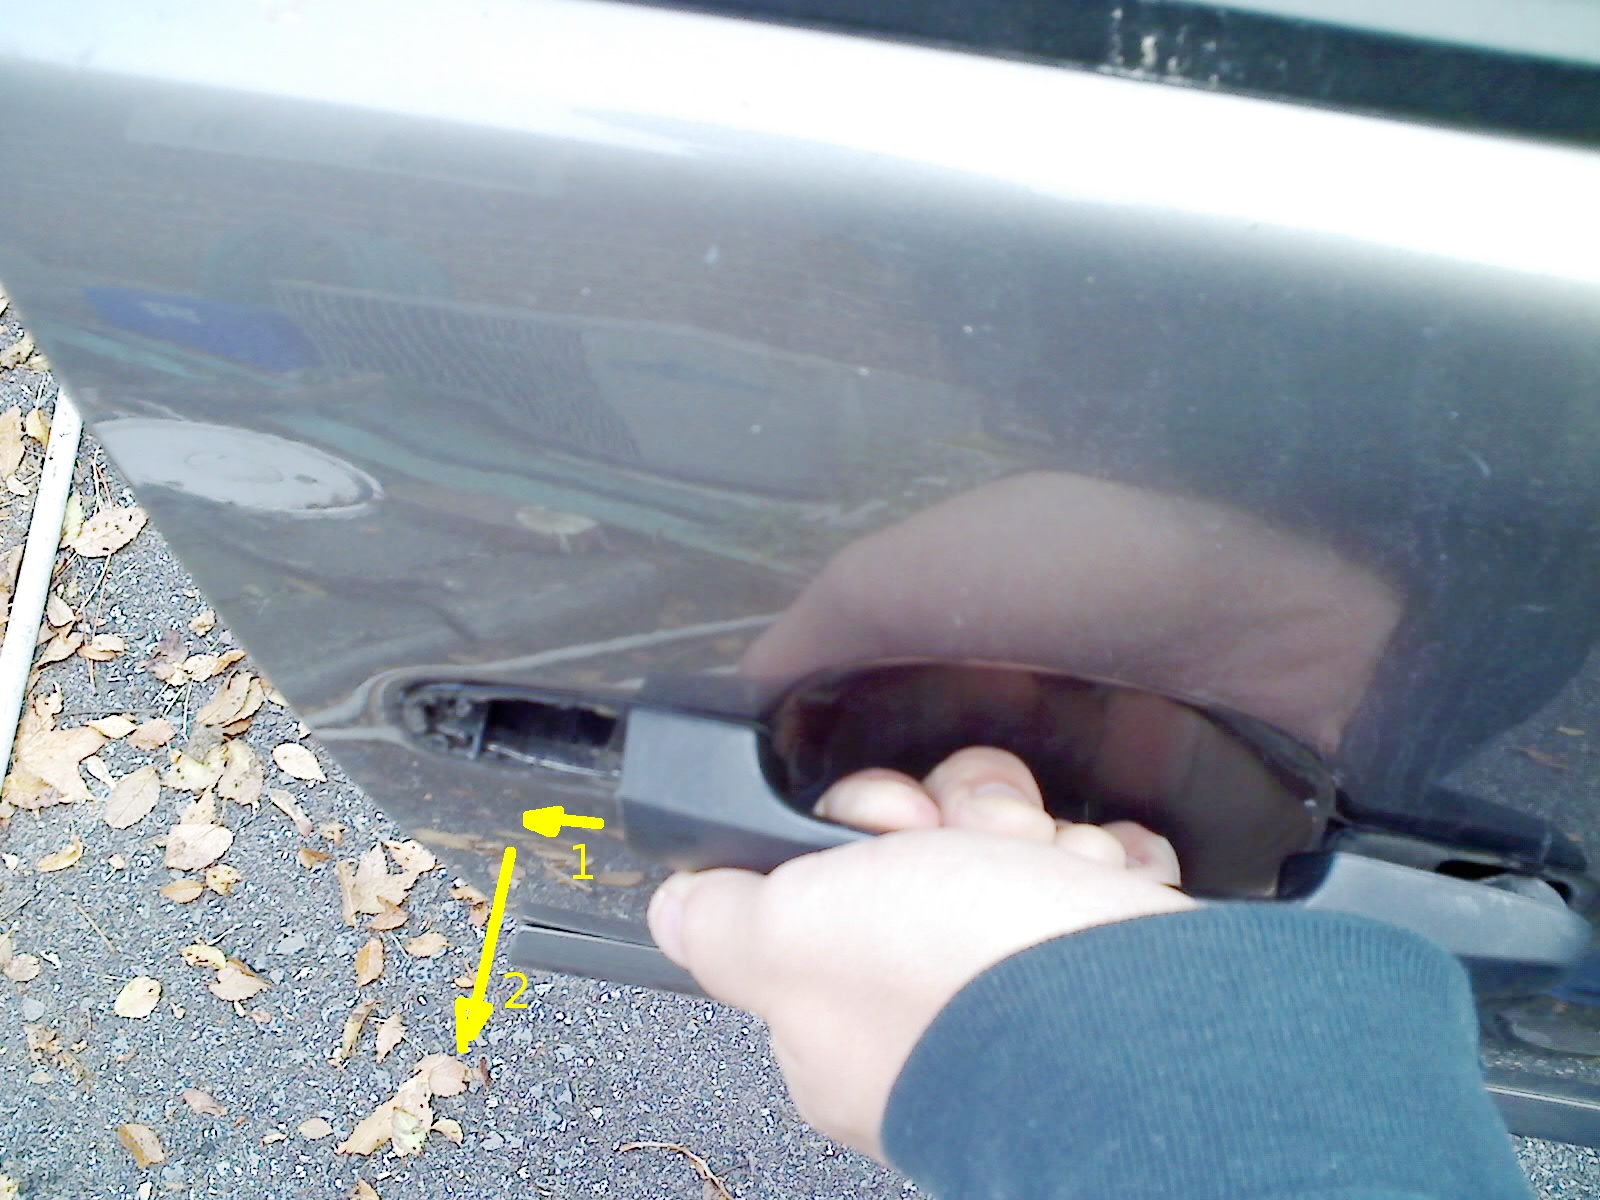
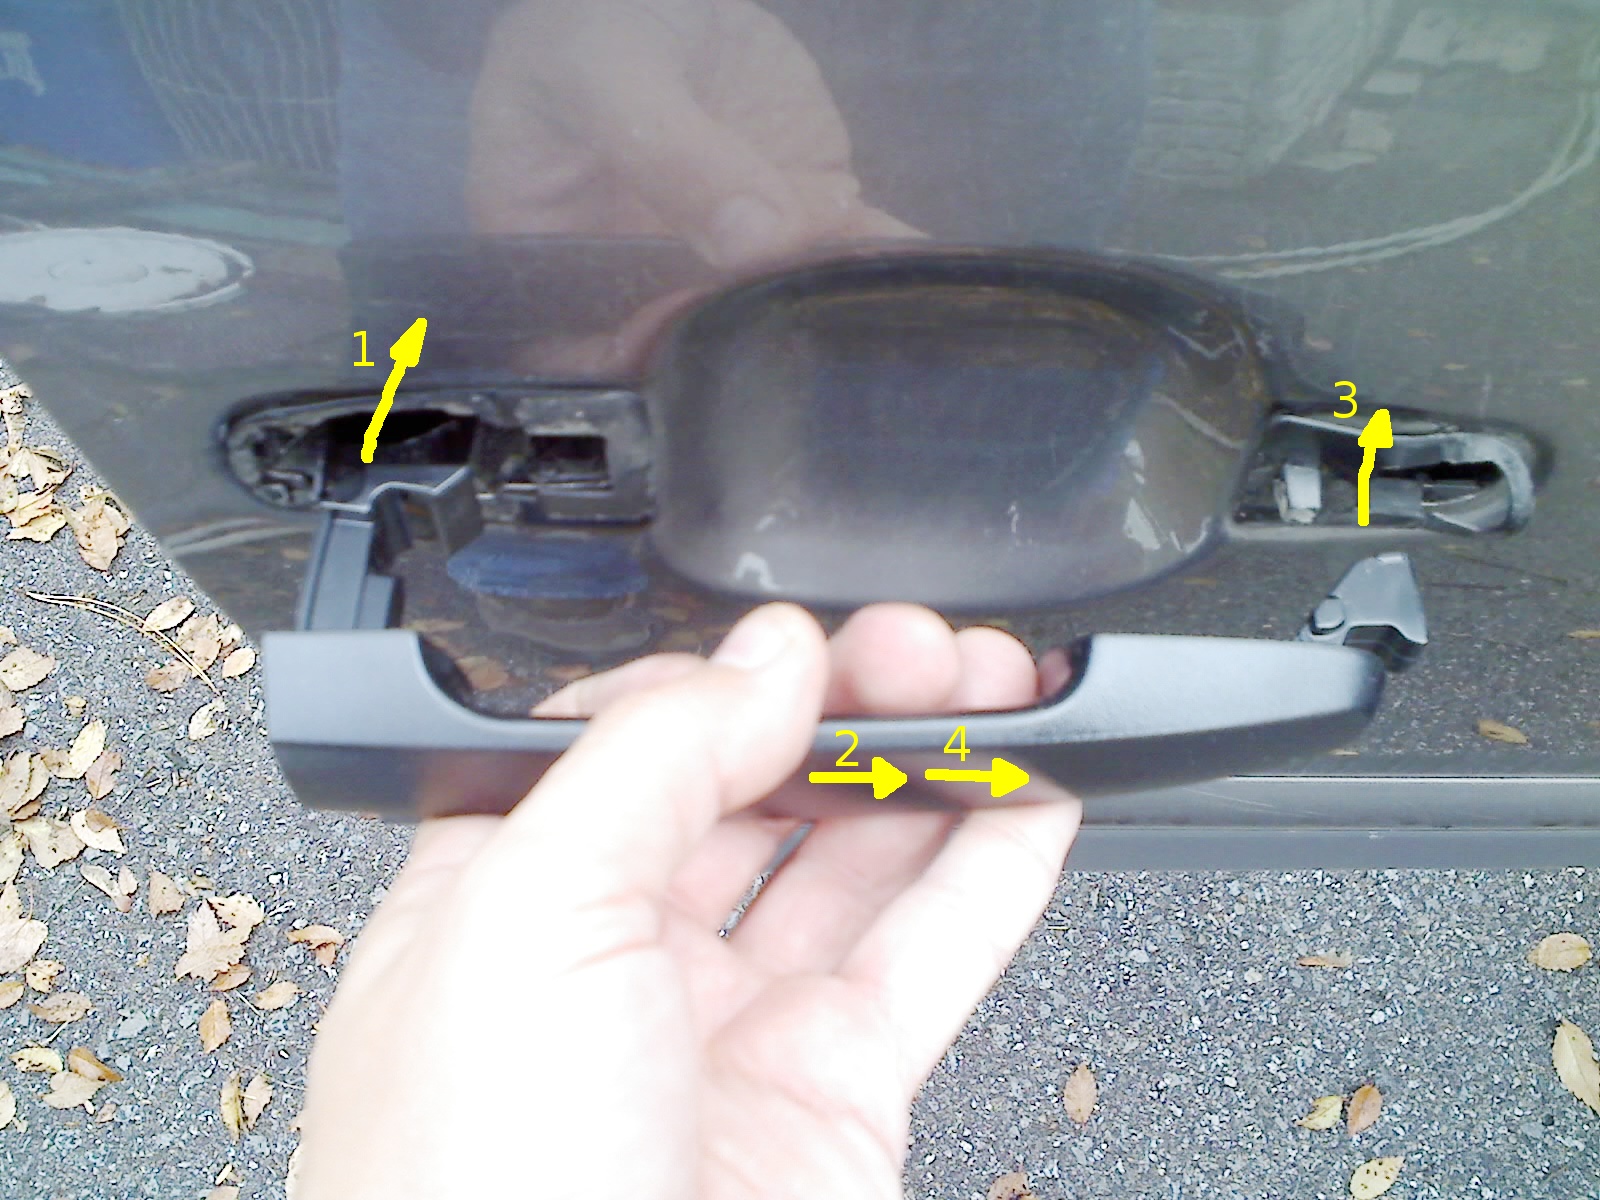
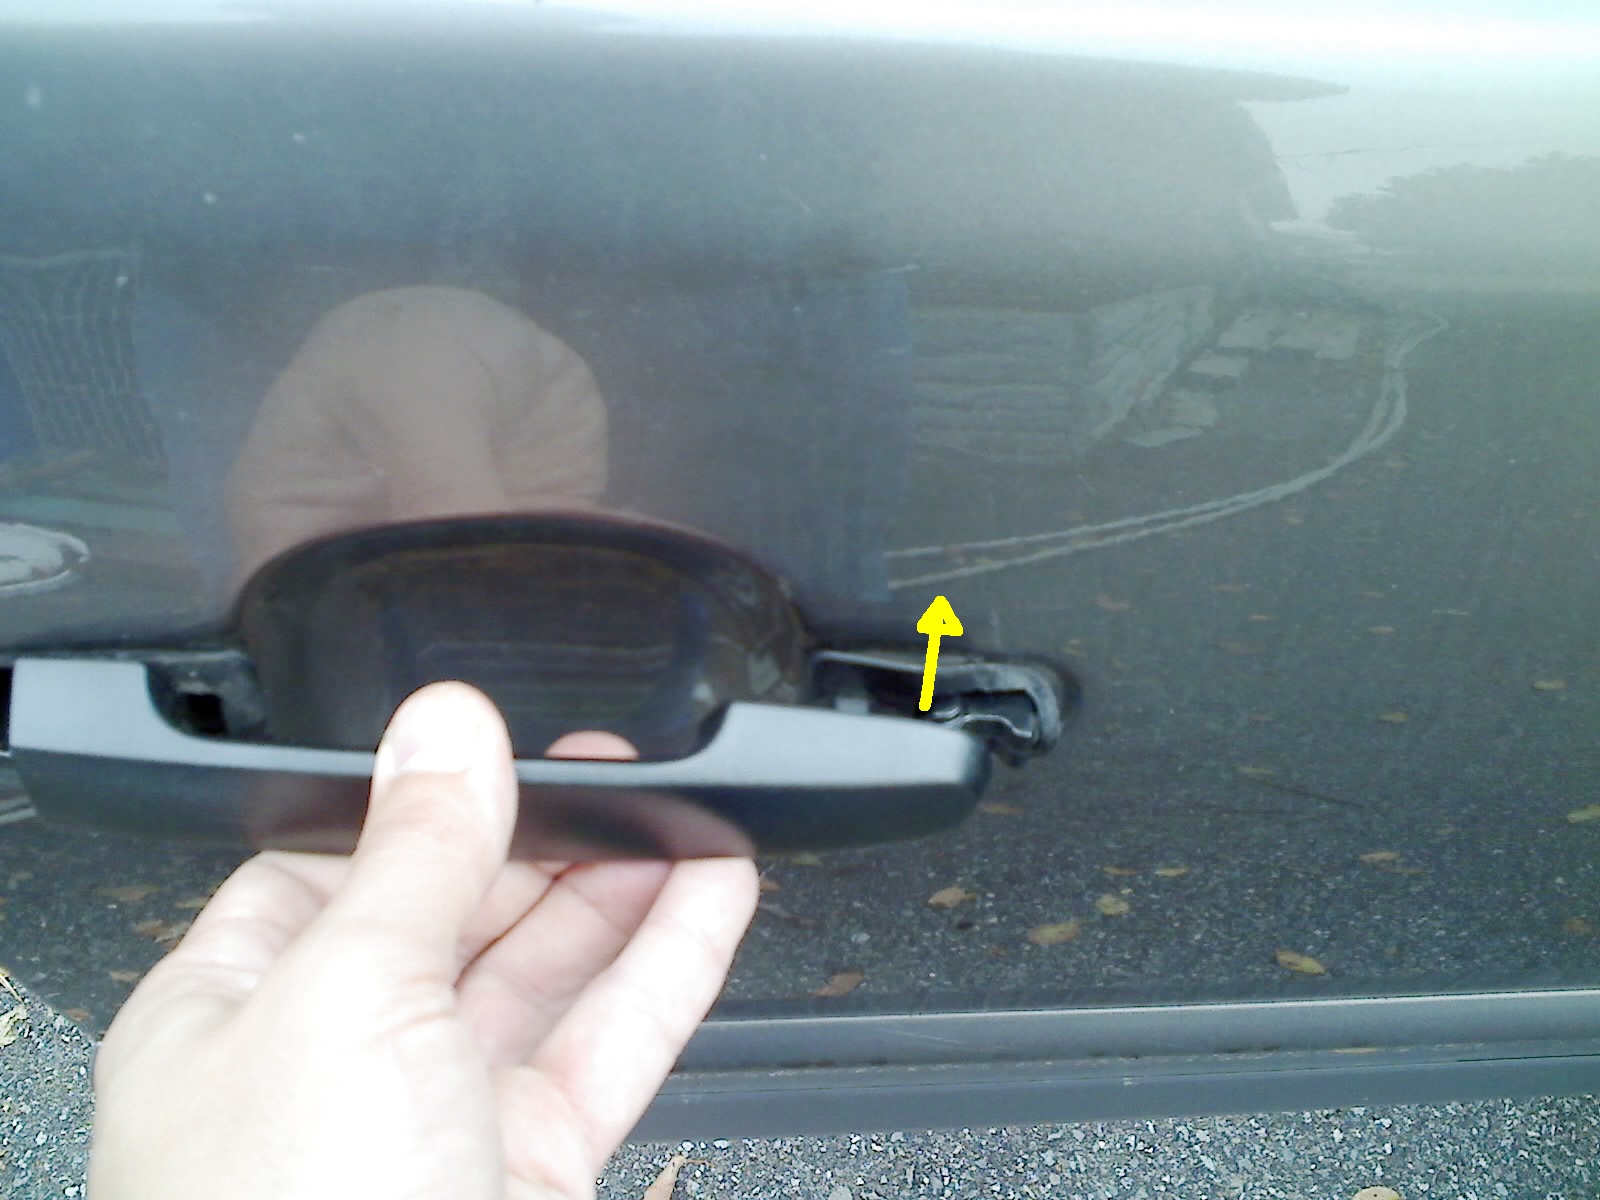
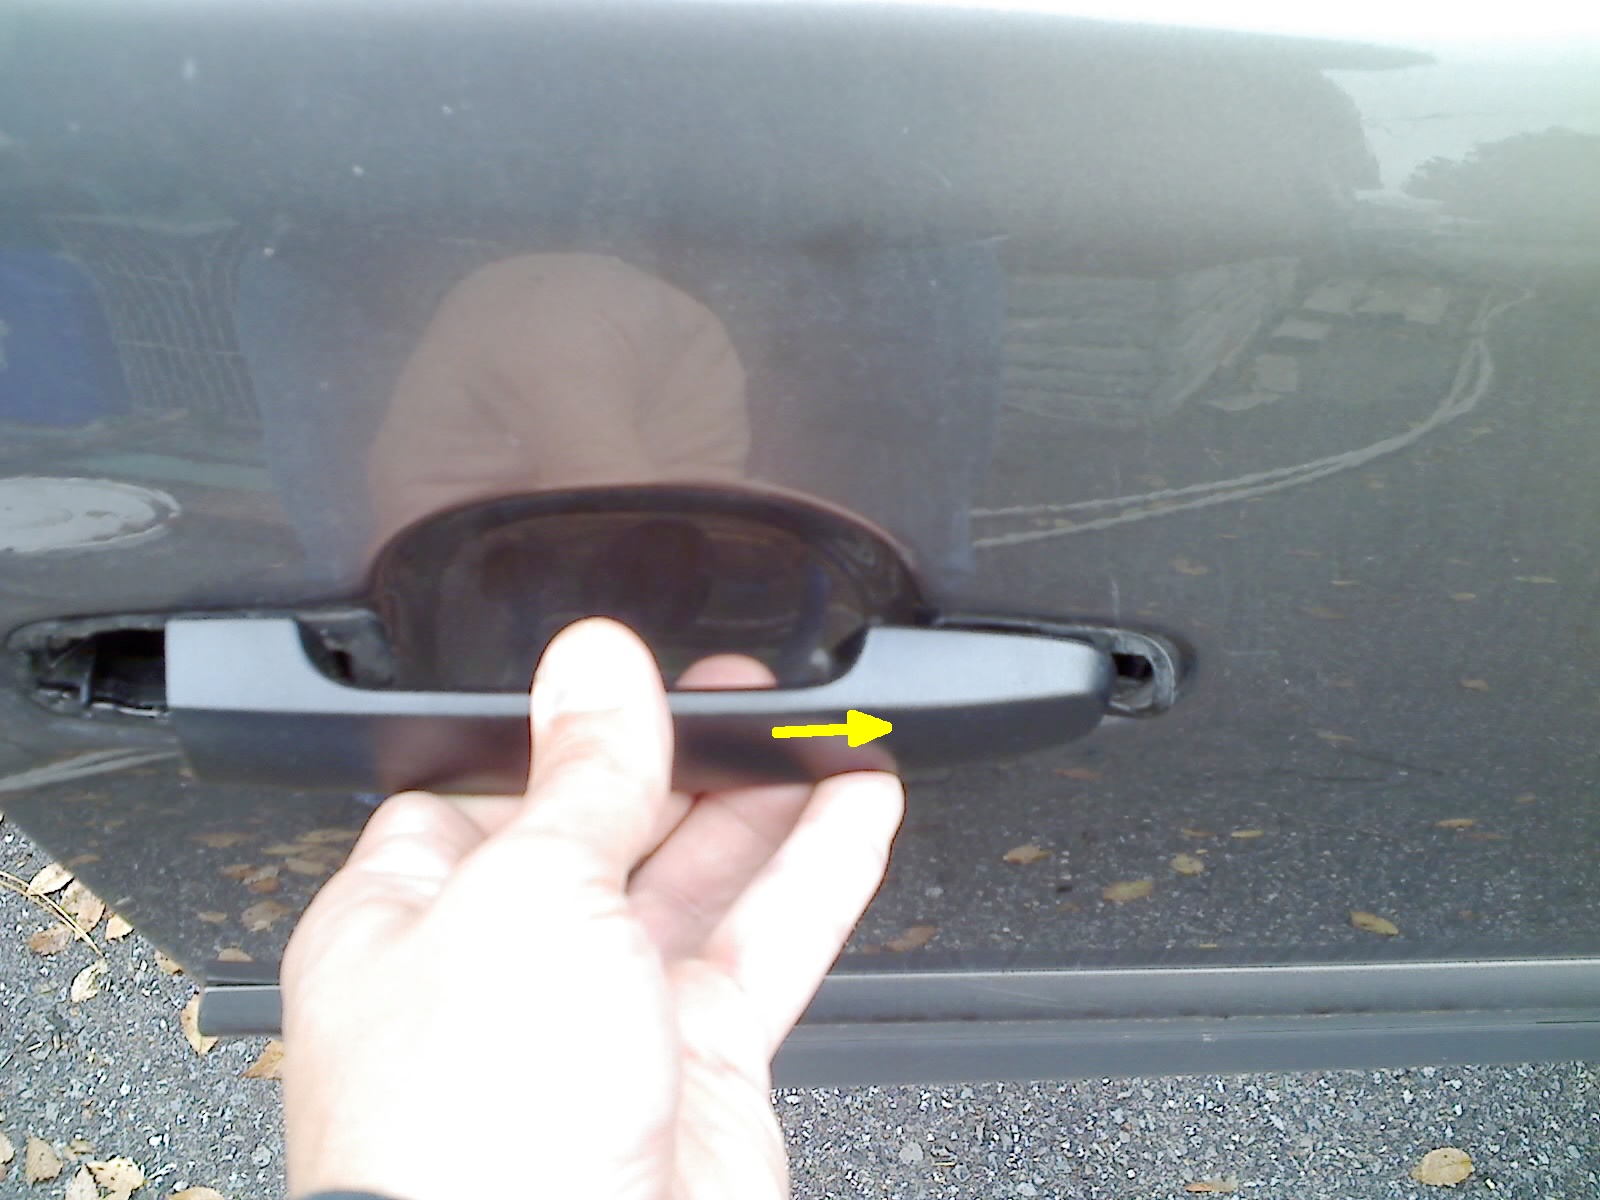
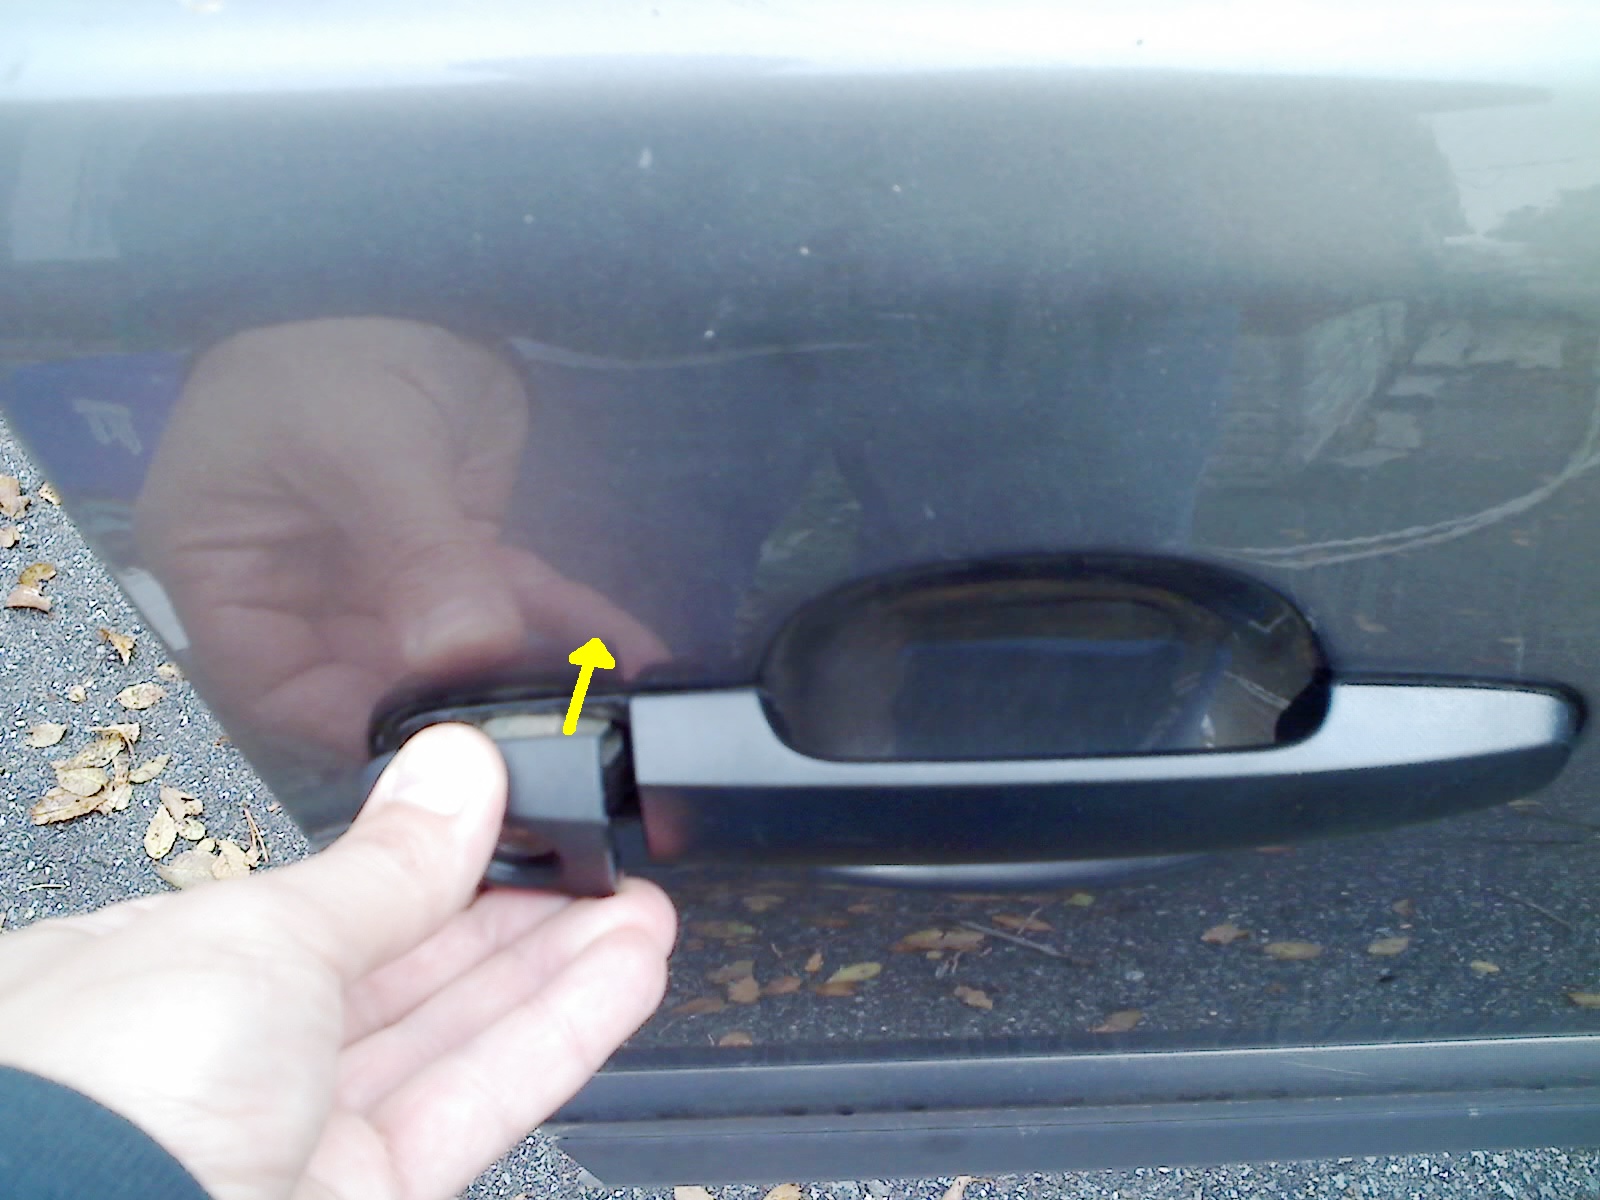
Start with the new door handle about 4 cm rear-wards of what looks like the correct/final position... (1) push the rear-wards end of the handle (i.e. the larger end, i.e. the left in the photo, i.e. the end that wasn't broken on the old handle) into the opening, then (2) slide the whole thing about 2 cm front-wards (i.e. to the right in the photo), then (3) push the front-wards end of the handle into its opening, then (4) slide the whole thing about 2 cm more front-wards, the rest of the way to the correct/final looking position. Make sure black plastic gaskets have remained in place and remained flat. (Note, steps 2, 3, 4, and end result, are shown more gradually in the next four photos.)
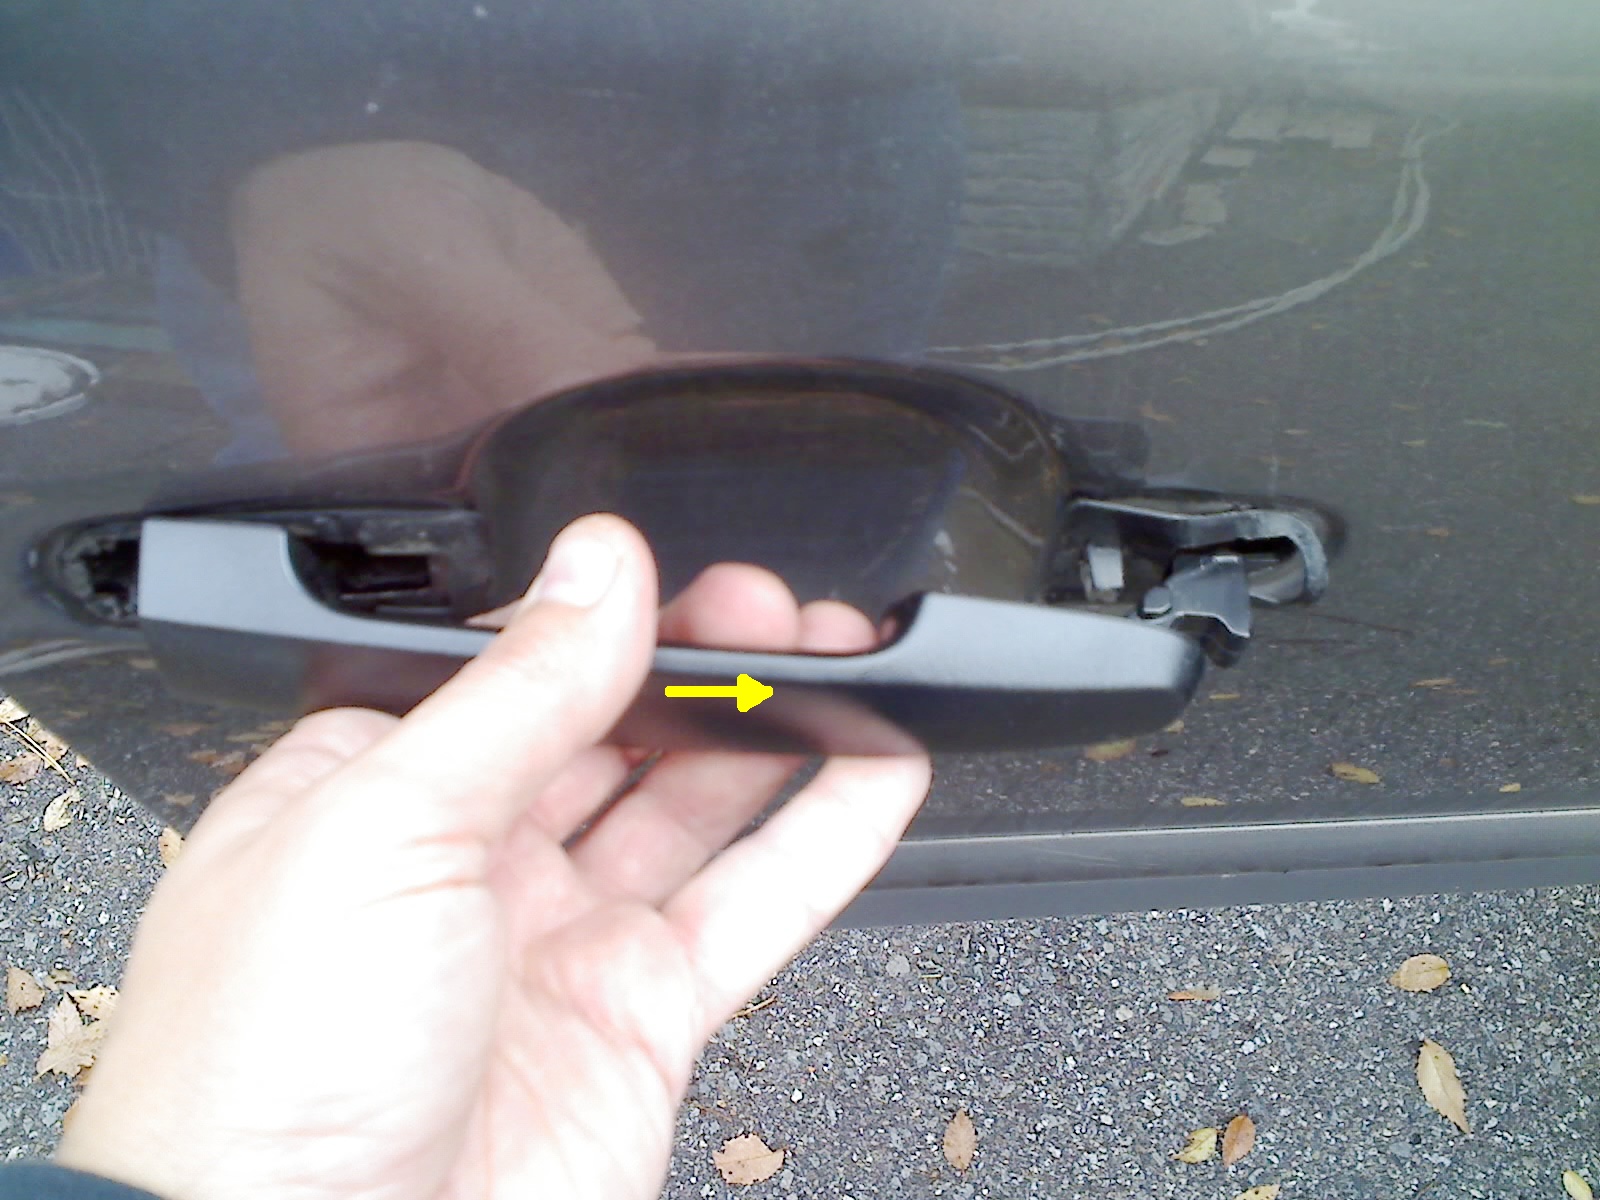
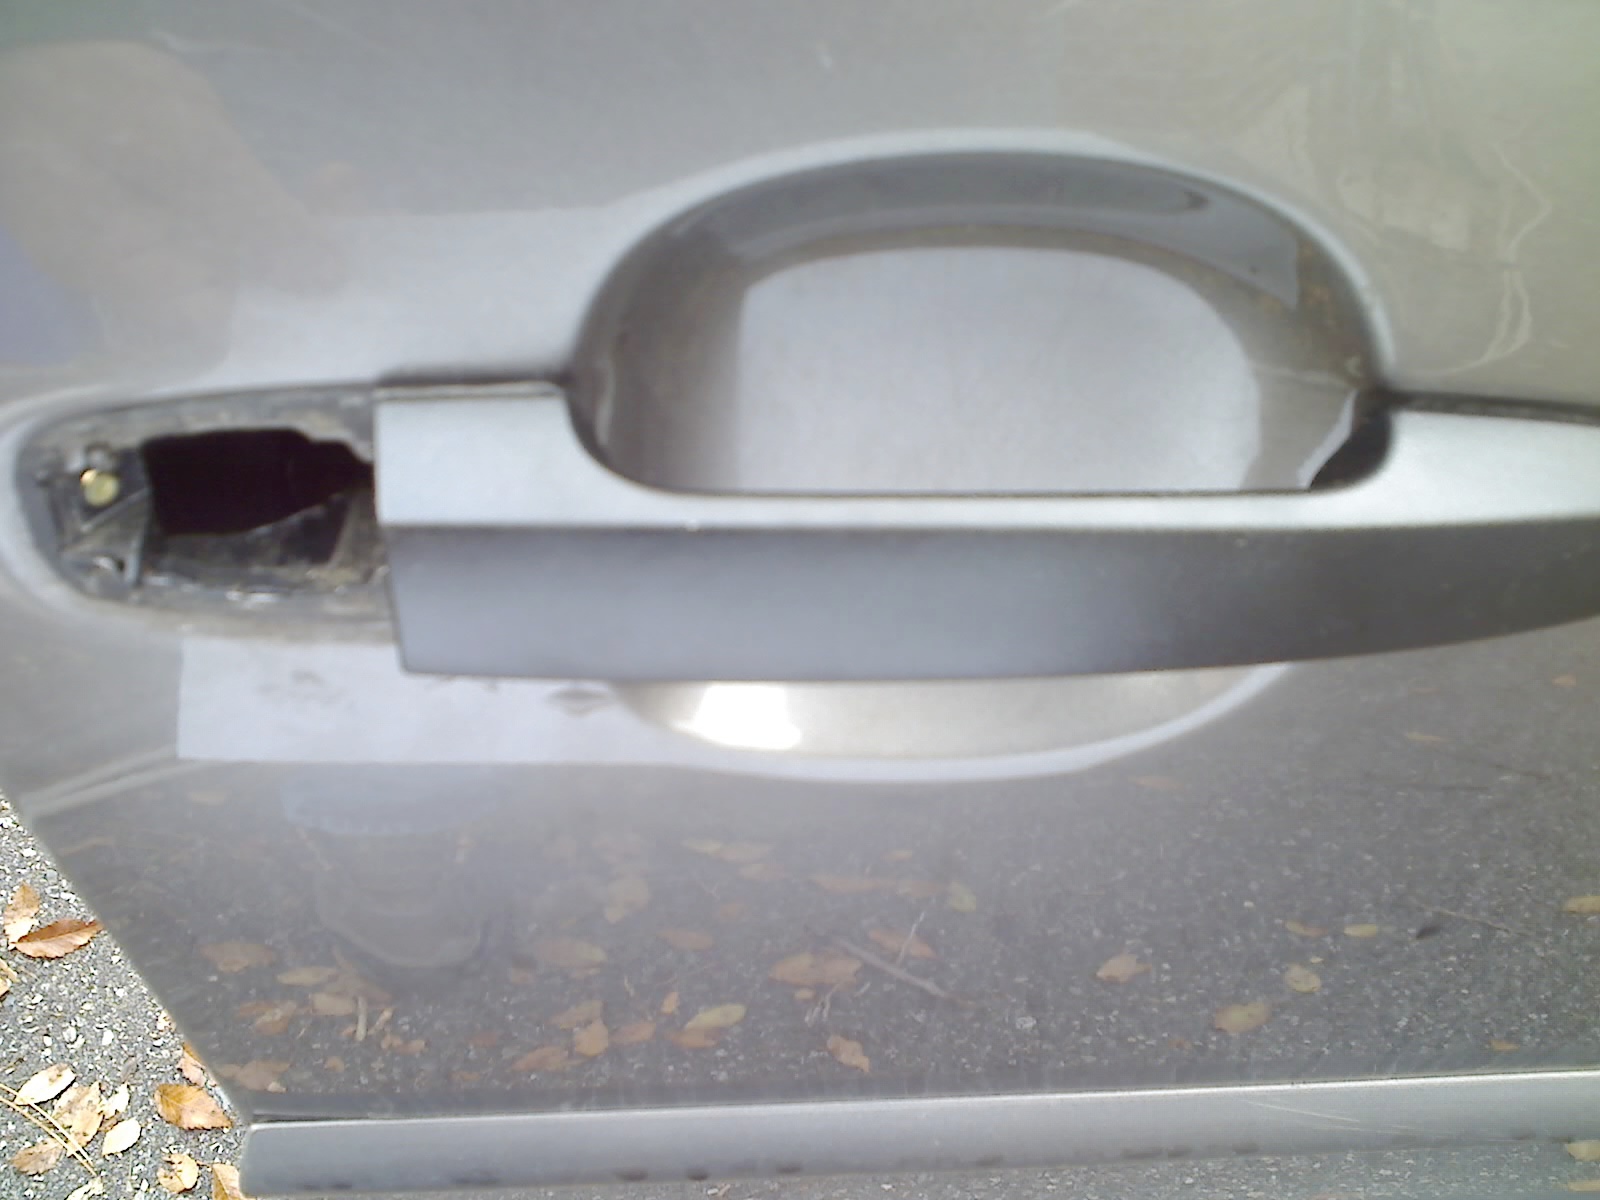
End result of previous four steps. At this point you can try opening and closing the door with the new handle. Although nothing is well tightened, it should successfully work the latch.
Slide the key mechanism back into the door. It may take a few stabs to get the long rod aligned well enough to go all the way in, but if it goes all the way in then it is in the right spot.
End result of pushing key mechansm back into the door. Make sure plastic gasket remained in place and remained flat.
Tighten brass Torx screw on rear edge of door in circular access hole.
Test opening and closing the door with the new handle, and locking and unlocking the door with the key and from the inside lever.
IF you had previously loosened the second Torx screw inside the door, then tighten it now making sure the inside-the-door section of the black plastic remains in its correct place (if the front end of the new handle caught into it correctly then probably everything is fine), and replace the blue plastic by pushing it back onto the black tar sealant. Optionally test door handle a few more times.
Double check the tightness of the brass coloured Torx screw on rear edge of door. It seems that it needs to be very tight before the looseness / play of the key mechanism is all firmed up.
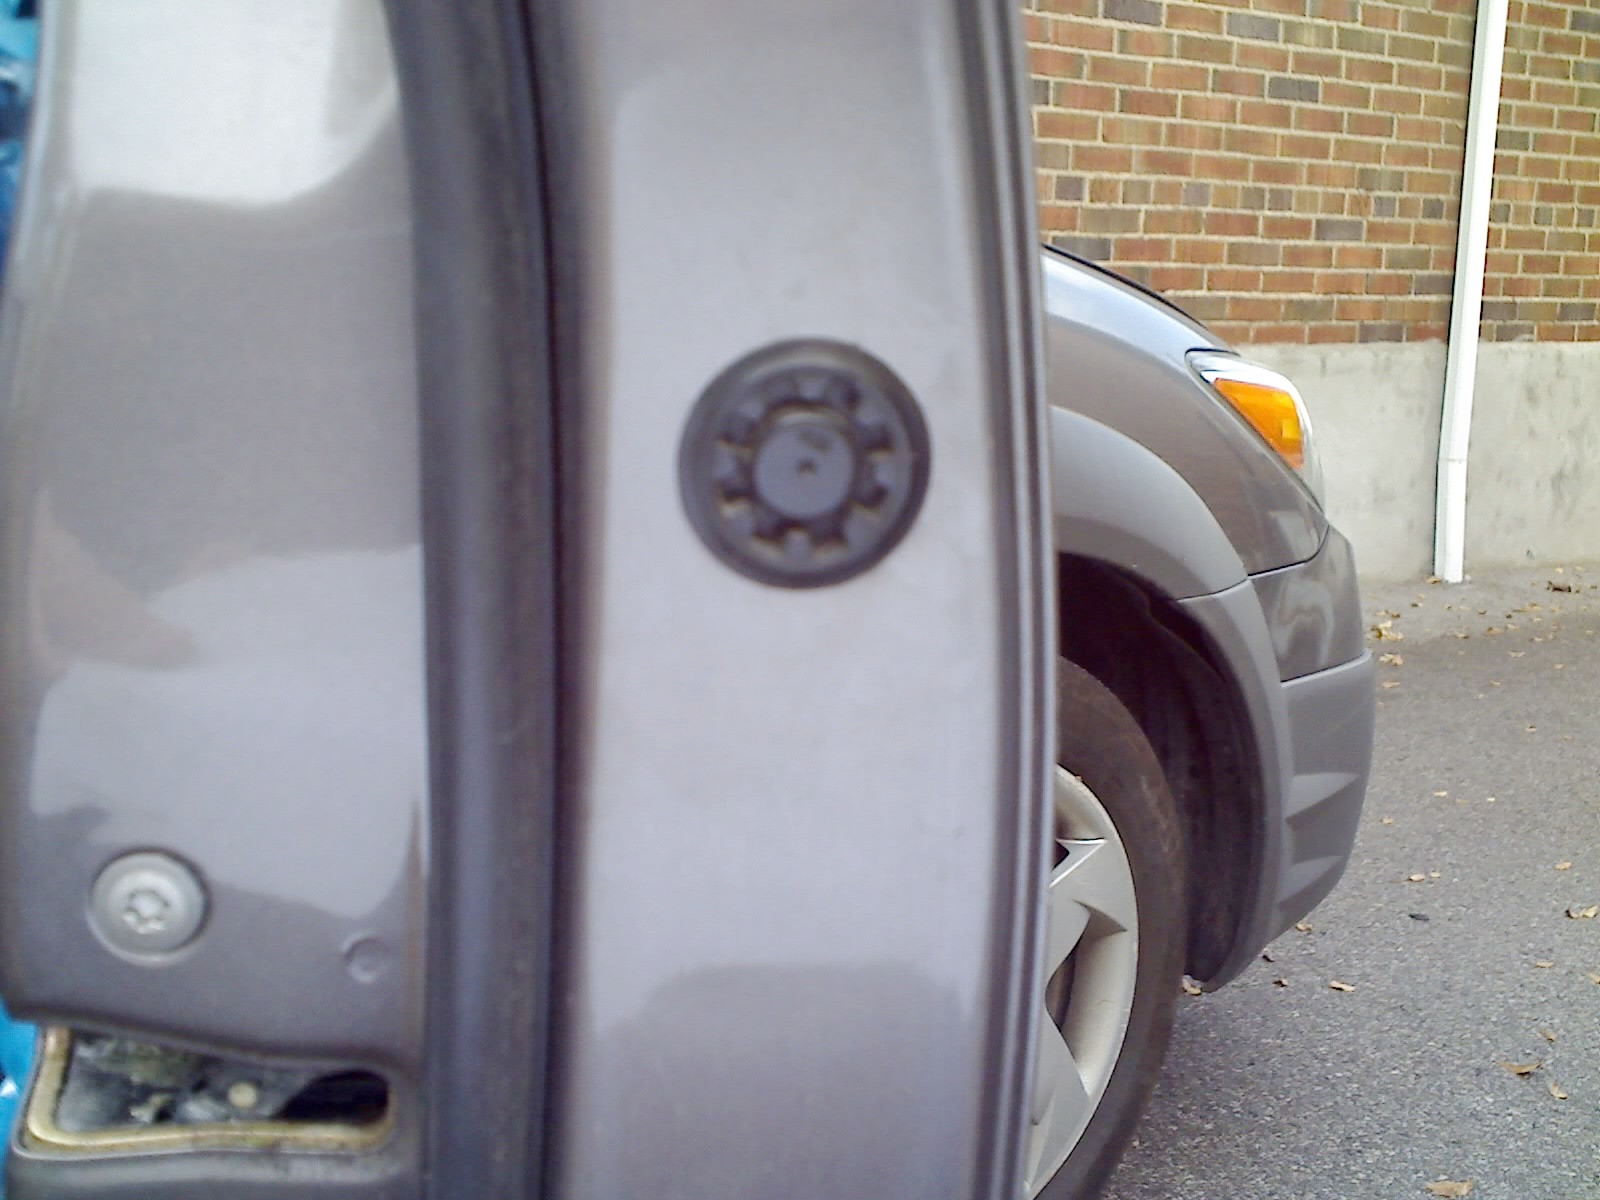
Replace circular black plastic cap over hole on rear edge of door.
End result of replacing black plastic cap.
Replace interior door panel, dropping top edge first inwards and then downwards, and then pushing around the other three edges where white plastic clips were, until they snap in.
Replace plastic triangle at interior section of side view mirror, bottom edge first, then pushing in top corner until it snaps in.
End result with plastic triangle at side view mirror in place.
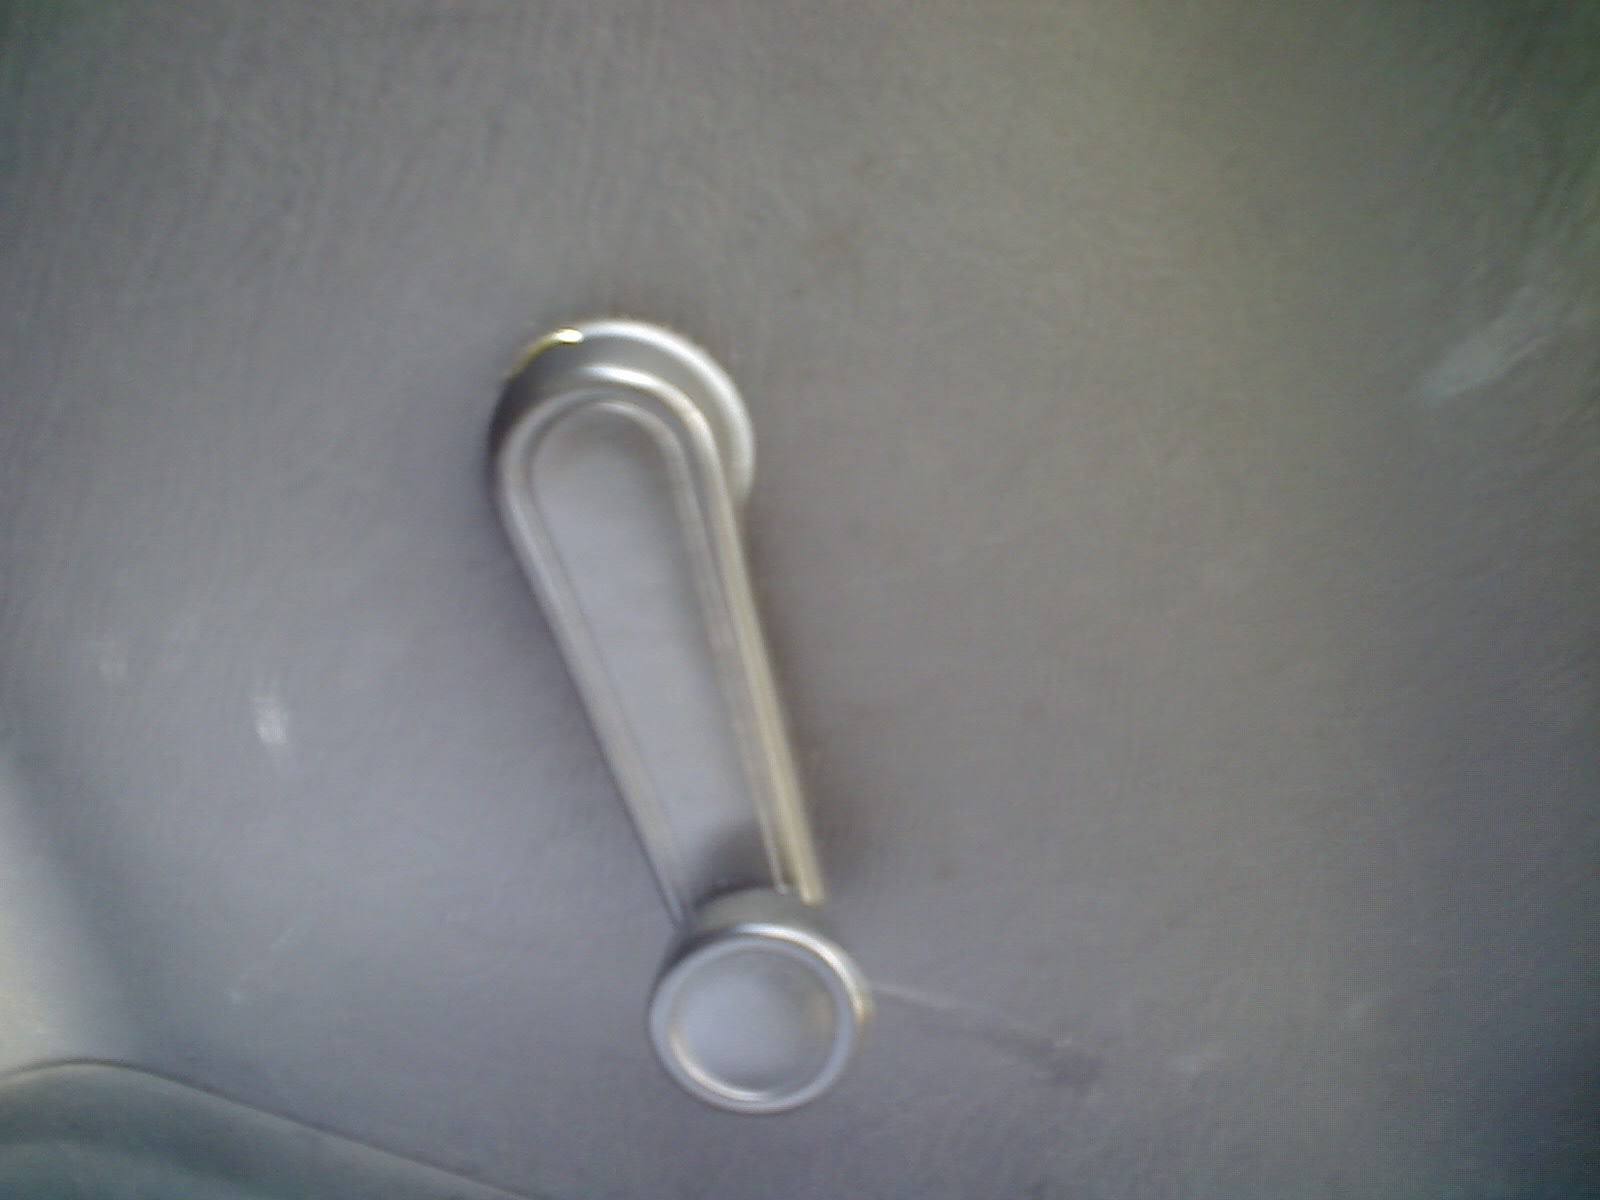
Replace white plastic washer around window crank spindle (dished side away from you - further into the door).
Place window crank handle back onto spindle and push C-clip back on, either from side directly under the arm of the crank, or directly opposite (i.e. not at right angles to the crank handle arm, I don't think it will clip on).
In this photo, the C-clip is not all the way on but is as far as it can be pushed with fingers.
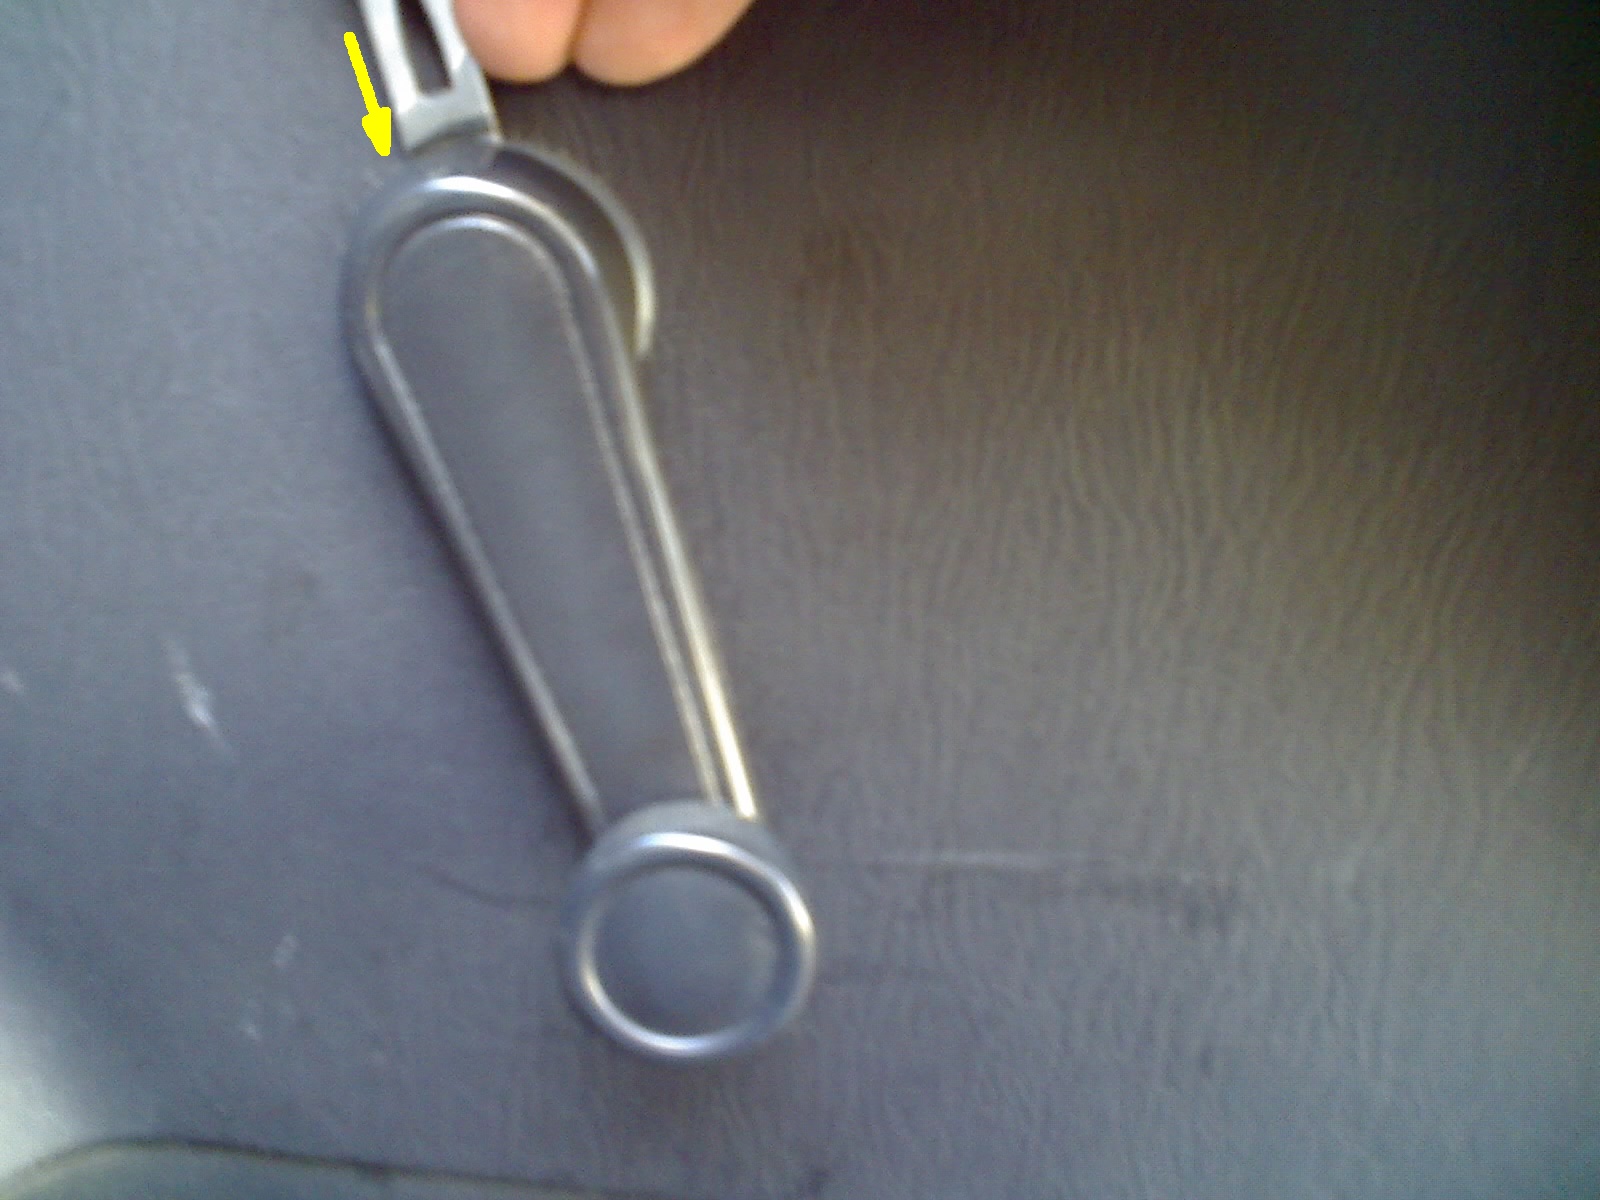
I found that even a flat screwdriver was too thick to push the C-clip on without also pushing the crank handle too far away from the door panel. I used the blunt end of a nail file to push the C-clip the rest of the way onto the spindle. It will definitely click and then you can test pulling the crank handle off (it should stay) and rolling the window up and down a few times to test (watch for C-clip falling out if it didn't catch in the right spot).
Replace Phillips (star) screw behind interior door handle.
Replace plastic cup and Phillips screw in interior door pull.
Replace small plastic cover on screw behind interior door handle.
End result of replacing plastic cover. Mine was fairly mangled during removal so it didn't clip in nicely or sit very flush : - (
Done. Throw away old broken door handle and broken clips from interior door panel.
Contact Martin with
questions or comments.
All images and
text is copyright © 2010 by Martin Muc